标签:create nta cli code stash stack rate 密码 main
之前写过一篇 设置的,感觉不大对。ELK elasticsearch7 设置账号、权限
还是重新配置一下。
准备资料:elasticsearch7.1.1、kibana7.1.1镜像文件。
在docker下成功安装集群。注意的是,所有的需要安装es相关的ELK版本都要一致,甚至es的插件版本也都是要一致
[root@izm5ej4bsah4npfgi5wl3vz config]# docker images | grep 7.1.1
115.28.136.252/third/logstash                 7.1.1               b0cb1543380d        12 months ago       847MB
115.28.136.252/third/kibana                   7.1.1               67f17df6ca3e        12 months ago       746MB
115.28.136.252/third/elasticsearch            7.1.1               b0e9f9f047e6        12 months ago       894MB
115.28.136.252/third/filebeat                 7.1.1               0bd69a03e199        12 months ago       288MB
我这集群两台服务器:
创建相应目录:
mkdir -p /home/soft/elasticsearch/config
mkdir -p /home/soft/elasticsearch/data/data00
mkdir -p /home/soft/elasticsearch/data/data01
mkdir -p /home/soft/elasticsearch/logs/logs00
mkdir -p /home/soft/elasticsearch/logs/logs01
配置脚本:
es00.yml==============
cluster.name: mses-cluster
node.name: es00
node.master: true
node.data: true
bootstrap.memory_lock: false
bootstrap.system_call_filter: false
network.host: 172.20.0.10
http.port: 9200
transport.tcp.port: 9300
http.cors.enabled: true
http.cors.allow-origin: "*"
discovery.seed_hosts: ["172.20.0.10:9300","172.20.0.11:9300"]
cluster.initial_master_nodes: ["es00","es01"]
discovery.zen.minimum_master_nodes: 2
http.cors.allow-headers: Authorization

es00.yml==============
cluster.name: mses-cluster
node.name: es01
node.master: true
node.data: true
bootstrap.memory_lock: false
bootstrap.system_call_filter: false
network.host: 172.20.0.11
http.port: 9200
transport.tcp.port: 9300
http.cors.enabled: true
http.cors.allow-origin: "*"
discovery.seed_hosts: ["172.20.0.10:9300","172.20.0.11:9300"]
cluster.initial_master_nodes: ["es00","es01"]
discovery.zen.minimum_master_nodes: 2
http.cors.allow-headers: Authorization
启动脚本:其中的esnetwork 是我创建的es专属网络,其中的IP地址172.20.0.xxx也是依赖这里网络来的。
查看网络列表
docker network ls
进入网络查看绑定情况
docker network inspect esnetwork
docker run --restart=always -m 1000m -e ES_JAVA_OPTS="-Xms512m -Xmx512m" -d --net esnetwork --ip 172.20.0.10 -p 9200:9200 -p 9300:9300 -v /home/soft/ES/config/es00.yml:/usr/share/elasticsearch/config/elasticsearch.yml -v /home/soft/ES/data/data00:/usr/share/elasticsearch/data -v /home/soft/ES/logs/logs00:/usr/share/elasticsearch/logs --name es00 elasticsearch:7.1.1

docker run --restart=always -m 1000m -e ES_JAVA_OPTS="-Xms512m -Xmx512m" -d --net esnetwork --ip 172.20.0.11 -p 9201:9201 -p 9301:9301 -v /home/soft/ES/config/es01.yml:/usr/share/elasticsearch/config/elasticsearch.yml -v /home/soft/ES/data/data01:/usr/share/elasticsearch/data -v /home/soft/ES/logs/logs01:/usr/share/elasticsearch/logs --name es01 elasticsearch:7.1.1
启动后通过IP:PORT可以查看到当前单台情况
{
  "name" : "es00",
  "cluster_name" : "mses-cluster",
  "cluster_uuid" : "_na_",
  "version" : {
    "number" : "7.1.1",
    "build_flavor" : "default",
    "build_type" : "docker",
    "build_hash" : "7a013de",
    "build_date" : "2019-05-23T14:04:00.380842Z",
    "build_snapshot" : false,
    "lucene_version" : "8.0.0",
    "minimum_wire_compatibility_version" : "6.8.0",
    "minimum_index_compatibility_version" : "6.0.0-beta1"
  },
  "tagline" : "You Know, for Search"
}
通过IP:PORT/_cat/nodes?pretty 可以当前集群情况
172.20.0.10 29 83 11 1.40 1.47 1.01 mdi - es00
172.20.0.11 28 83 11 1.40 1.47 1.01 mdi * es01
以上说明能正常访问。
下面是重点============配置xpack,es的账号密码
停掉服务。
docker stop es00 es01
删除data数据
rm -rf data/data0*/*
修改es00.yml配置,重新启动。
末尾增加 xpack.security.enabled: true
[root@izm5ej4bsah4npfgi5wl3vz elasticsearch]# vi config/es00.yml
cluster.name: mses-cluster
node.name: es00
node.master: true
node.data: true
bootstrap.memory_lock: false
bootstrap.system_call_filter: false
network.host: 172.20.0.10
http.port: 9200
transport.tcp.port: 9300
http.cors.enabled: true
http.cors.allow-origin: "*"
discovery.seed_hosts: ["172.20.0.10:9300","172.20.0.11:9300"]
cluster.initial_master_nodes: ["es00","es01"]
discovery.zen.minimum_master_nodes: 2
http.cors.allow-headers: Authorization
xpack.security.enabled: true
重启
docker restart es00
查看启动日志
docker logs -f --tail=10 es00
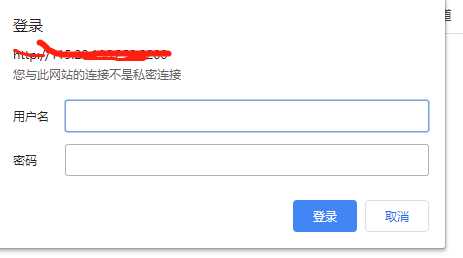
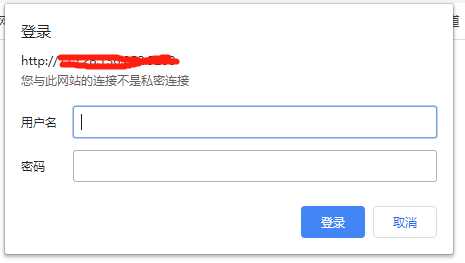
看到启动完成后,访问ip:端口,会弹出登录对话窗口


进入容器,
docker exec -it es00 /bin/bash
生成配置ca证书:这里可输入密码,也可直接回车不输密码,我这里密码:不输入,
bin/elasticsearch-certutil ca
证书生成位置是当前位置,会生成一个证书名字:elastic-stack-ca.p12
当然也可以用 out指定生成证书位置。
[root@ee7fae207374 elasticsearch]# bin/elasticsearch-certutil ca
WARNING: An illegal reflective access operation has occurred
WARNING: Illegal reflective access by org.bouncycastle.jcajce.provider.drbg.DRBG (file:/usr/share/elasticsearch/lib/tools/security-cli/bcprov-jdk15on-1.61.jar) to constructor sun.security.provider.Sun()
WARNING: Please consider reporting this to the maintainers of org.bouncycastle.jcajce.provider.drbg.DRBG
WARNING: Use --illegal-access=warn to enable warnings of further illegal reflective access operations
WARNING: All illegal access operations will be denied in a future release
This tool assists you in the generation of X.509 certificates and certificate
signing requests for use with SSL/TLS in the Elastic stack.

The ‘ca‘ mode generates a new ‘certificate authority‘
This will create a new X.509 certificate and private key that can be used
to sign certificate when running in ‘cert‘ mode.

Use the ‘ca-dn‘ option if you wish to configure the ‘distinguished name‘
of the certificate authority

By default the ‘ca‘ mode produces a single PKCS#12 output file which holds:
    * The CA certificate
    * The CA‘s private key

If you elect to generate PEM format certificates (the -pem option), then the output will
be a zip file containing individual files for the CA certificate and private key

Please enter the desired output file [elastic-stack-ca.p12]:
Enter password for elastic-stack-ca.p12 :
[root@ee7fae207374 elasticsearch]# ls
123456  LICENSE.txt  NOTICE.txt  README.textile  bin  config  data  elastic-stack-ca.p12  jdk  lib  logs  modules  plugins
生成私钥证书
将证书复制到宿主机
将证书复制到所有需要集群的es节点
修改所有需要集群的节点
重启所有节点
测试查看结果
ELK docker elasticsearch7 设置xpack账号密码
标签:create nta cli code stash stack rate 密码 main
原文地址:https://www.cnblogs.com/a393060727/p/12971290.html