标签:des android style blog http io color ar os
Toolbar其实是一个ActionBar的变体,大大扩展了Actionbar。我们可以像对待一个独立控件一样去使用ToolBar,可以将它放到屏幕的任何位置,不必拘泥于顶部,还可以将它改变高度或者是在ToolBar上使用动画。
下面我们来讲如何使用这个控件。
1.将控件放入布局中
<RelativeLayout xmlns:android="http://schemas.android.com/apk/res/android"
    xmlns:tools="http://schemas.android.com/tools"
    android:layout_width="match_parent"
    android:layout_height="match_parent"
    android:paddingBottom="@dimen/activity_vertical_margin"
    android:paddingLeft="@dimen/activity_horizontal_margin"
    android:paddingRight="@dimen/activity_horizontal_margin"
    android:paddingTop="@dimen/activity_vertical_margin"
    tools:context=".MainActivity" >

    <android.support.v7.widget.Toolbar
        android:id="@+id/toolbar"
        android:layout_width="match_parent"
        android:layout_height="wrap_content"
        android:layout_centerHorizontal="true"
        android:layout_centerVertical="true"

        android:background="@color/colorPrimary" >
    </android.support.v7.widget.Toolbar>
</RelativeLayout>
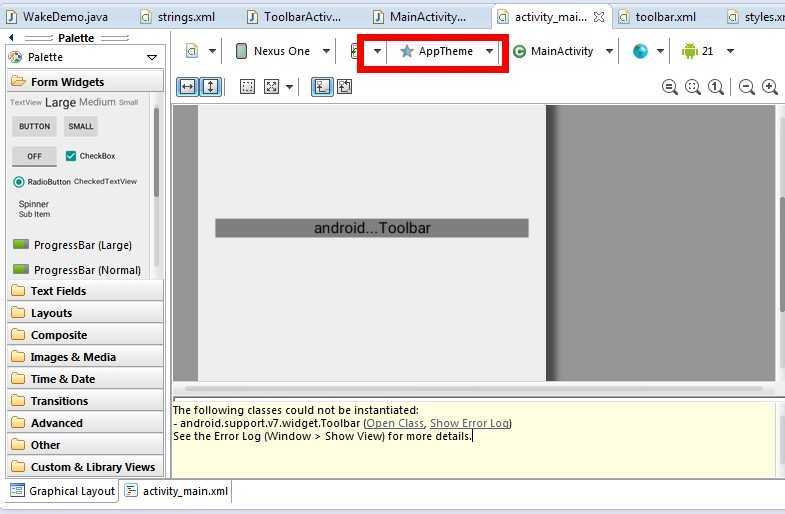
我们在布局中使用它的时候可能会遇到这样的问题——不能被实例化
The following classes could not be instantiated:
- android.support.v7.widget.Toolbar (Open Class, Show Error Log)
See the Error Log (Window > Show View) for more details.
解决方法:重启下Eclipse。
Sometimes, when a new resource is added, Eclipse doesn‘t compile correctly the new code (maybe a caching issue), causing this error.Normally, simply restarting Eclipse is enough to fix the problem.
还可能遇到这样的问题——丢失样式
Missing styles. Is the correct theme chosen for this layout?
Use the Theme combo box above the layout to choose a different layout, or fix the theme style references.
Failed to find style ‘toolbarStyle‘ in current theme
解决方法:在可视化布局窗口中更改下主题样式,我由之前的AppTheme改为AppBaseTheme就解决了。
方法来自:http://blog.csdn.net/romaticxiaoyu/article/details/7241512
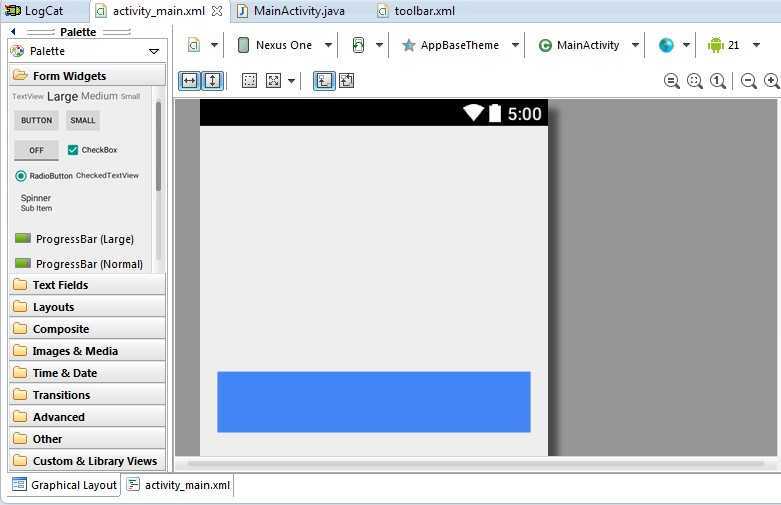
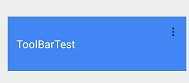
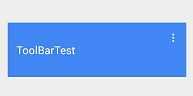
好了,解决完这两个问题后我们可以看到这个控件啦。控件的颜色是我们之前在color中指定的颜色,通过background=”“来设置的。
2.将其与Actionbar进行关联
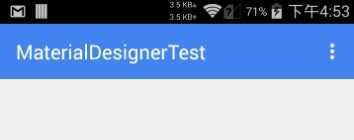
我们先看看之前的Actionbar是什么样的
现在在代码中找到这个控件然后设置给Actionbar(setSupportActionBar(toolbar)),但有两个前提。
1.主题中必须设置没有Actionbar(<item name="windowActionBar">false</item>),否则就会出现报里两个actionbar的错误
<resources xmlns:android="http://schemas.android.com/apk/res/android">

    <!--
        Base application theme, dependent on API level. This theme is replaced
        by AppBaseTheme from res/values-vXX/styles.xml on newer devices.
    -->
    <style name="AppBaseTheme" parent="Theme.AppCompat.Light.DarkActionBar">
        <!--
            Theme customizations available in newer API levels can go in
            res/values-vXX/styles.xml, while customizations related to
            backward-compatibility can go here.

        -->
    </style>

    <!-- Application theme. -->
    <style name="AppTheme" parent="AppBaseTheme">

        <!-- All customizations that are NOT specific to a particular API-level can go here. -->
        <item name="colorPrimary">@color/colorPrimary</item>
        <item name="colorPrimaryDark">@color/primary_material_light</item>
        <item name="android:textColorPrimary">@android:color/white</item>
        <item name="android:windowNoTitle">true</item>
        <item name="windowActionBar">false</item>
    </style>

</resources>
2.当前Activity必须继承自ActionBarActivity
public class MainActivity extends ActionBarActivity {

    @Override
    protected void onCreate(Bundle savedInstanceState) {
        super.onCreate(savedInstanceState);
        setContentView(R.layout.activity_main);
        Toolbar toolbar = (Toolbar) findViewById(R.id.toolbar);
        if (toolbar != null) {
            setSupportActionBar(toolbar);
        }
    }
}
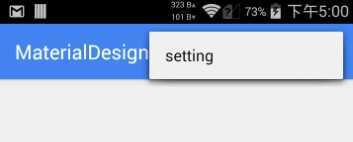
设置完后我们发现又来了问题,明明刚刚用系统Actionbar的时候显示的不错,但将Actionbar变为Toolbar后就出现了下面的效果。
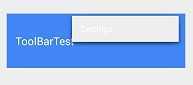
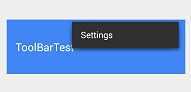
我们发现三个点菜单图标变成了黑色,这个还好说我们换个图片就行了,关键是点开后的菜单背景变成了白色,体验很差。于是我们就开始想怎么解决呢?其实也简单,把主题样式换成继承自:Theme.AppCompat就行了。我为了防止主题错乱,将别的版本的主题文件全删除了,就留了一个values中的,并且将主题的背景色设为#eeeeee
(<item name="android:windowBackground">@color/windowBackground</item> )
<resources xmlns:android="http://schemas.android.com/apk/res/android">

    <!--
        Base application theme, dependent on API level. This theme is replaced
        by AppBaseTheme from res/values-vXX/styles.xml on newer devices.
    -->
    <style name="AppBaseTheme" parent="Theme.AppCompat">
        <!--
            Theme customizations available in newer API levels can go in
            res/values-vXX/styles.xml, while customizations related to
            backward-compatibility can go here.

        -->
    </style>

    <!-- Application theme. -->
    <style name="AppTheme" parent="AppBaseTheme">

        <!-- All customizations that are NOT specific to a particular API-level can go here. -->
        <item name="colorPrimary">@color/colorPrimary</item>
        <item name="colorPrimaryDark">@color/primary_material_light</item>
        <item name="android:textColorPrimary">@android:color/white</item>
        <item name="android:windowBackground">@color/windowBackground</item>
        <item name="android:windowNoTitle">true</item>
        <item name="windowActionBar">false</item>
    </style>

</resources>
3.监听器(可选)
我们在activity中有个回调方法来监听每个item的点击事件,现在在toolbar中也提供了这个接口进行监听。文档中写的是,如果每个itme没有独立的监听器,那么可以在toolbar中绑定监听器。我个人认为还是按照往常一样的写法吧,便于管理。
<1>常规方法
    @Override
    public boolean onCreateOptionsMenu(Menu menu) {
        // Inflate the menu; this adds items to the action bar if it is present.
        getMenuInflater().inflate(R.menu.main, menu);
        return true;
    }

    @Override
    public boolean onOptionsItemSelected(MenuItem item) {
        // Handle action bar item clicks here. The action bar will
        // automatically handle clicks on the Home/Up button, so long
        // as you specify a parent activity in AndroidManifest.xml.
        int id = item.getItemId();
        if (id == R.id.action_settings) {
            Toast.makeText(getApplicationContext(), "setting", 0).show();
            return true;
        }
        return super.onOptionsItemSelected(item);
    }
<2>toolbar中的方法
      toolbar.setOnMenuItemClickListener(new OnMenuItemClickListener() {

            @Override
            public boolean onMenuItemClick(MenuItem item) {
                // TODO 自动生成的方法存根
                System.out.println("click + "+item.getItemId());
                return false;
            }
        });
参考自:
http://blog.csdn.net/hjj0212/article/details/7065050
Material Designer的代码实现(四)—— ToolBar
标签:des android style blog http io color ar os
原文地址:http://www.cnblogs.com/tianzhijiexian/p/4082892.html