标签:rmi command listen firewall image mtu conf bsp nmcli


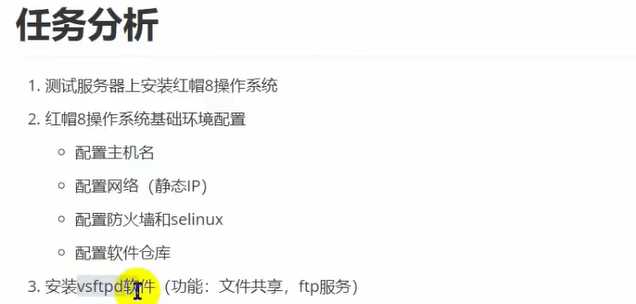
一、RHEL8 Web控制台管理系统
rhel web控制台是一个基于红帽企业版linux 8 界面,用于管理和监视本地系统及网络环境的linux服务器。是交互式服务器管理界面,通过浏览器与真实的linux系统交互。
能监控基本系统功能,例如硬件信息,时间配置,性能配置等;检查系统日志文件;管理网络接口和配置防火墙;管理虚拟机;管理用户账户;管理软件包;配置SELinux;更新软件;访问终端。
1)系统默认已安装(如果没有安装则需要安装cockpit)

2)设置是否开机自启
# 查看是否开启自启
[root@tourby tanbaobao]# systemctl list-unit-files | grep cockpit
cockpit-motd.service                       static
cockpit.service                            static
cockpit.socket                             disabled

# 设置开机自启
[root@tourby tanbaobao]# systemctl enable --now cockpit.socket

# 启动服务(端口号为9090)
[root@tourby tanbaobao]# systemctl start cockpit

# 查看启动端口
[root@tourby tanbaobao]# netstat -nltp | grep 9090
tcp6       0      0 :::9090                 :::*                    LISTEN      1/systemd

# 查看启动状态
[root@tourby tanbaobao]# systemctl status cockpit
3)设置防火墙策略
说明:如果防火墙是开启的则需要将cockpit服务的9090端口加入到防火墙中
# 查看防火墙状态
[root@tourby tanbaobao]# systemctl status firewalld

# 添加防火墙策略
[root@tourby tanbaobao]# firewall-cmd --add-service=cockpit --permanent
Warning: ALREADY_ENABLED: cockpit
success
[root@tourby tanbaobao]# firewall-cmd --reload
success
说明:默认情况下cockpit服务是启动的,可以用lsof命令检查9090端口是否存在。
[root@tourby tanbaobao]# lsof -i :9090
COMMAND PID USER   FD   TYPE DEVICE SIZE/OFF NODE NAME
systemd   1 root   26u  IPv6 113285      0t0  TCP *:websm (LISTEN)
1)浏览器版本
2)登录账号
3)本地登录
在本地谷歌浏览器上访问:https://服务器IP地址:9090/
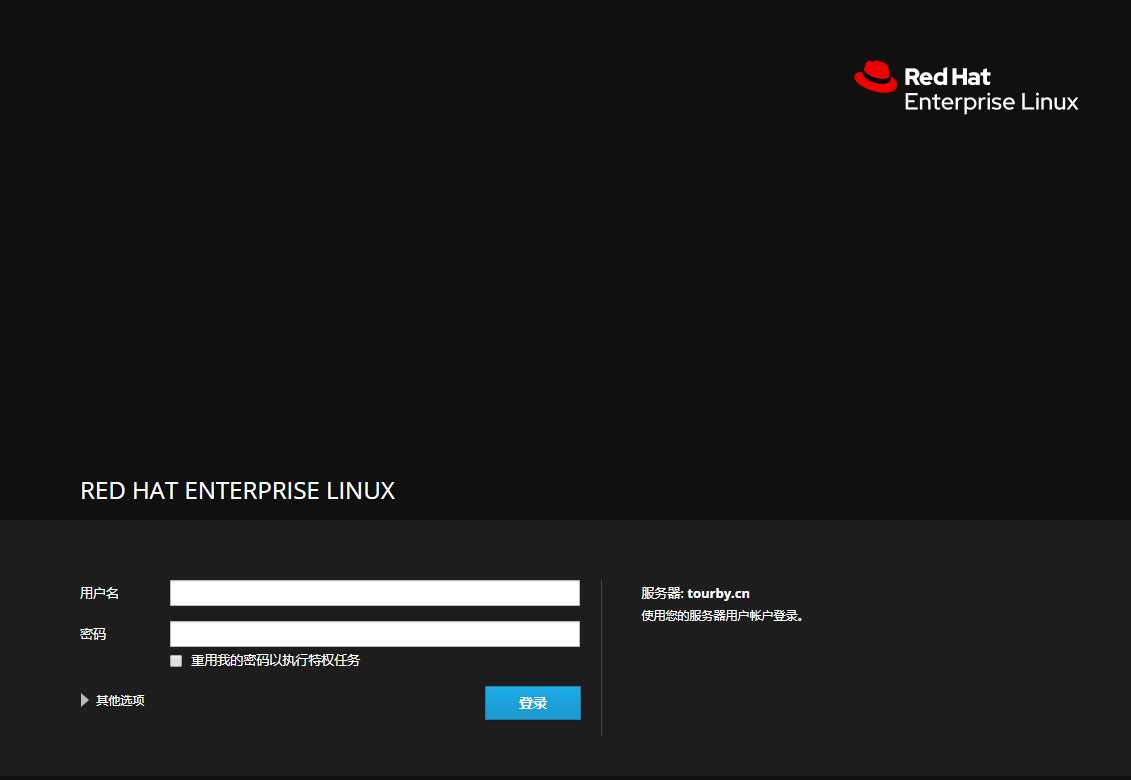
使用root用户登录
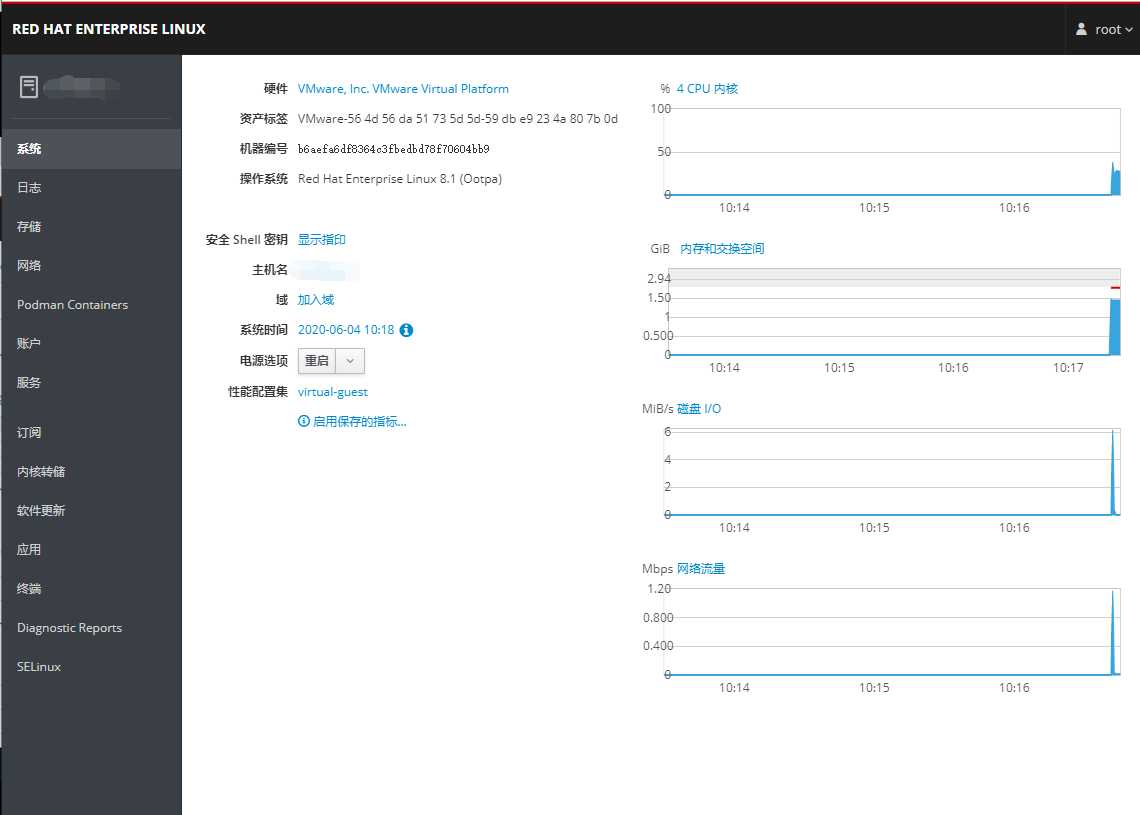
4)配置主机名和网络
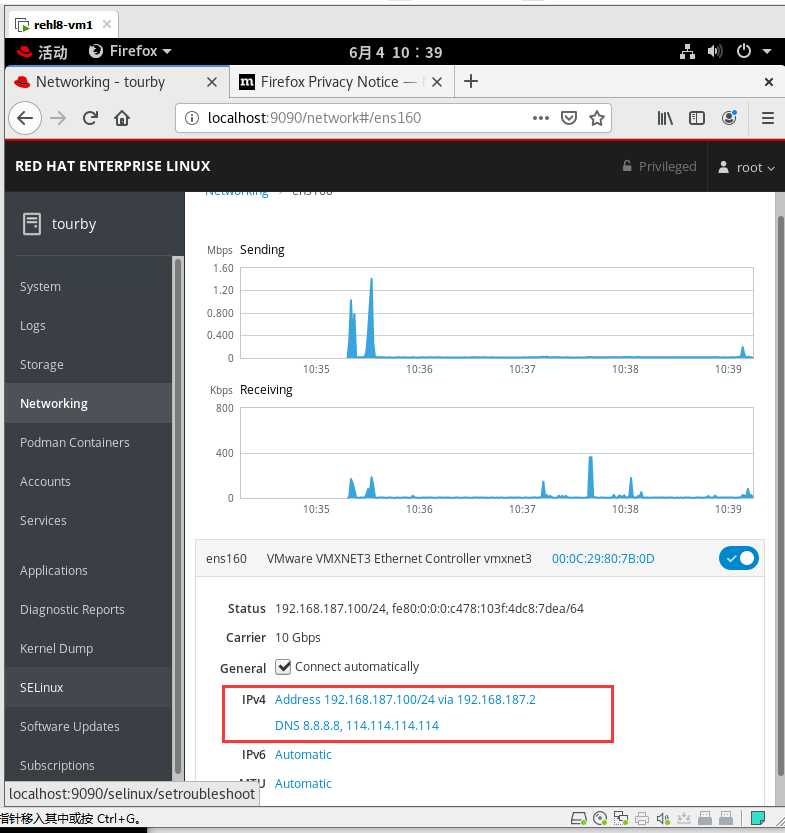
在系统模块可以直接配置主机名。配置DHCP动态ip地址
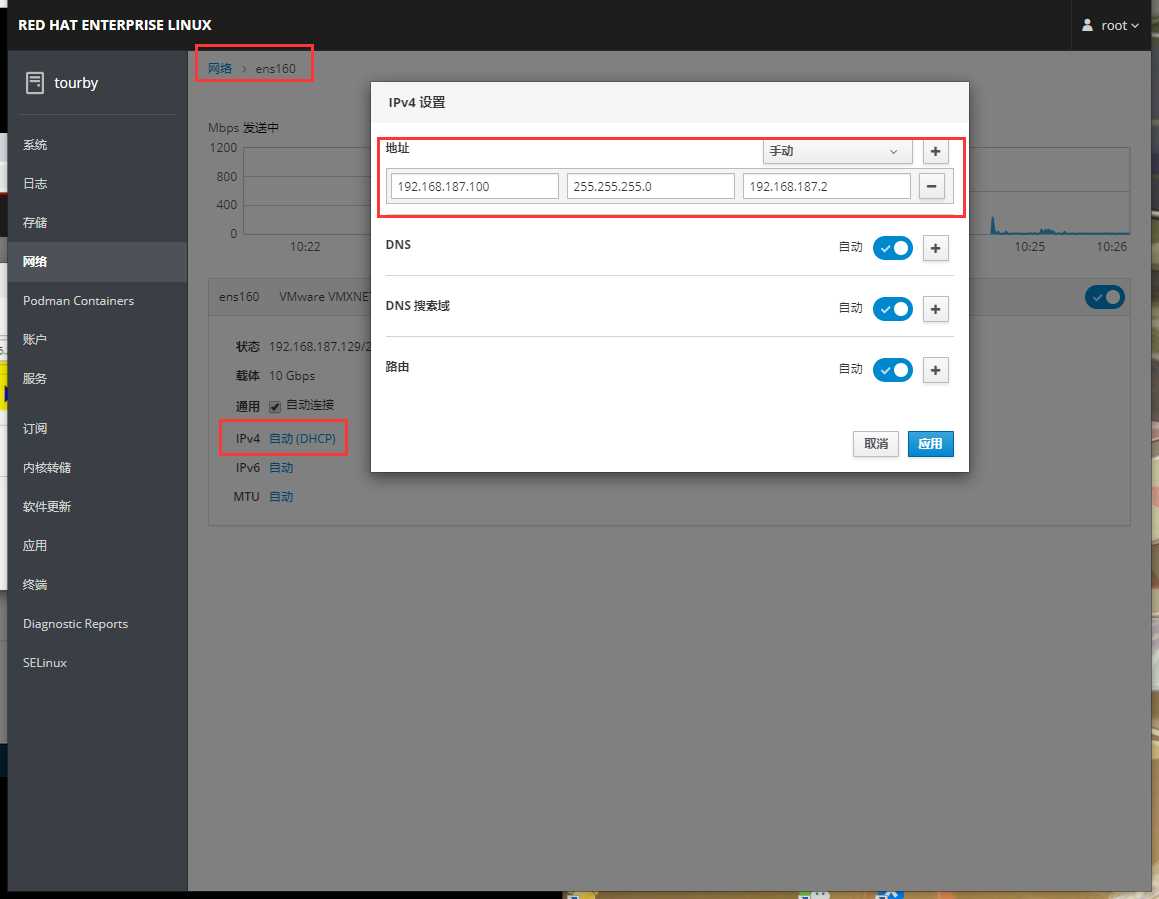
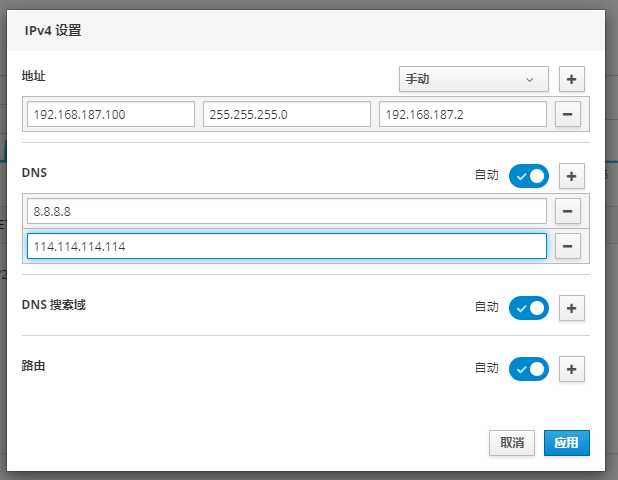
上面是远程访问,网络会修改不成功。所以从服务器本地登录http://localhost:9090
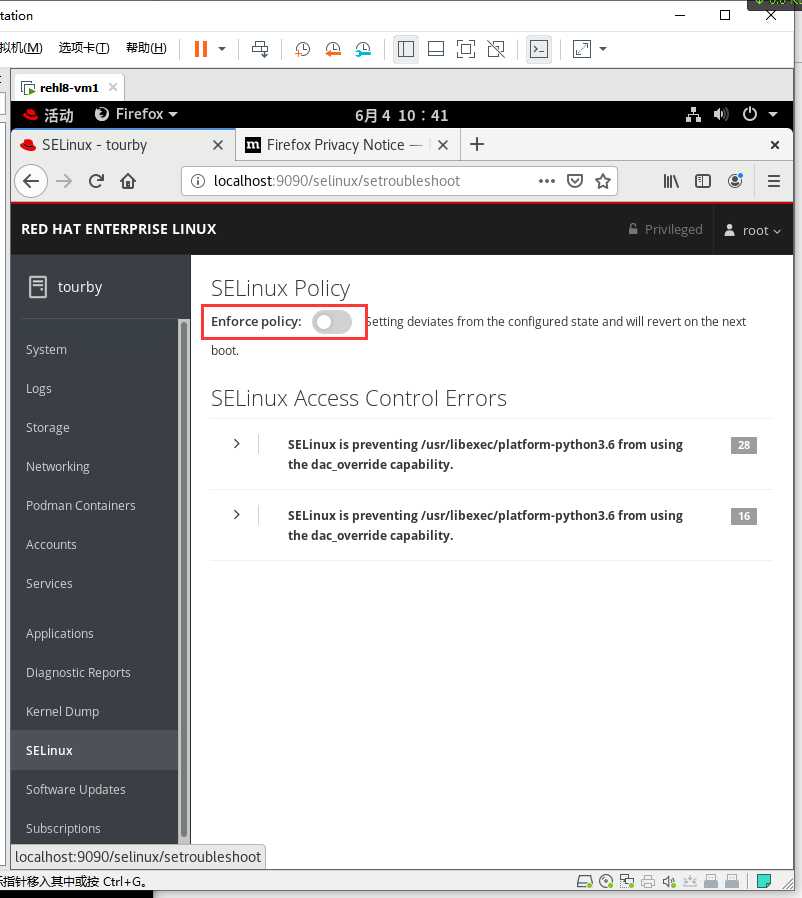
关闭SELinux
[root@tourby ~]# hostnamectl set-hostname rhel8.tourby.cn
[root@tourby ~]# hostname

rhel8.tourby.cn
[root@tourby ~]# cat /etc/hostname
rhel8.tourby.cn
1)Vmware三种网络模式:
2)三种网络模式了解:
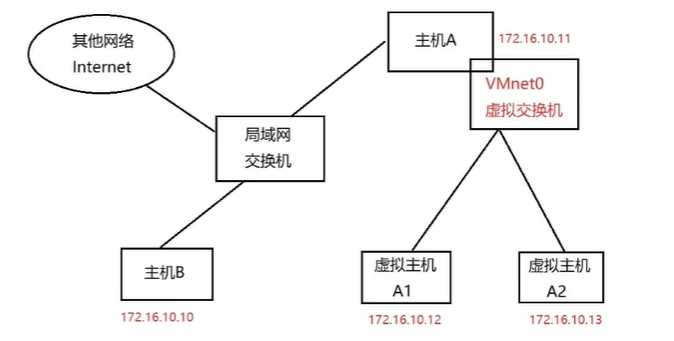
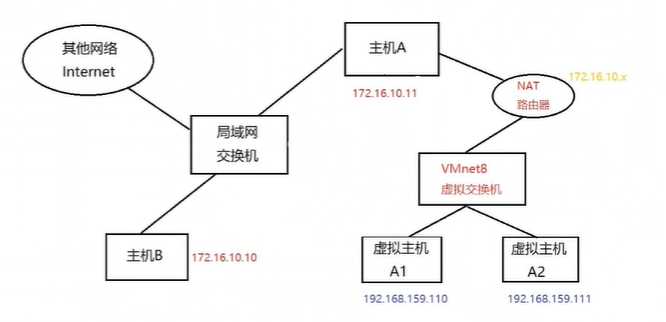
上边虚拟主机A1能访问主机B,主机B不能访问虚拟主机A1(因为他们之间没有VMnet8虚拟网卡);主机A能访问虚拟主机A1(因为他们之间有VMnet8虚拟网卡)。
注意:私有IP地址是不能访问互联网,但虚拟机只要物理真机能访问互联网,他也就能访问。NAT模式具有路由转发功能,会将VMnet8接收到的虚拟ip地址转换为能上网的物理真机的ip网段地址。
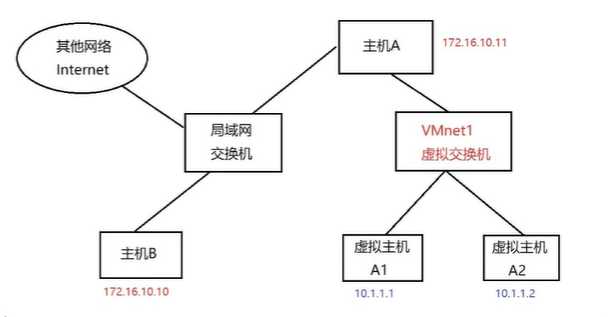
仅主机模式和物理真机不在同网段,虚拟机 A1不能直接访问物理主机172.16.10.*,只有连接在同一VMnet1模式下的虚拟主机内部ping通访问,且能和主机A访问(因为主机A有VMnet1虚拟网卡)。物理真机能访问互联网,但虚拟主机A1,A2不能访问互联网(因为它是一个闭环的网络)
3)虚拟机虚拟网络配置
虚拟机编辑菜单选择【虚拟网络配置】选项
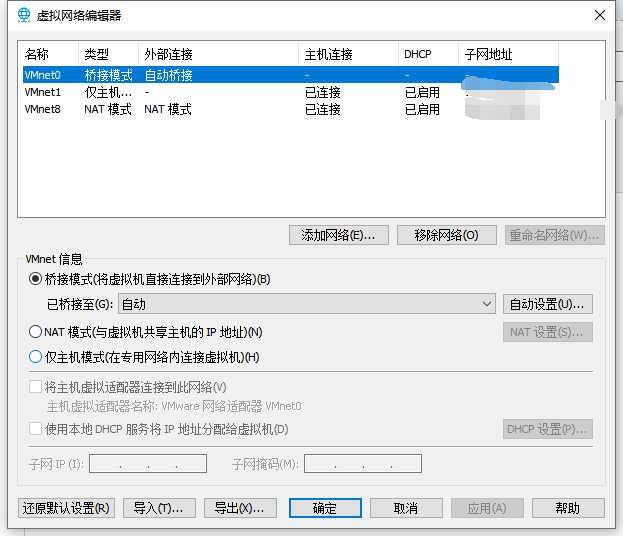
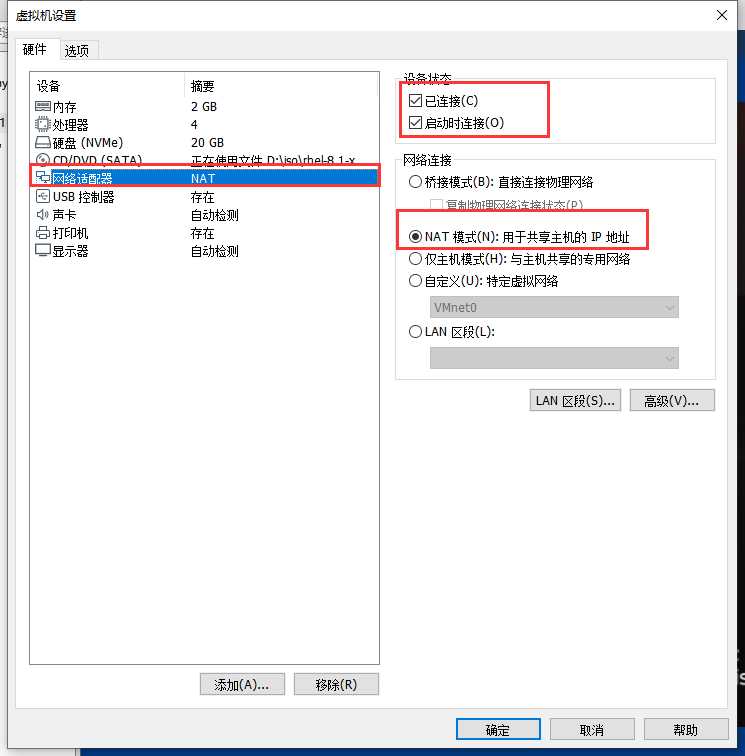
配置好模式后,点击虚拟机【设置】里边选【网络适配器】,进行模式调整
1)直接修改网卡配置文件
[root@rhel8 ~]# cd /etc/sysconfig/network-scripts/
[root@rhel8 network-scripts]# ls
ifcfg-ens160
[root@rhel8 network-scripts]# cat ifcfg-ens160
TYPE=Ethernet                 # 以太网
PROXY_METHOD=none
BROWSER_ONLY=no
BOOTPROTO=none                # IP获取方式,none和static表静态,dhcp表动态
DEFROUTE=yes
IPV4_FAILURE_FATAL=no
IPV6INIT=yes
IPV6_AUTOCONF=yes
IPV6_DEFROUTE=yes
IPV6_FAILURE_FATAL=no
IPV6_ADDR_GEN_MODE=stable-privacy
NAME=ens160                    # 网卡名
UUID=502dfd4a-3d61-4e42-a268-9fc39eea1b18         # 网卡UUID唯一标识
DEVICE=ens160                  # 网卡设备名
ONBOOT=yes                     # 激活网卡
IPV6_PRIVACY=no
IPADDR=192.168.187.100      # IP地址
PREFIX=24                   # 子网掩码 等价于:NETMASK=255.255.255.0
GATEWAY=192.168.187.2       # 网关
DNS1=8.8.8.8                # dns服务器
DNS2=114.114.114.114
[root@rhel8 network-scripts]# vi ifcfg-ens160
TYPE=Ethernet
BOOTPROTO=none
NAME=ens160
UUID=502dfd4a-3d61-4e42-a268-9fc39eea1b18
DEVICE=ens160
ONBOOT=yes
IPADDR=192.168.187.10
PREFIX=24
GATEWAY=192.168.187.2
DNS1=8.8.8.8
DNS2=114.114.114.114

# rhel8中不能使用systemctl重启网络
[root@rhel8 network-scripts]# systemctl restart network.service
Failed to restart network.service: Unit network.service not found.
[root@rhel8 network-scripts]# nmcli connection reload ens160
[root@rhel8 network-scripts]# nmcli connection up ens160
2)使用nmcli工具配置
# 这里的c表示connection
[root@rhel8 ~]# nmcli c show
NAME    UUID                                  TYPE      DEVICE
ens160  502dfd4a-3d61-4e42-a268-9fc39eea1b18  ethernet  ens160
virbr0  01950f62-d071-49b3-9ee0-a042b749dcb7  bridge    virbr0

# 查看激活的网卡信息
[root@rhel8 ~]# nmcli c show --active
# 可以修改IP地址,掩码,网关,dns地址等(这条命令相当于修改的网络配置文件,改完后并不会立即生效)
[root@rhel8 ~]# nmcli connection modify ens160 ipv4.addresses 192.168.187.100/24 ipv4.gateway 192.168.187.2 ipv4.
dns 8.8.8.8

# 需重载配置文件,激活网卡
[root@rhel8 ~]# nmcli c reload ens160
[root@rhel8 ~]# nmcli c up ens160

# 还可以添加或减去IP地址(网关,DNS等)
[root@rhel8 ~]# nmcli connection modify ens160 +ipv4.addresses 10.1.1.100/24
[root@rhel8 ~]# nmcli connection modify ens160 -ipv4.addresses 10.1.1.100/24

# 修改都需要重载配置文件激活网络
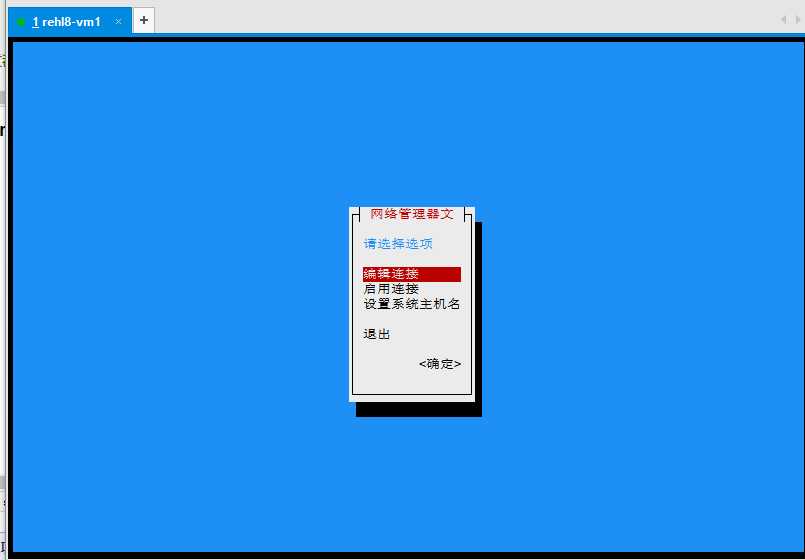
3)使用nmtui文本图形工具
终端中输入:nmtui进入图形界面,选择【编辑连接】,按回车键
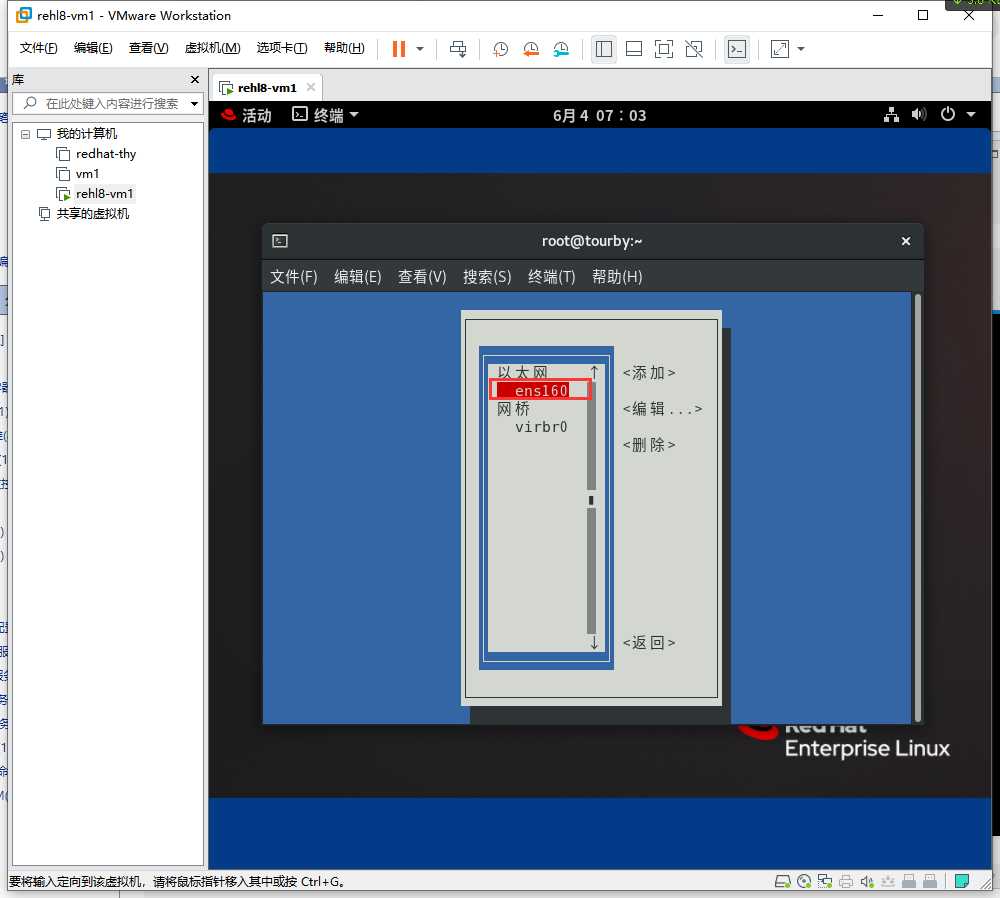
选择ens160网卡,回车,进入编辑界面
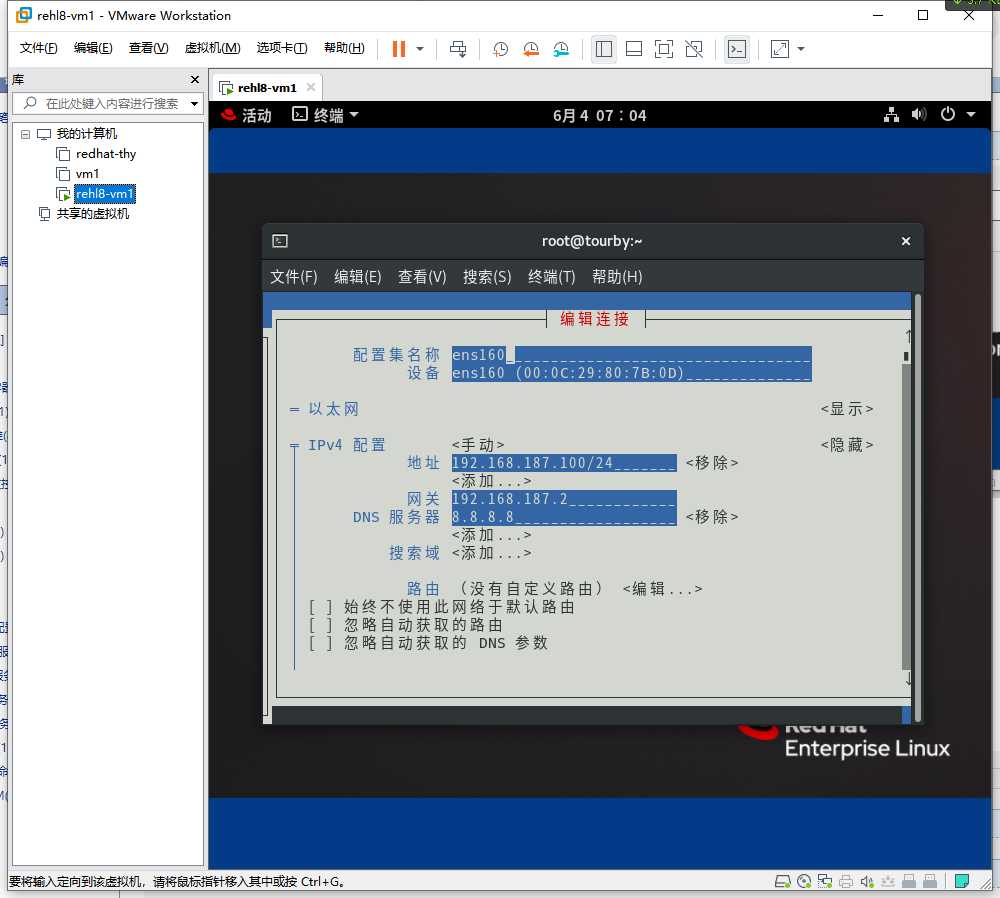
配置好之后用方向键向下翻,选择【确定键】,【返回】,最后不要忘记启动连接
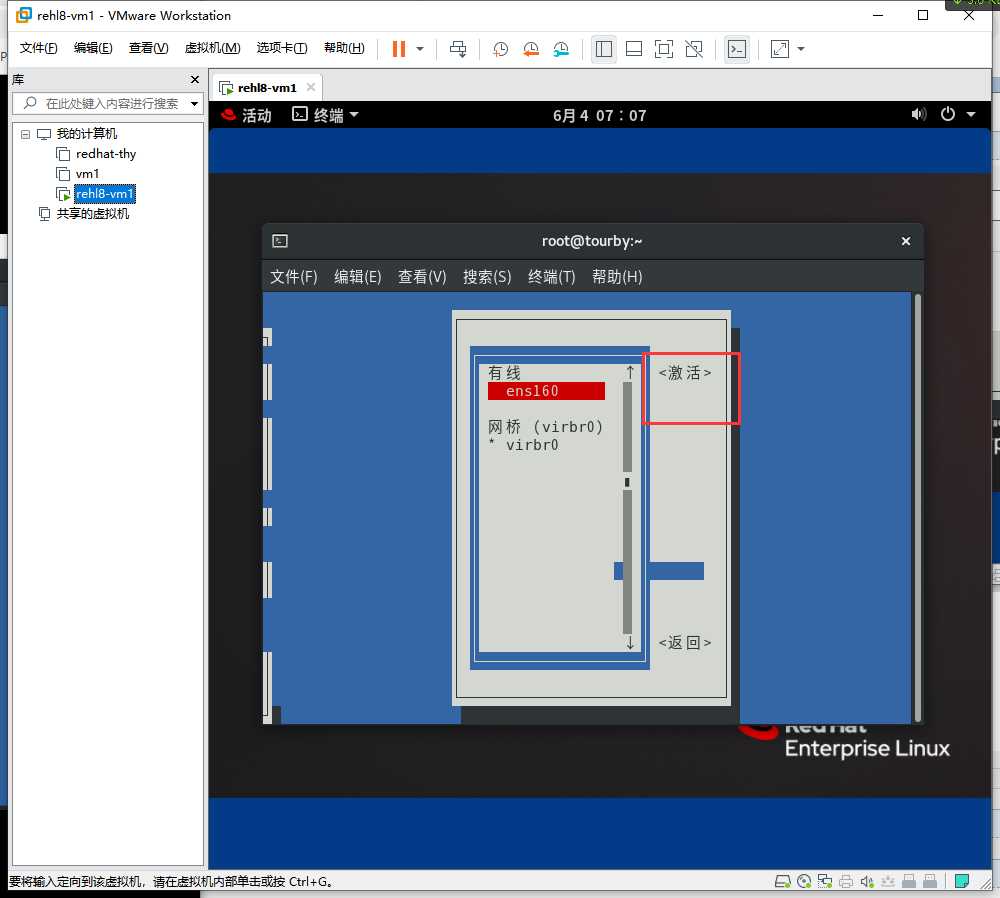
注意:如果ip a没有查看到ip,可能是没有激活,需要手动激活
[root@rhel8 ~]# nmcli c up ens160
连接已成功激活(D-Bus 活动路径:/org/freedesktop/NetworkManager/ActiveConnection/9)
[root@rhel8 ~]# getenforce
Permissive
[root@rhel8 ~]# setenforce 0
[root@rhel8 ~]# getenforce
Permissive
[root@rhel8 ~]# vi /etc/selinux/config
将SELINUX修改为
SELINUX=disabled
yum源配置参考我博客:
# 安装vsftpd服务
[root@rhel8 ~]# dnf install vsftpd -y
# 查看是否安装成功
[root@rhel8 ~]# dnf list installed | grep vsftpd
标签:rmi command listen firewall image mtu conf bsp nmcli
原文地址:https://www.cnblogs.com/HeiDi-BoKe/p/13039476.html