标签:border 变化 开发 nav name int vba lap 生日
做一个简单的联系人管理,码云源码地址
Vue前端 + C# WebAPI + MySql
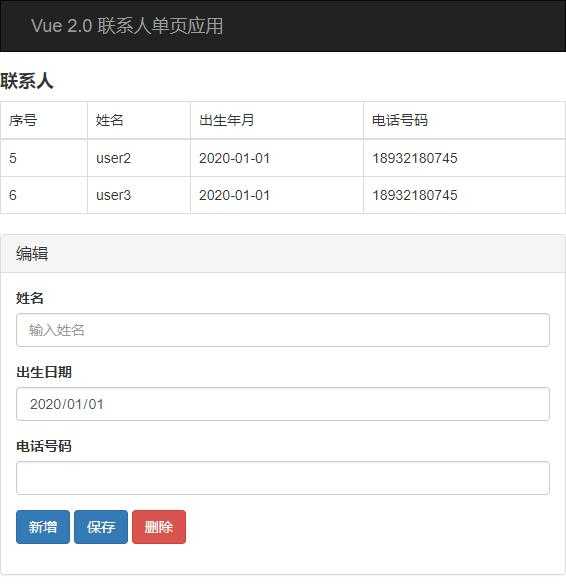
预览界面
代码参考
<!DOCTYPE html>
<html>
	<head>
		<meta charset="utf-8">
		<title></title>
		<link href="css/bootstrap.min.css" rel="stylesheet">
		<script src="js/bootstrap.min.js"></script>
		<script src="js/vue.js" type="text/javascript" charset="utf-8"></script>
	</head>
	<body>
		<div id="demo">
			<nav class="navbar navbar-inverse">
				<div class="container-fluid">
					<div class="navbar-brand">Vue 2.0 联系人单页应用</div>
				</div>
			</nav>
			<!-- 主页面 -->
			<div>
				<h4><b>联系人</b></h4>
			</div>
			<table class="table table-bordered table-hover">
				<thead>
					<tr>
						<td>序号</td>
						<td>姓名</td>
						<td>出生年月</td>
						<td>电话号码</td>
					</tr>
				</thead>
				<tbody>
					<tr v-for="item in list" :key="item.Id">
						<td>{{item.Id}}</td>
						<td>{{item.Name}}</td>
						<td>{{item.Birthday}}</td>
						<td>{{item.Telephone}}</td>
					</tr>
				</tbody>
			</table>
			<!-- 添加修改页面  -->
			<div id="editform" class="panel panel-default">
				<div class="panel-heading">
					<h3 class="panel-title">编辑</h3>
				</div>
				<div class="panel-body">
					<form class="form-horizontal" role="form" v-on:submit.prevent>
						<div class="form-group">
							<label class="col-sm-2 control-label">姓名</label>
							<div class="col-sm-10">
								<input class="form-control" v-model="row.Name" id="name" placeholder="输入姓名">
							</div>
						</div>
						<div class="form-group">
							<label class="col-sm-2 control-label">出生日期</label>
							<div class="col-sm-10">
								<input type="date" class="form-control" v-model="row.Birthday" id="birthday">
							</div>
						</div>
						<div class="form-group">
							<label class="col-sm-2 control-label">电话号码</label>
							<div class="col-sm-10">
								<input class="form-control" v-model="row.Telephone" id="phone">
							</div>
						</div>
						<div class="form-group">
							<div class="col-sm-offset-2 col-sm-10">
								<button @click="newrow" class="btn btn-primary">新增</button>
								<button @click="saverow" class="btn btn-primary">保存</button>
								<button @click="deleterow" class="btn btn-danger">删除</button>
							</div>
						</div>
					</form>
				</div>
			</div>

			<script>
				new Vue({
					el: "#demo",
					data: {
						row: {
							Id: 0,
							Name: "",
							Birthday: "2020-01-01",
							Telephone: ""
						},
						list: [{
								Id: 5,
								Name: "user2",
								Birthday: "2020-01-01",
								Telephone: "18932180745"
							},
							{
								Id: 6,
								Name: "user3",
								Birthday: "2020-01-01",
								Telephone: "18932180745"
							}
						]
					}
				})
			</script>
	</body>
</html>
head中引入
		<link href="css/bootstrap.min.css" rel="stylesheet">
		<script src="js/bootstrap.min.js"></script>
head中引入
		<script src="js/underscore.js"></script>
		<script type="text/javascript" src="https://unpkg.com/axios/dist/axios.min.js"></script>
		<script src="https://cdn.bootcdn.net/ajax/libs/qs/6.9.3/qs.min.js"></script>
为了运行速度和版本兼容,一些库保存到了本地,一般使用公共CDN即可,如猫云CDN。
public class people
    {
        private int id;
        private string name;
        private string birthday;
        private string telephone;

        public int Id { get => id; set => id = value; }
        public string Name { get => name; set => name = value; }
        public string Birthday { get => birthday; set => birthday = value; }
        public string Telephone { get => telephone; set => telephone = value; }
    }
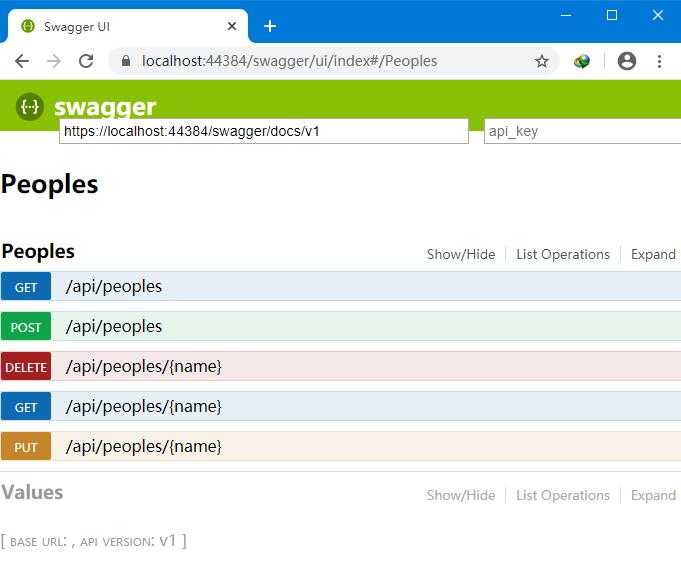
使用RESTful API接口设计: 查询 GET :GET /peoples/{userId} 增加 POST:POST /peoples 修改 PUT:PUT /peoples/{userId} 即提供该用户的所有信息来修改 删除 DELETE:DELETE /peoples/{userId}
public class PeoplesController : ApiController
    {
        private MySqlConnection GetConnection()
        {
            string connectString = "data source=106.53.98.143;database=fastlink;user id=root;password=admin;pooling=false;charset=utf8";//pooling代表是否使用连接池
            MySqlConnection conn = new MySqlConnection(connectString);
            conn.Open();
            return conn;
        }
        [Route("api/peoples")]
        // GET api/peoples
        public IEnumerable<people> Get()
        {
            List<people> list = new List<people>();
            using (MySqlConnection conn = this.GetConnection())
            {
                using (MySqlCommand com = new MySqlCommand())
                {
                    com.Connection = conn;
                    com.CommandText = "select * from peoples";
                    MySqlDataReader reader = com.ExecuteReader();
                    while (reader.Read())
                    {
                        people line = new people();
                        int id = 0;
                        int.TryParse(reader["id"].ToString(), out id);
                        line.Id = id;
                        line.Name = reader["name"].ToString();
                        DateTime dt = DateTime.MinValue;
                        DateTime.TryParse(reader["birthday"].ToString(), out dt);
                        line.Birthday = dt.ToString("yyyy-MM-dd");
                        line.Telephone = reader["telephone"].ToString();
                        list.Add(line);
                    }
                }
            }
            return list.ToArray();
        }
        [HttpGet]
        //注意:如果想通过Get请求AA/index/names,可以在Get前面加Route。
        [Route("api/peoples/{name}")]
        // GET api/peoples/zhangsan
        public people Get(string name)
        {
            people line = new people();
            using (MySqlConnection conn = this.GetConnection())
            {
                using (MySqlCommand com = new MySqlCommand())
                {
                    com.Connection = conn;
                    com.CommandText = "select * from peoples" + " where name=@name ";
                    com.Parameters.AddWithValue("@name", name);
                    MySqlDataReader reader = com.ExecuteReader();
                    if (reader.Read())
                    {

                        int id = 0;
                        int.TryParse(reader["id"].ToString(), out id);
                        line.Id = id;
                        line.Name = reader["name"].ToString();
                        DateTime dt = DateTime.MinValue;
                        DateTime.TryParse(reader["birthday"].ToString(), out dt);
                        line.Birthday = dt.ToString("yyyy-MM-dd");
                        line.Telephone = reader["telephone"].ToString();

                    }
                }
            }
            return line;
        }
        //create
        [HttpPost]
        [Route("api/peoples")]
        // POST: api/Users
        public void Post([FromBody]people line)
        {
            using (MySqlConnection conn = this.GetConnection())
            {
                using (MySqlCommand com = new MySqlCommand())
                {
                    com.Connection = conn;
                    com.CommandText = "insert into peoples(name, birthday, telephone) values (@name, @birthday, @telephone) ";
                    com.Parameters.AddWithValue("@name", line.Name);
                    com.Parameters.AddWithValue("@birthday", line.Birthday);
                    com.Parameters.AddWithValue("@telephone", line.Telephone);
                    com.ExecuteNonQuery();
                }
            }
        }

        [HttpPut]
        [Route("api/peoples/{name}")]
        // PUT: api/Users/5
        public void Put(string name, [FromBody]people line)
        {
            using (MySqlConnection conn = this.GetConnection())
            {
                using (MySqlCommand com = new MySqlCommand())
                {
                    com.Connection = conn;
                    com.CommandText = "update peoples set birthday=@birthday, telephone=@telephone where name=@name ";
                    com.Parameters.AddWithValue("@name", name);
                    com.Parameters.AddWithValue("@birthday", line.Birthday);
                    com.Parameters.AddWithValue("@telephone", line.Telephone);
                    com.ExecuteNonQuery();
                }
            }
        }

        [HttpDelete]
        [Route("api/peoples/{name}")]
        // DELETE: api/Users/5
        public void Delete(string name)
        {
            using (MySqlConnection conn = this.GetConnection())
            {
                using (MySqlCommand com = new MySqlCommand())
                {
                    com.Connection = conn;
                    com.CommandText = "delete from peoples where name=@name ";
                    com.Parameters.AddWithValue("@name", name);
                    com.ExecuteNonQuery();
                }
            }
        }
    }
//跨域配置
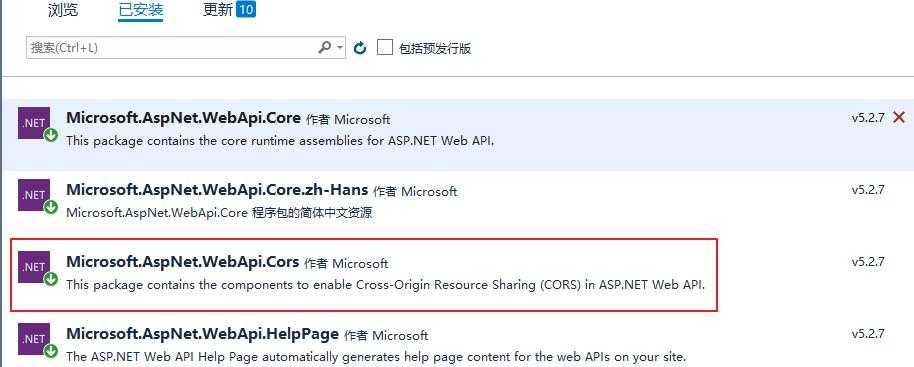
config.EnableCors(new EnableCorsAttribute("*", "*", "*"));
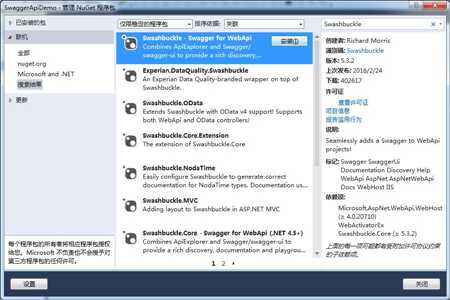
非必须,只是更好的管理接口,可跳过。使用nuget包获取Swashbuckle(swagger的包)并安装。
用于调试后端接口 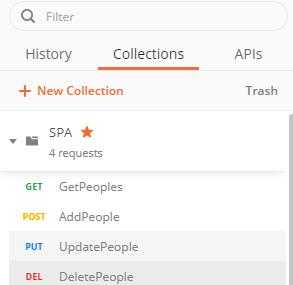
如图,已经导出SPA.postman_collection.json,见attachment文件夹。
CREATE TABLE `peoples` (
  `id` int(11) NOT NULL AUTO_INCREMENT,
  `name` varchar(50) DEFAULT NULL,
  `birthday` varchar(50) DEFAULT NULL,
  `telephone` varchar(50) DEFAULT NULL,
  PRIMARY KEY (`id`)
) ENGINE=MyISAM AUTO_INCREMENT=3 DEFAULT CHARSET=utf8mb4;
INSERT INTO `peoples` VALUES (‘1‘, ‘user51‘, ‘2020-01-01‘, ‘18932180745‘);
INSERT INTO `peoples` VALUES (‘2‘, ‘kevin‘, ‘2020-01-01‘, ‘18932180745‘);
至此,完成前后端分离的开发。
标签:border 变化 开发 nav name int vba lap 生日
原文地址:https://www.cnblogs.com/shengguo/p/13049427.html