标签:des style blog http io color ar java sp
编写chrome插件之前,需要熟悉一下相应的chrome插件开发环境。从编写hello world开始,参考阅读官方的教程,是一个不错的选择。这里主要是基于chrome的官方教程,稍稍做了一些修改和扩充,总结成了如下的几个部分。
在chrome中编写插件和写网页应用基本一致,采用的是javascript+css+html的方式。所以对于用过chrome浏览器审阅过一些网页的源码,写过网页或者脚本的人而言,编写chrome的插件感觉到还是比较熟悉的。
比较常见的插件形式是:
1.browser action:即在浏览器的右上角有一个新增的显示插件图标的按钮,用户点击该按钮即可以触发插件的应用逻辑;
2.backgroud javascript:这种情况下插件没有对应的图标和按钮,在chrome启动时,插件运行在自己的单独的背景线程中。与用户的交互方式通常是在某些相关网页加载完之后,通过javascript对该网页进行修改,将插件逻辑嵌入到页面html代码中。
3.page action:这种插件形式在需要时在浏览器地址栏中弹出一个图标。
更多:见Developer‘s Guide - Google Chrome
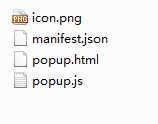
先来看看hello world插件的文件清单,如下图所示。其中icon.png用于图标的显示,manifest.json是chrome 插件的基本配置文件,popup.html用于下拉菜单的构建,popup.js是和popup.html对应的js文件。
{
"manifest_version":2,

"name":"one-click hello_world",
"description":"my first chrome extension-browser action",
"version":"1.0",
"permissions":[
    "https://*/*",
    "http://*/*"
    ],
"browser_action":{
    "default_icon":"icon.png",
    "default_popup":"popup.html"
    }
}
manifest.json是chrome插件的配置文件,其基本内容如上所示。"manifest_version"字段默认设置为2。permissions字段设置了插件的基本权限,即具有访问所有http链接的权限。browser_action字段中default_icon和default_popup分别和之前的icon.png,popup.html文件相对应。
<!doctype html>
<html>
  <head>
    <title>Hello World</title>
    <style>
      body {
        min-width: 100px;
        overflow-x: hidden;
      }

      img {
        margin: 5px;
        border: 2px solid black;
        vertical-align: middle;
        width: 75px;
        height: 75px;
      }
    </style>

    <!--
      - JavaScript and HTML must be in separate files: see our Content Security
      - Policy documentation[1] for details and explanation.
      -
      - [1]: http://developer.chrome.com/extensions/contentSecurityPolicy.html
     -->
  </head>
  <body>
  <p id="p1">Hello World-1</p>
  <p id="p2">Hello World-2</p>
  <script src="popup.js"></script>
  </body>
</html>
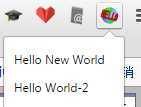
popup.html中有两个分别为p1和p2的标签,其中p1标签中原有的内容是Hello World-1,p2标签中原有的内容是Hello World-2。在popup.js中通过代码将标签1的内容修改为了Hello New World。
document.getElementById("p1").innerHTML="Hello New World"
2.5.1进入extension页面扩展程序
2.5.2勾选开发者模式

2.5.3将包含源码的目录直接拖入extension页面,完成安装。点击重新加载可以更新。

2.5.4运行,并看到了popup.html页面的正确显示且被popup.js所修改
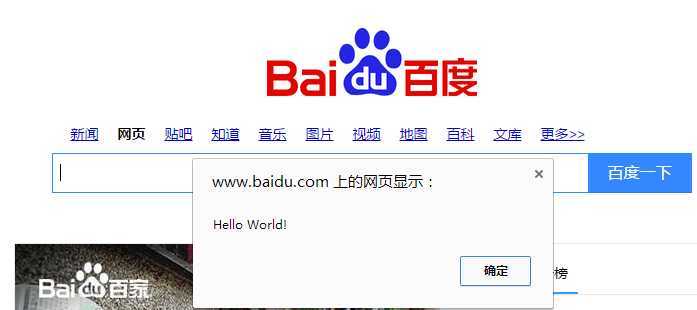
目标:打开http://www.baidu.com/时,弹出hello world的提示框

{
"manifest_version":2,

"name":"one-click hello_world",
"description":"my first chrome extension-background",
"version":"1.0",
"permissions":[
    "tabs",
    "https://*/*",
    "http://*/*"
    ],
"background": {
    "scripts": ["bg.js"],
    "persistent": false
  }
}
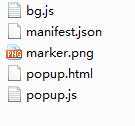
permission字段中,新增“tabs”属性,后面需要通过tab来获得当前页面的url。background字段中指明了需要在后台运行的bg.js
console.log("background")
chrome.tabs.onUpdated.addListener(function(tabId , info) {
    if (info.status == "complete") {
        chrome.tabs.query({‘active‘: true, ‘lastFocusedWindow‘: true}, function (tabs) {
            var url = tabs[0].url;
            console.log(url)
            if(url=="http://www.baidu.com/"){
                chrome.tabs.executeScript(null,{code:‘alert("Hello World!")‘});
            }
        });
    }
});
bg.js中注册了tabs的监听器,在当前页面加载完整之后检查当前页面链接是否是http://www.baidu.com/,并执行相应操作。
访问http://www.baidu.com,在地址栏的右侧出现page action的图标,点击弹出html页面
{
"manifest_version":2,

"name":"one-click hello_world",
"description":"my first chrome extension-background",
"version":"1.0",
"permissions":[
    "tabs",
    "http://*/*"
    ],
"background": {
    "scripts": ["bg.js"],
    "persistent": false
},
"page_action": {
    "default_name": "Hello world",
    "default_icon": "marker.png",
    "default_popup": "popup.html"
    }
}
新增了page_action字段,指定了page action的图标和下拉html。
console.log("background")
chrome.tabs.onUpdated.addListener(function(tabId , info) {
    if (info.status == "complete") {
        chrome.tabs.query({‘active‘: true, ‘lastFocusedWindow‘: true}, function (tabs) {
            var url = tabs[0].url;
            console.log(url)
            if(url=="http://www.baidu.com/"){
                chrome.pageAction.show(tabs[0].id)
            }
        });
    }
});
page action默认不做显示,当页面url=="http://www.baidu.com/",通过api chrome.pageAction.show显示page action
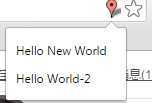
page action适用于插件仅针对少数页面的情况,browser action则主要适用于插件对大部分页面都有效的情况。就能够实现的功能而言是基本一致的。二者对比可以进一步参见[4]
[1]Getting Started: Building a Chrome Extension - Google Chrome
[2]How can I get the URL for a Google Chrome tab? - Stack Overflow
[4]chrome.pageAction - Google Chrome
[5]Sample Extensions - Google Chrome
标签:des style blog http io color ar java sp
原文地址:http://www.cnblogs.com/jiangz/p/4084894.html