标签:lang https port har set 显示 直接 lease pre
在Spring中实现Session共享比较简单,也就是Spring-Session组件的使用。
先添加依赖。
此处选用redis作为缓存库,所以redis相关的依赖,再加上session与redis集成依赖就可以了。其他的缓存产品也大同小异。
<dependency>
    <groupId>org.springframework.session</groupId>
    <artifactId>spring-session-data-redis</artifactId>
</dependency>

<dependency>
    <groupId>org.springframework.boot</groupId>
    <artifactId>spring-boot-starter-data-redis</artifactId>
</dependency>
其次再配置下redis连接。如下例:
 @Configuration
@EnableRedisHttpSession
public class SessionConfig {
    @Bean
    public LettuceConnectionFactory connectionFactory() {
        RedisStandaloneConfiguration configuration = new RedisStandaloneConfiguration();
        // 使用redis的3号库
        // 默认库写了太多其他的东西
        // 此处redis的配置与配置文件中redis的属性是独立的
        configuration.setDatabase(3);
        return new LettuceConnectionFactory(configuration);
    }
}
配置就写这么多,下面写个页面测试下。
测试方法很简单:
    @GetMapping("")
    public ModelAndView hello(ModelAndView mv, HttpSession session) {
        session.setAttribute("aaa", LocalDateTime.now());
        Object shared = session.getAttribute("shared");
        if (shared == null) {
            String value = "I am shared from " + port;
            shared = value;
            session.setAttribute("shared", value);
        }
        Object aaa = session.getAttribute("aaa");
        mv.addObject("time", aaa);
        mv.addObject("shared", shared);
        mv.setViewName("hello");
        return mv;
    }
我们放入两个变量到session里,一个是当前时间,另一个带有第一次访问的端口号。如果session共享成功,那么再次以不同端口号启动当前项目将看到第一次的启动的端口号。如下图:
表明的确实现了session共享。
另外,session共享是在同一个浏览器实现的。两个浏览器是不行的。
应该不会我是最后一个知道IDEA可以启动多个项目的吧,不会吧,不会吧。
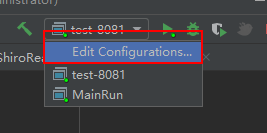
先打开配置项

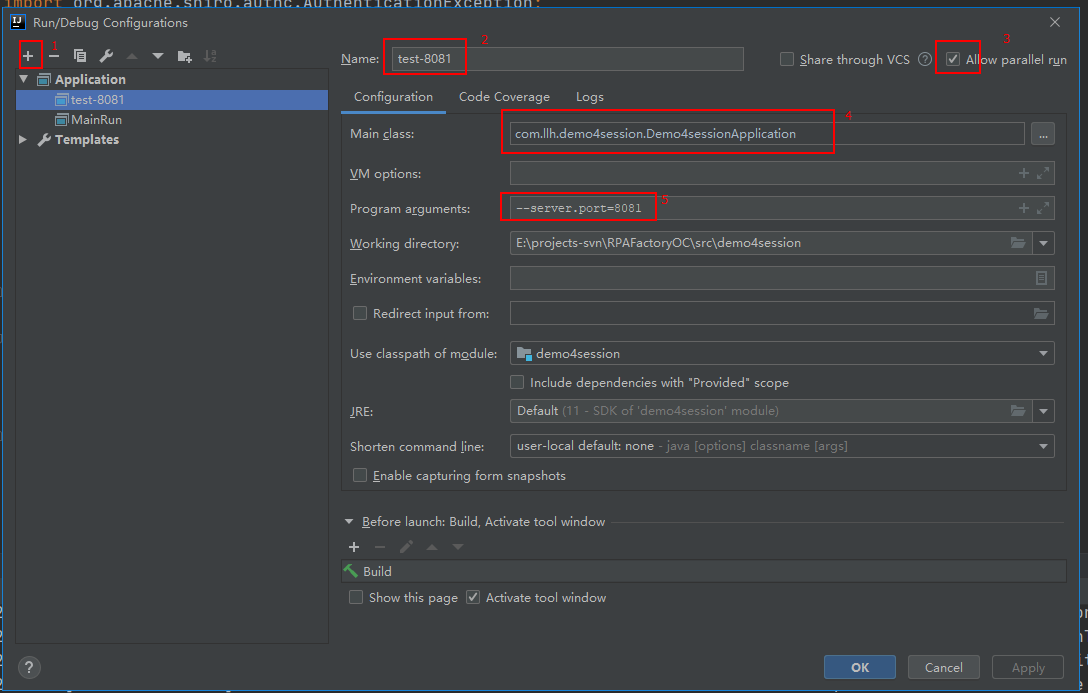
编辑配置项

配置完成就可以很方便地运行同一项目两次了。
上面搞定了简单的session,加一点点难度,整下shiro的session共享。
添加依赖:
<dependency>
    <groupId>org.apache.shiro</groupId>
    <artifactId>shiro-spring</artifactId>
    <version>1.5.2</version>
</dependency>
<!-- shiro+redis缓存插件 -->
<dependency>
    <groupId>org.crazycake</groupId>
    <artifactId>shiro-redis</artifactId>
    <version>2.4.2.1-RELEASE</version>
    <scope>compile</scope>
</dependency>
<dependency>
    <groupId>com.github.theborakompanioni</groupId>
    <artifactId>thymeleaf-extras-shiro</artifactId>
    <version>2.0.0</version>
</dependency>
写点配置:
    @Bean
    public DefaultWebSessionManager sessionManager() {
        DefaultWebSessionManager sessionManager = new DefaultWebSessionManager();
        sessionManager.setSessionDAO(redisSessionDAO());
        return sessionManager;
    }

    @Bean
    public RedisSessionDAO redisSessionDAO() {
        RedisSessionDAO redisSessionDAO = new RedisSessionDAO();
        redisSessionDAO.setRedisManager(redisManager());
        return redisSessionDAO;
    }

    @Bean
    public RedisManager redisManager() {
        //        RedisManager redisManager = new RedisManager();
//        redisManager.setHost(host);
//        redisManager.setPort(port);
//        // 配置缓存过期时间
//        redisManager.setExpire(expireTime);
//        redisManager.setTimeout(timeOut);
        // redisManager.setPassword(password);
        return new RedisManager();
    }
这里主是把shiro的session操作替换为redis。其他配置就随便配配。
另外,为了测试方便,登录时直接通过,不会作验证的。
@Override
protected AuthenticationInfo doGetAuthenticationInfo(AuthenticationToken token)
    throws AuthenticationException {
    Object principal = token.getPrincipal();
    return new SimpleAuthenticationInfo(principal, "123", "MyShiroRealm");
}
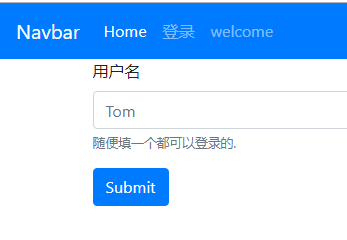
建立一个登录画面,登录成功后会重定向welcome画面,会显示登录名。

下面我们使用Jerry来登录
标签:lang https port har set 显示 直接 lease pre
原文地址:https://www.cnblogs.com/llh4cnblogs/p/13616820.html