标签:服务 ast ext like log config ase cts tar
Elasticsearch官网: https://www.elastic.co/products/elasticsearch
https://www.elastic.co/cn/downloads/past-releases/elasticsearch-6-6-0
本课程选择的版本是elasticsearch-6.6.0
下载好后放到/opt/module/目录下
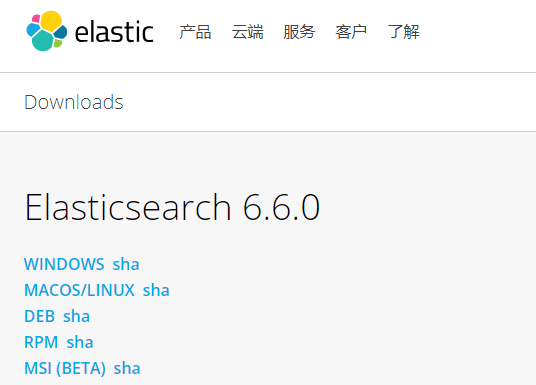
拷贝 elasticsearch-6.6.0.tar.gz 到 /opt/module 目录下
2.1 修改配置文件
/bigdata/elasticsearch-6.6.0/config/elasticsearch.yml
修改yml配置的注意事项:
每行必须顶格,不能有空格
“:”后面必须有一个空格
集群名称,同一集群名称必须相同

单个节点名称

网络部分 改为当前的ip地址 ,端口号保持默认9200就行

把bootstrap自检程序关掉

自发现配置:新节点向集群报到的主机名

2.2 修改linux配置
为什么要修改linux配置?
默认elasticsearch是单机访问模式,就是只能自己访问自己。
但是我们之后一定会设置成允许应用服务器通过网络方式访问。这时,elasticsearch就会因为嫌弃单机版的低端默认配置而报错,甚至无法启动。
所以我们在这里就要把服务器的一些限制打开,能支持更多并发。
问题1:max file descriptors [4096] for elasticsearch process likely too low, increase to at least [65536] elasticsearch
原因:系统允许 Elasticsearch 打开的最大文件数需要修改成65536
解决:vi /etc/security/limits.conf
添加内容:
* soft nofile 65536
* hard nofile 131072
* soft nproc 2048
* hard nproc 65536
注意:“*” 不要省略掉
问题2:max number of threads [1024] for user [judy2] likely too low, increase to at least [4096] (CentOS7.x 不用改)
原因:允许最大进程数修该成4096
解决:vi /etc/security/limits.d/90-nproc.conf
修改如下内容:
* soft nproc 1024
#修改为
* soft nproc 4096
问题3:max virtual memory areas vm.max_map_count [65530] likely too low, increase to at least [262144] (CentOS7.x 不用改)
原因:一个进程可以拥有的虚拟内存区域的数量。
解决:
在 /etc/sysctl.conf 文件最后添加一行
vm.max_map_count=262144
即可永久修改
重启linux
2.3 教学环境启动优化
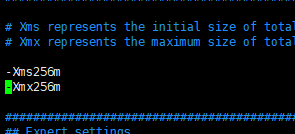
ES是用在Java虚拟机中运行的,虚拟机默认启动占用2G内存。但是如果是装在PC机学习用,实际用不了2个G。所以可以改小一点内存。
vim /opt/module/elasticsearch-6.6.0/config/jvm.options
2g修改为256m
2.4 重启linux
2.5 集群模式
es天然就是集群状态。
1、 把ES的安装包分发给其他两台机器
2、 根据第一台机器的linux系统配置,修改其他两台机子
3、 在三台机器能够独立启动的情况下,修改/etc/elasticsearch/elasticsearch.yml
设置新主机的“报道中心” 就行了
1 node-xx
2 network-host hadoop1

还要记得把 三台主机的node.name改成各自的
2.5 集群启动脚本
#!/bin/bash
es_home=/bigdata/elasticsearch-6.6.0
kibana_home=/bigdata/kibana-6.6.0-linux-x86_64
case $1  in
 "start") {
  for i in hadoop1 hadoop2 hadoop3
  do
    ssh $i  "source /etc/profile;${es_home}/bin/elasticsearch >/dev/null 2>&1 &"

   done

};;
"stop") {
  for i in hadoop1 hadoop2 hadoop3
  do
      ssh $i "ps -ef|grep $es_home |grep -v grep|awk ‘{print \$2}‘|xargs kill" >/dev/null 2>&1
  done

};;
esac
2.7 测试
curl http://hadoop1:9200/_cat/nodes?v

2.8 如果启动未成功
如果启动未成功,请去查看相关日志
vim /opt/module/elasticsearch6.6.0/logs/my-es.log
3.1 解压缩
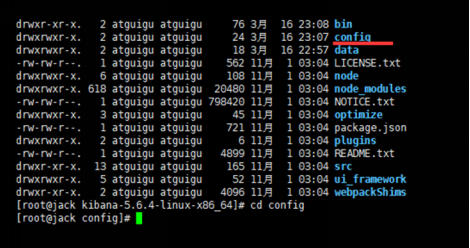
进入kibana主目录的config目录下
3.2 配置
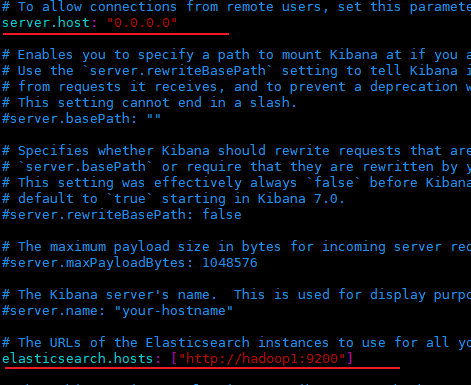
vim kibana.yml
启动
测试
访问http://hadoop1:5601/

最终集
#!/bin/bash
es_home=/bigdata/elasticsearch-6.6.0
kibana_home=/bigdata/kibana-6.6.0-linux-x86_64
case $1  in
 "start") {
  for i in hadoop1 hadoop2 hadoop3
  do
    ssh $i  "source /etc/profile;${es_home}/bin/elasticsearch >/dev/null 2>&1 &"

   done
   nohup ${kibana_home}/bin/kibana >/home/atguigu/kibana.log 2>&1 &
};;
"stop") {
  ps -ef|grep ${kibana_home} |grep -v grep|awk ‘{print $2}‘|xargs kill
  for i in hadoop1 hadoop2 hadoop3
  do
      ssh $i "ps -ef|grep $es_home |grep -v grep|awk ‘{print \$2}‘|xargs kill" >/dev/null 2>&1
  done

};;
esac
实时电商数仓(十二)之实时数据存储与查询(二)ElasticSearch(二)安装(centos)
标签:服务 ast ext like log config ase cts tar
原文地址:https://www.cnblogs.com/qiu-hua/p/13660999.html