标签:本地 存储 例子 请求 com 集中 syn 临时 记录
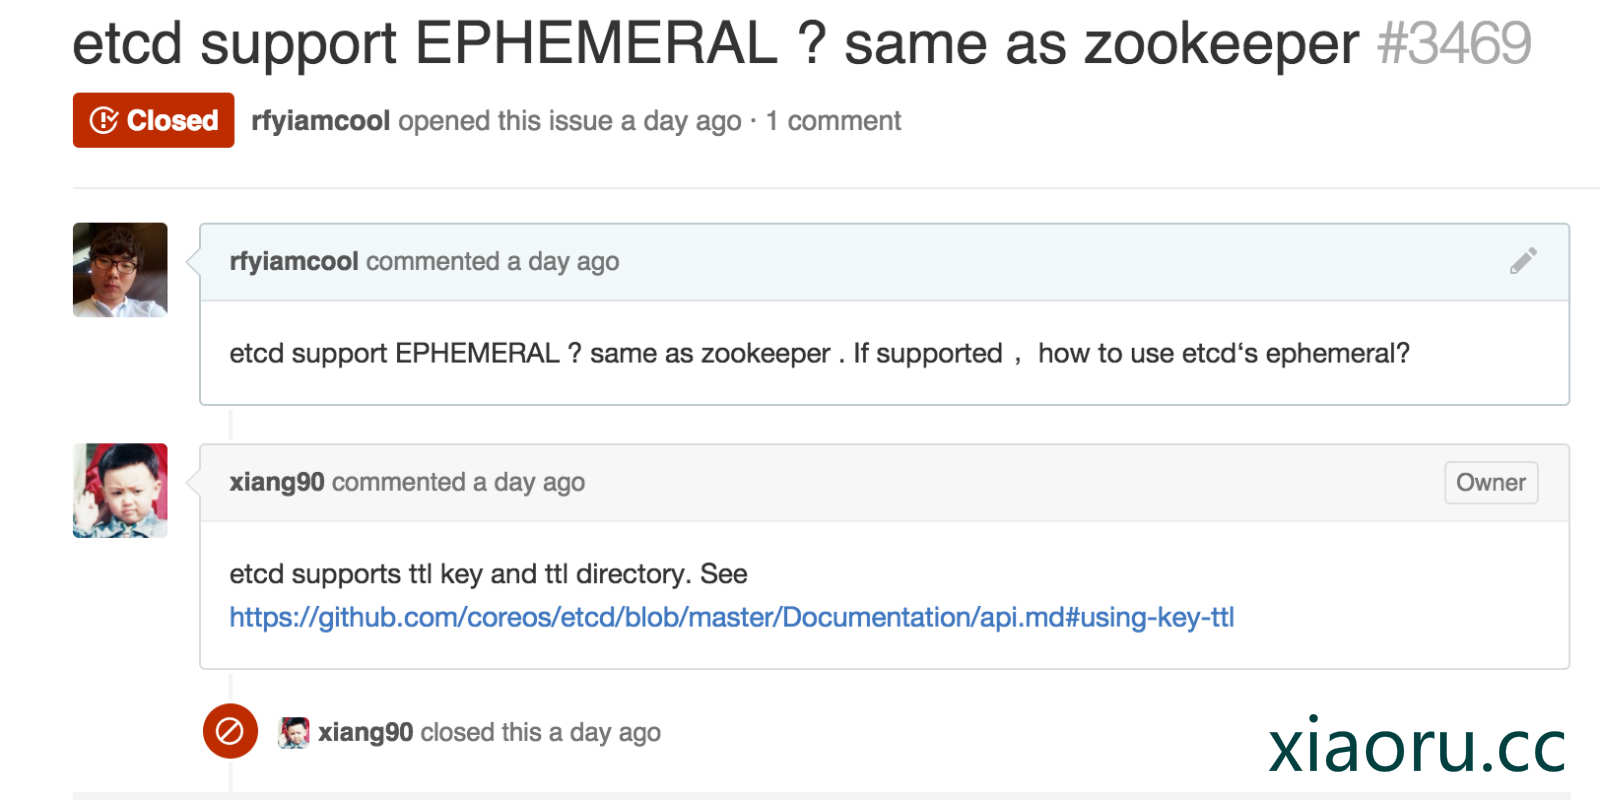
开发的进度已经到了服务发现了,在选择zookeeper和etcd的时候,我还真犹豫了,虽然两个都曾用过,但是长久不用就都忘了,又查了下两者的对比资料,发现在服务发现方面,两者都差不多的。只是zookeeper有Ephemeral的概念,Ephemeral结点在Zookeeper中是一个临时结点,这些结点只要创建它的结点session不挂,它就一直存在,当session中止了,比如客户端进程挂掉了,那么在zookeeper的结点也就被删除了。 etcd不支持ZooKeeper的ephemeral临时节点的概念,要监控服务的状态似乎比较麻烦。 哥还在github etcd issue里,问了那个xiang90 (中国人)….

好了,不能只看别人zookeeper vs etcd的评价,人云亦云不是我的风格,昨天花了点时间把监控的服务发现功能在zookeeper和etcd都测试了下,结果他们都适合服务注册发现…. 虽然zookeeper公司有专门的集群,但是真是不想接入他们…. 怎么简单怎么来,那就用etcd吧,etcd的设计理念跟运维都是比较简单的。
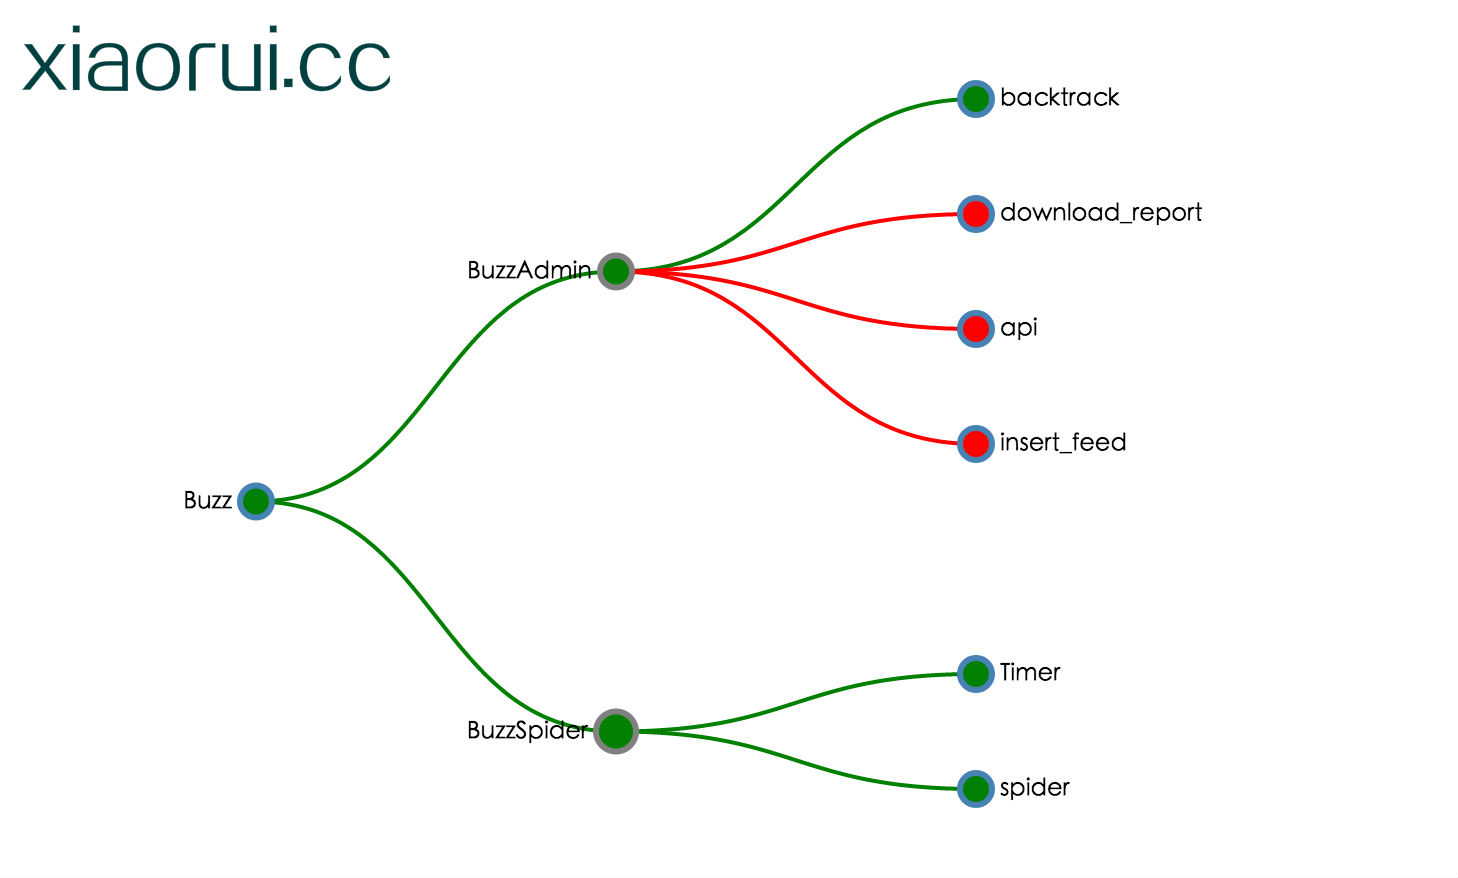
下面是我以前做测试的效果图,为了避嫌,我把图表的数据都裁剪了下,反正看明白他的意思就行了,绿色代码OK,红色代表问题。

关于模块的服务注册我是这么设计的 ~
/buzz/buzzadmin/download
/buzz/buzzadmin/api
buzz是大项目,buzzadmin是子项目,api 跟 download都是子项目中的两个模块。 这样就有了层级的关系。 /A/B/C ,B死了,C也就无意义了。 A死了,B也就完了,下层受限于上层。
etcd和zookeeper kv的存储本来就是这种树形目录,很适合我上面的监控需求设计。
我这里放两个python操作etcd服务的小例子。
set client: (这个写入的客户端)
import etcd
client = etcd.Client()
c = 0
for i in range(100):
   client.write(‘/nodes/n%s‘%i, 1,ttl=10)
   c += 1
   print i
watch client: (这个是监控端)
import etcd
client = etcd.Client()

c = 0
while 1:
    print client.watch(‘/nodes/‘,recursive=True)
    c += 1
    print c
这样会造成什么问题? 我想大家在看我watch client代码的时候,估计发现了问题所在。
写入端比如进行了100个set操作,以为他有ttl的配置,所以当他expire过期的时候,我的watch也是会收到请求的。 我一开始没有找到etcd watch有那样驻守监控的函数,所以就用以前监控socket recv那样,使用while循环地调用clent.watch() 。 这样造成的问题是,我这边收到节点反馈后,再去注册监听,这时候会丢失很多etcd反馈的信息的。 再来看看他丢失了多少,写入段100个set,还有100个expire的action。watch理应说到200个操作,结果只有150个,也就是丢失了50个。
找了下资料,看到一老外在stackoverflow.com 上说,他也是用while,一刹那间,眼前漂出一行字,caonima…..
最后直接看python-etcd的代码,原以为他会写的复杂,结果这代码只是http api的封装罢了。 下面代码是python-etcd里面关于watch监控的描述。注意有个eternal_watch,只是看字面的一面就知道他是我们要找寻找的,他构造了Generator生成器,然后用yield关键字返回。
另外watch函数其实就是self.read(self,wait=True)
def eternal_watch(self, key, index=None, recursive=None):
    """
    Generator that will yield changes from a key.
    Note that this method will block forever until an event is generated.
    Args:
        key (str):  Key to subcribe to.
        index (int):  Index from where the changes will be received.
    Yields:
        client.EtcdResult
    """
    local_index = index
    while True:
        response = self.watch(key, index=local_index, timeout=0, recursive=recursive)
        local_index = response.modifiedIndex + 1
        yield response


def watch(self, key, index=None, timeout=None, recursive=None):

    _log.debug("About to wait on key %s, index %s", key, index)
    if index:
        return self.read(key, wait=True, waitIndex=index, timeout=timeout,
                         recursive=recursive)
    else:
        return self.read(key, wait=True, timeout=timeout,
                         recursive=recursive)


def read(self, key, **kwdargs):

    _log.debug("Issuing read for key %s with args %s", key, kwdargs)
    key = self._sanitize_key(key)

    params = {}
    for (k, v) in kwdargs.items():
        if k in self._read_options:
            if type(v) == bool:
                params[k] = v and "true" or "false"
            elif v is not None:
                params[k] = v

    timeout = kwdargs.get(‘timeout‘, None)

    response = self.api_execute(
        self.key_endpoint + key, self._MGET, params=params,
        timeout=timeout)
    return self._result_from_response(response)
另外说下通过第一层key,取出所有下层key的方法…
directory = client.get("/nodes")

#可以取出所有
for result in directory.children:
  print(result.key + ": " + result.value)

#只能取出第一个
print(directory.children.next().value)
到此,我要讲述的坑就扯完成了…. etcd是个好东西,够简单,以前做配置集中管理的时候有用过etcd,虽然后期替换成zookeeper了。另外我没在线上用过etcd集群,但在社区中看到不少人在用,反馈也不错。 总之,etcd值得一用…..
另外这里记录etcd的安装方法,环境是linux,以前记录的文档没了,就贴在这里吧。
curl -L  https://github.com/coreos/etcd/releases/download/v2.1.3/etcd-v2.1.3-linux-amd64.tar.gz -o etcd-v2.1.3-linux-amd64.tar.gz
tar xzvf etcd-v2.1.3-linux-amd64.tar.gz
cd etcd-v2.1.3-linux-amd64
./etcd
或者是直接用docker启动
docker run -p 2379:2379 -v /usr/share/ca-certificates/:/etc/ssl/certs quay.io/coreos/etcd:v2.1.3
另外需要注意的是,docker默认启动是绑定在本地的4001端口,如果想绑定所有的网卡上,也就是0.0.0.0 ,可以./etcd -addr 0.0.0.0:4001
etcd解压的时候,貌似没有默认的配置文件,有兴趣的朋友可以用我的etcd 配置文件。
addr = "127.0.0.1:4001"
bind_addr = "127.0.0.1:4001"
ca_file = ""
cert_file = ""
cors = []
cpu_profile_file = ""
data_dir = "/var/xiaorui.cc/data/"
discovery = "http://etcd.local:4001/v2/keys/_etcd/registry/examplecluster"
http_read_timeout = 10.0
http_write_timeout = 10.0
key_file = ""
peers = []
peers_file = ""
max_result_buffer = 1024
max_retry_attempts = 3
name = "default-name"
snapshot = true
verbose = false
very_verbose = false

[peer]
addr = "127.0.0.1:7001"
bind_addr = "127.0.0.1:7001"
ca_file = ""
cert_file = ""
key_file = ""

[cluster]
active_size = 9
remove_delay = 1800.0
sync_interval = 5.0
标签:本地 存储 例子 请求 com 集中 syn 临时 记录
原文地址:https://www.cnblogs.com/lovezbs/p/14244053.html