标签:创建 engine 虚机 img 安装 and docker 并且 server
基于上一篇部署完成了企业级仓库harbor的部署,今天我们来聊聊什么是harbor的高可用
Harbor 支持基于策略的 Docker 镜像复制功能,这类似于 MySQL 的主从同步,
其可以实现不同的数据中心、不同的运行环境之间同步镜像,并提供友好的管理
界面,大大简化了实际运维中的镜像管理工作,已经有用很多互联网公司使用
harbor 搭建内网 docker 仓库的案例,并且还有实现了双向复制的案列,本文将
实现单向复制的部署:
 1 1.准备机器
 2 #我这边直接复用上一篇的10.0.0.110,再开一个虚机为10.0.0.111
 3 10.0.0.110  harbor1
 4 10.0.0.111  harbor2
 5 2.更改主机名
 6 #为了清晰看见,我这里做了主机名修改
 7 root@ubuntu1804:~# hostnamectl set-hostname harbor1
 8 root@ubuntu1804:~# hostnamectl set-hostname harbor2
 9 root@harbor2:~# apt install lrzsz
10 3.安装docker
11 root@harbor2:~# bash docker-install.sh
12 4.解压缩和安装插件
13 root@harbor2:/usr/local/src# tar -xvf harbor-offline-installer-v1.7.6.tgz
14 #安装插件我这里就不多说了,在我的harbor安装有详细步骤说明
15 5.安装成功
16 [Step 4]: starting Harbor ...
17 Creating network "harbor_harbor" with the default driver
18 Creating harbor-log ... done
19 Creating harbor-adminserver ... done
20 Creating registryctl        ... done
21 Creating harbor-db          ... done
22 Creating registry           ... done
23 Creating redis              ... done
24 Creating harbor-core        ... done
25 Creating harbor-portal      ... done
26 Creating harbor-jobservice  ... done
27 Creating nginx              ... done
28
29 ? ----Harbor has been installed and started successfully.----
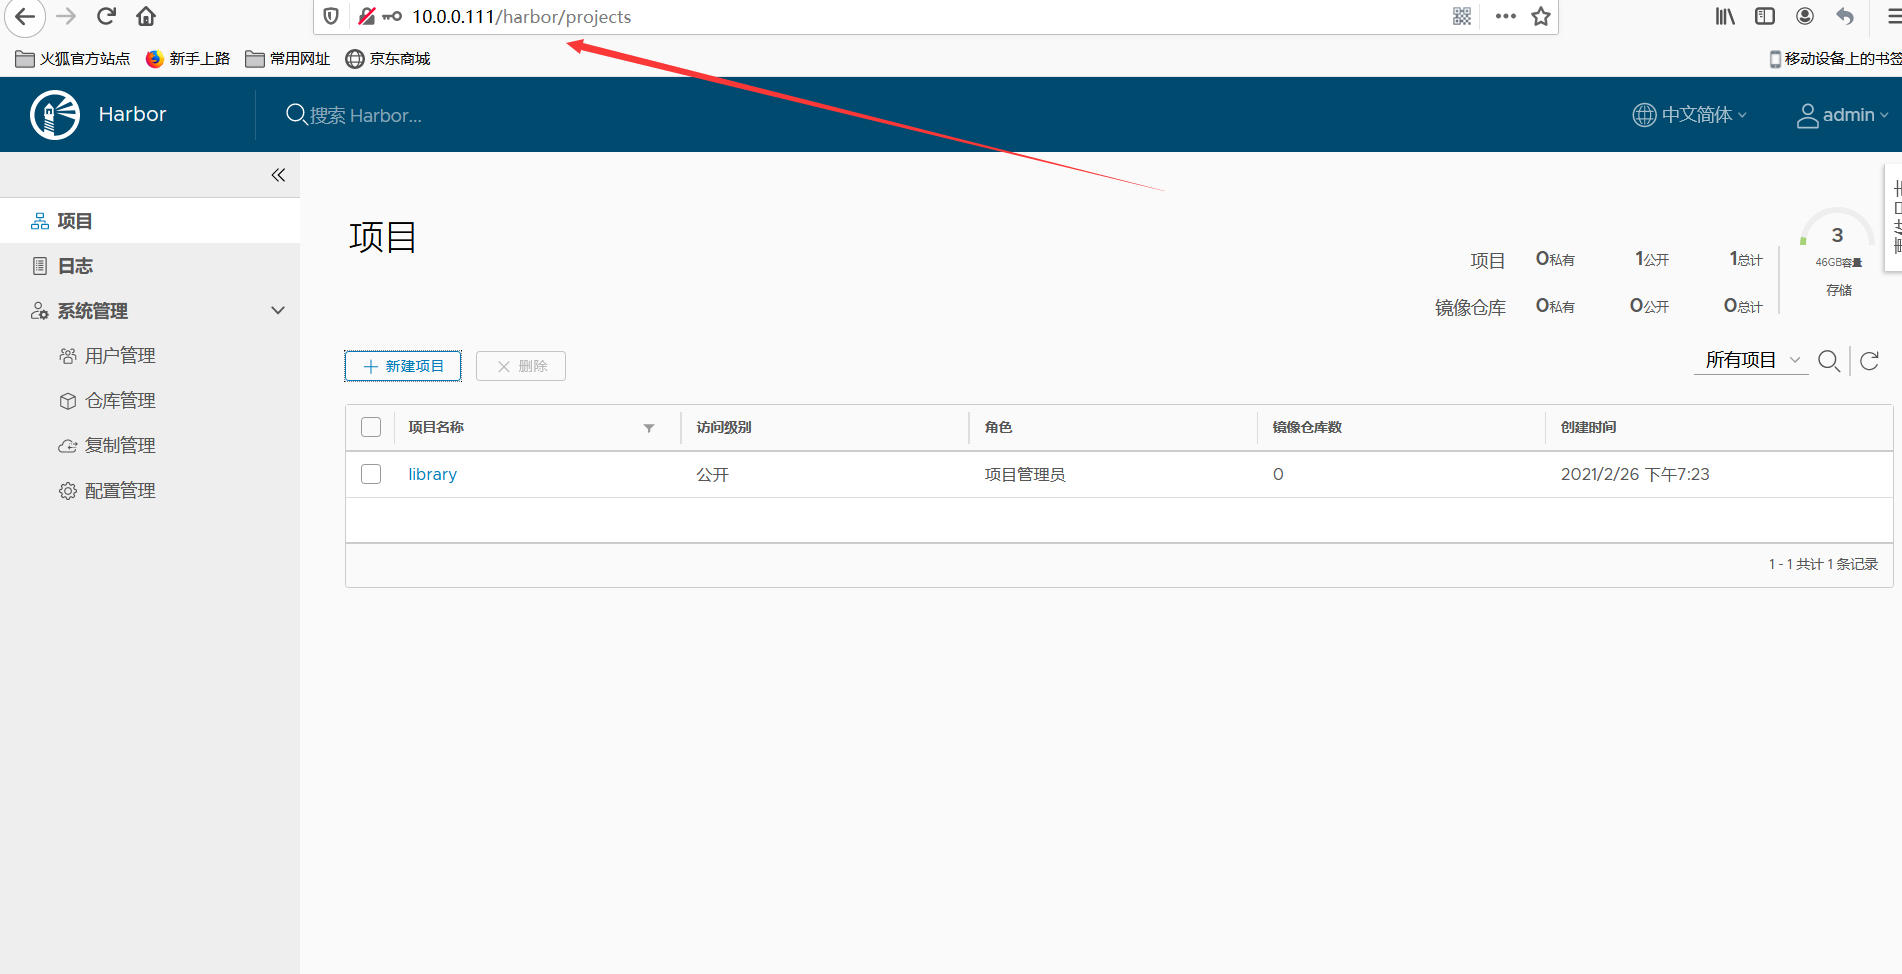
6.验证从harbor登录
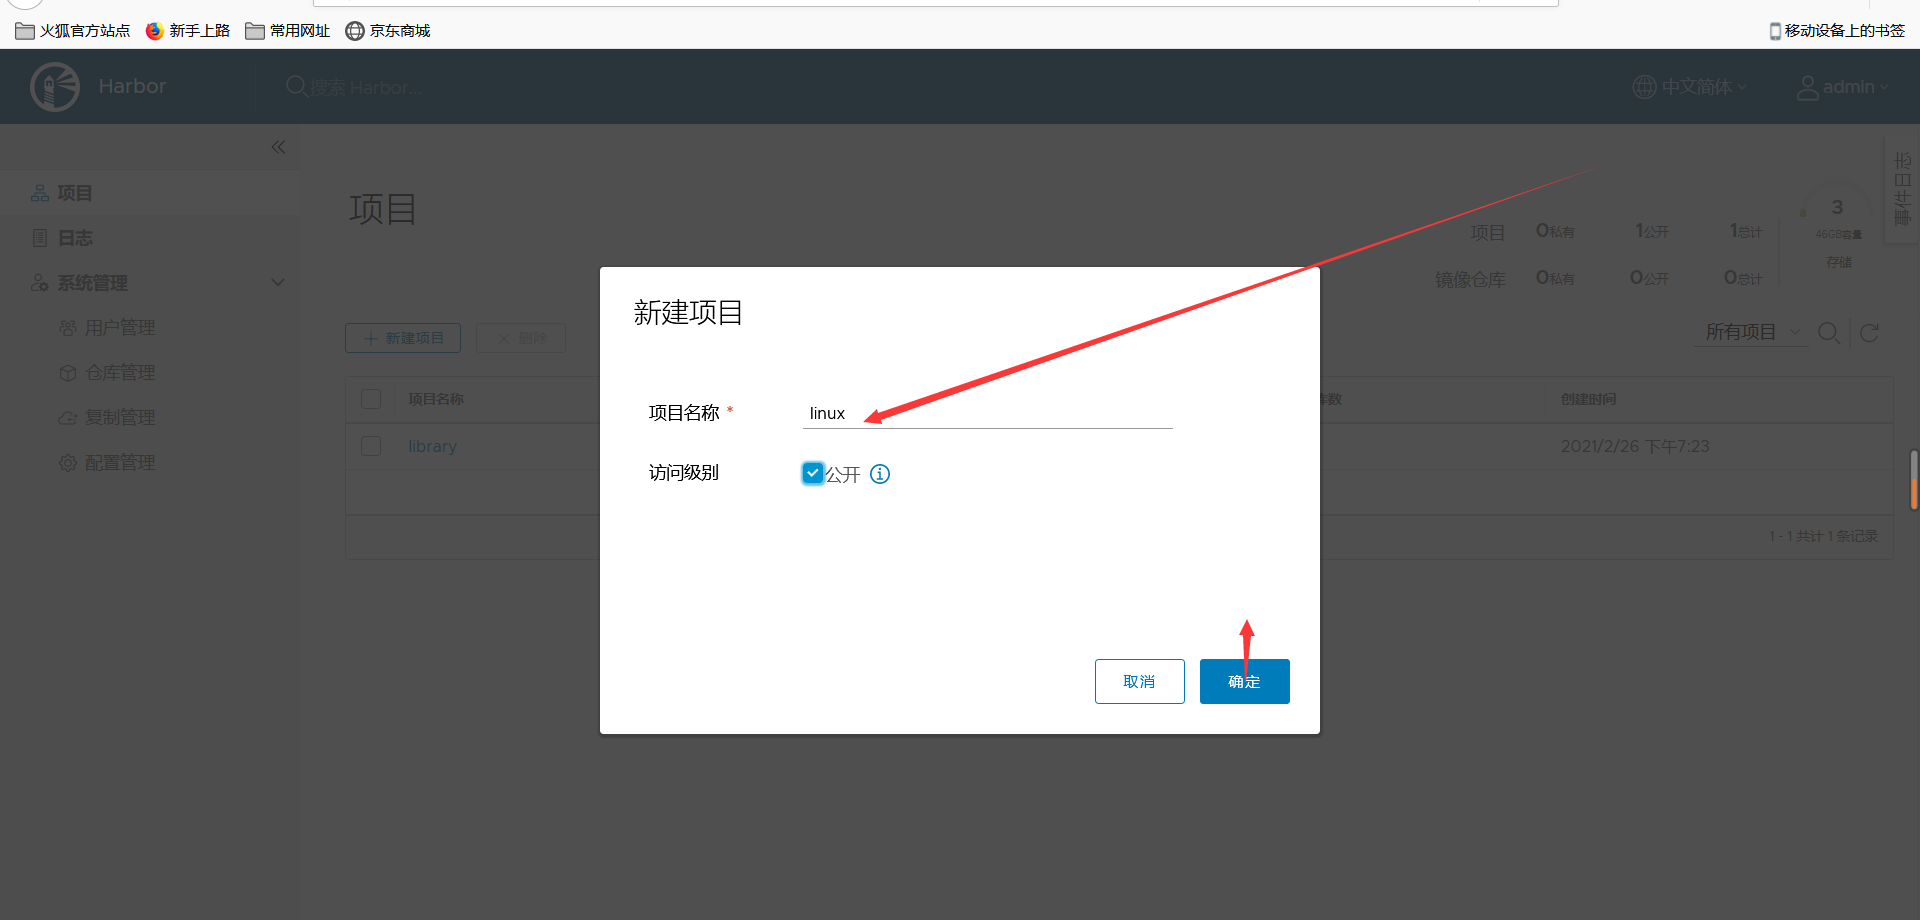
7.创建一个linux项目
#和主harbor的项目名称保持一致
8.测试登录harbor2
root@harbor2:/usr/local/src/harbor# docker login 10.0.0.111
Username: admin
Password:
WARNING! Your password will be stored unencrypted in /root/.docker/config.json.
Configure a credential helper to remove this warning. See
https://docs.docker.com/engine/reference/commandline/login/#credentials-store

Login Succeeded
root@harbor2:/usr/local/src/harbor# docker login 10.0.0.110
Username: admin
Password:
WARNING! Your password will be stored unencrypted in /root/.docker/config.json.
Configure a credential helper to remove this warning. See
https://docs.docker.com/engine/reference/commandline/login/#credentials-store

Login Succeeded
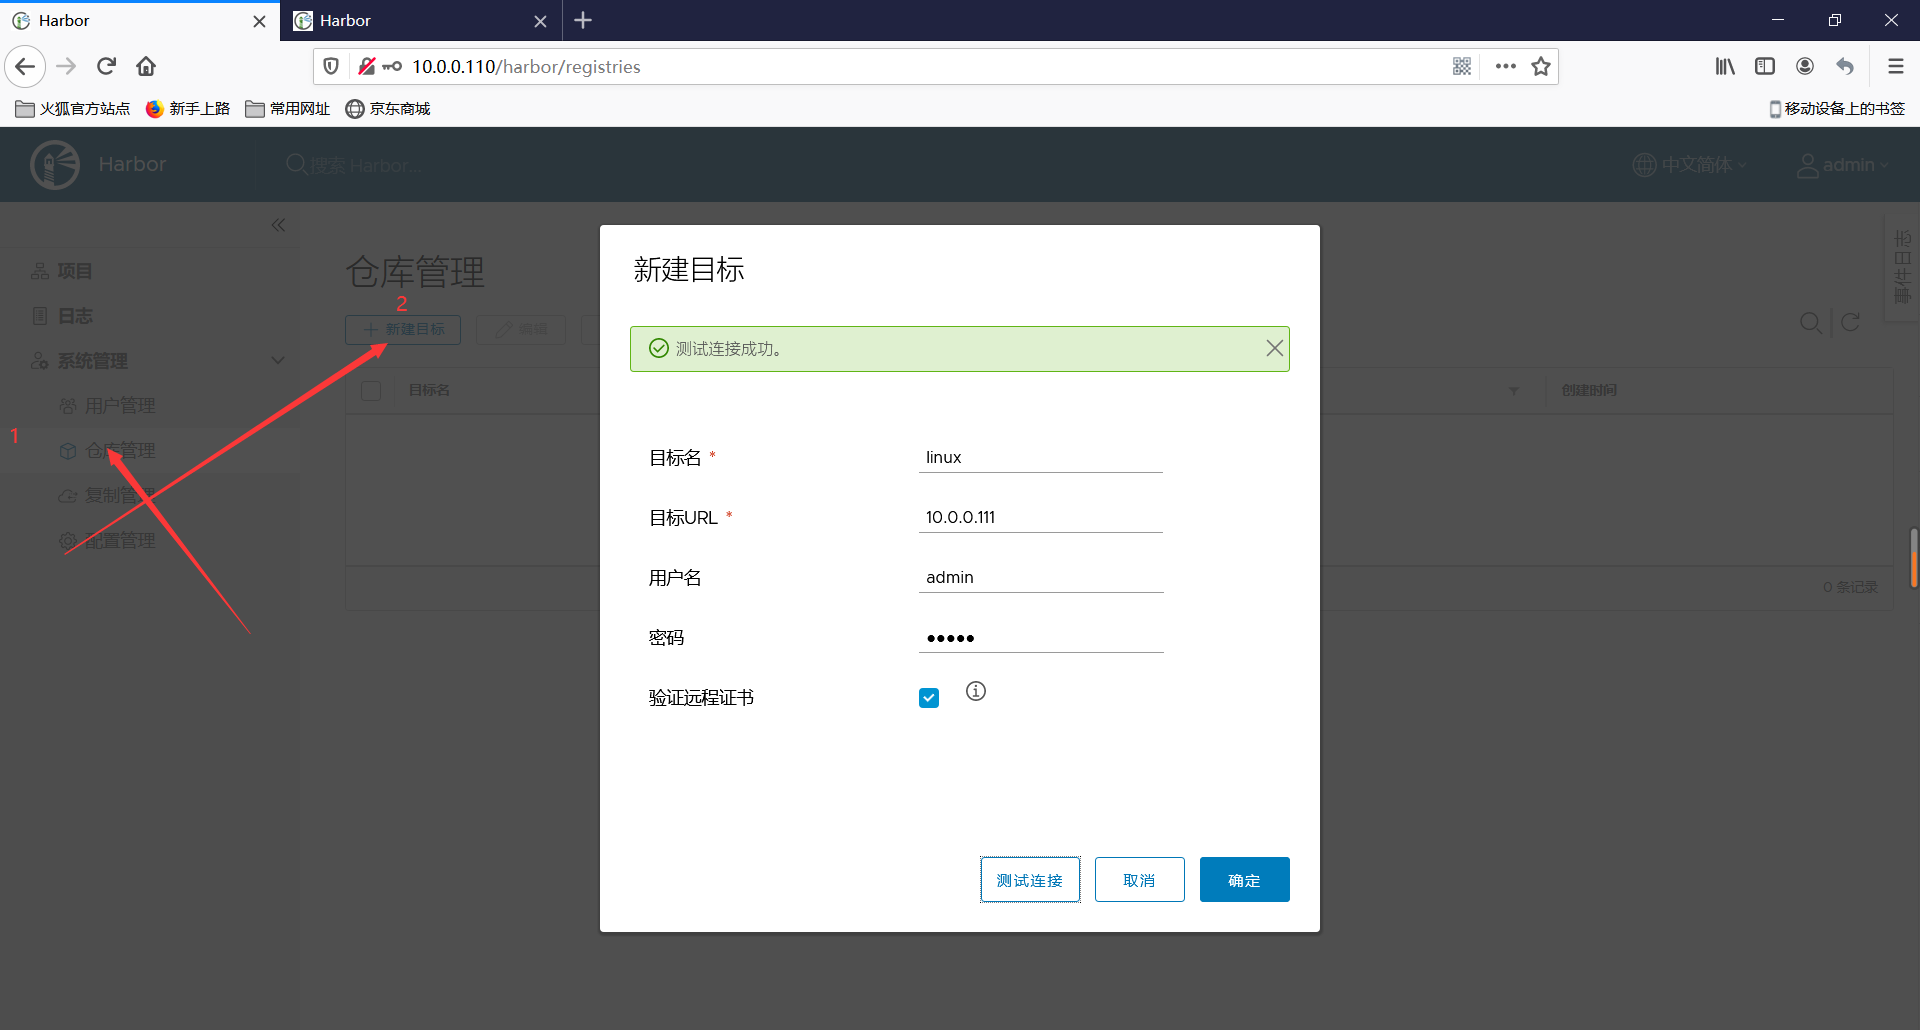
9.点击复制管理,设置harbor的主同步策略, 主harbor和从harbor设置双向同步规则!!!
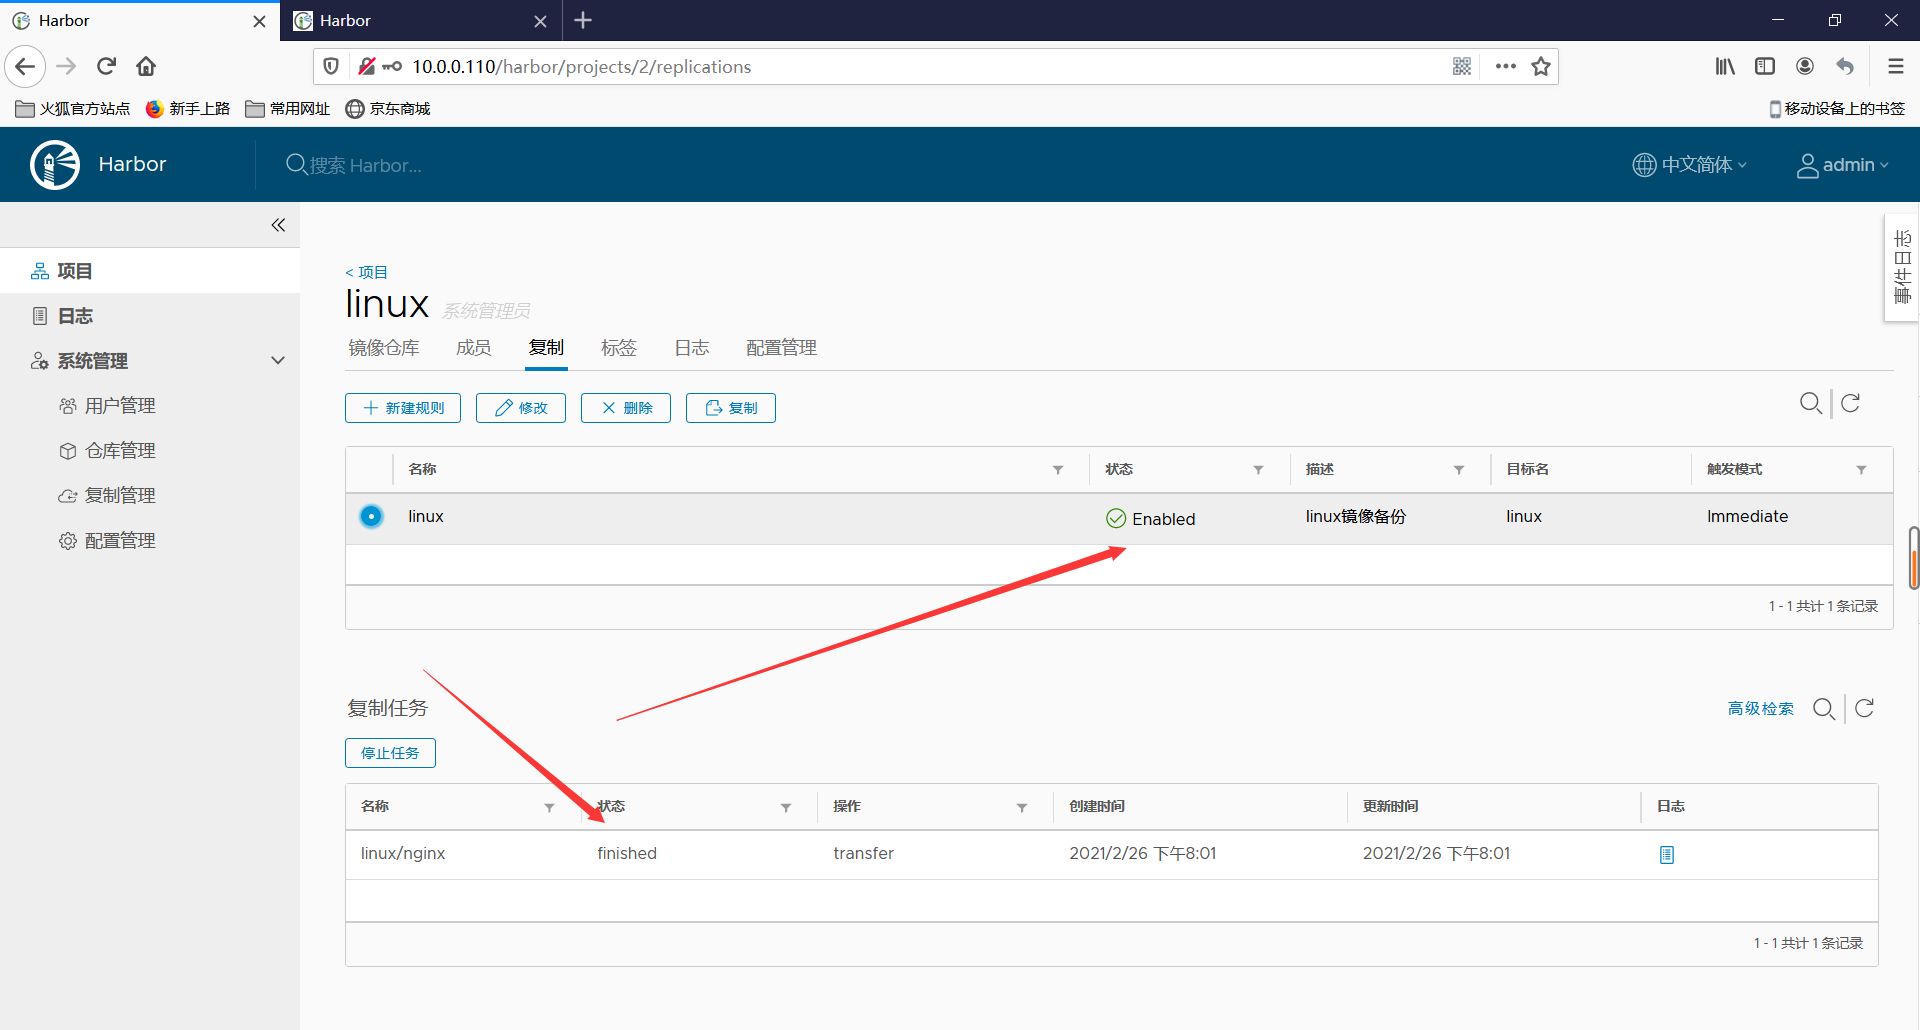
10.主harbor查看镜像同步状态
11.查看镜像是否以及被同步
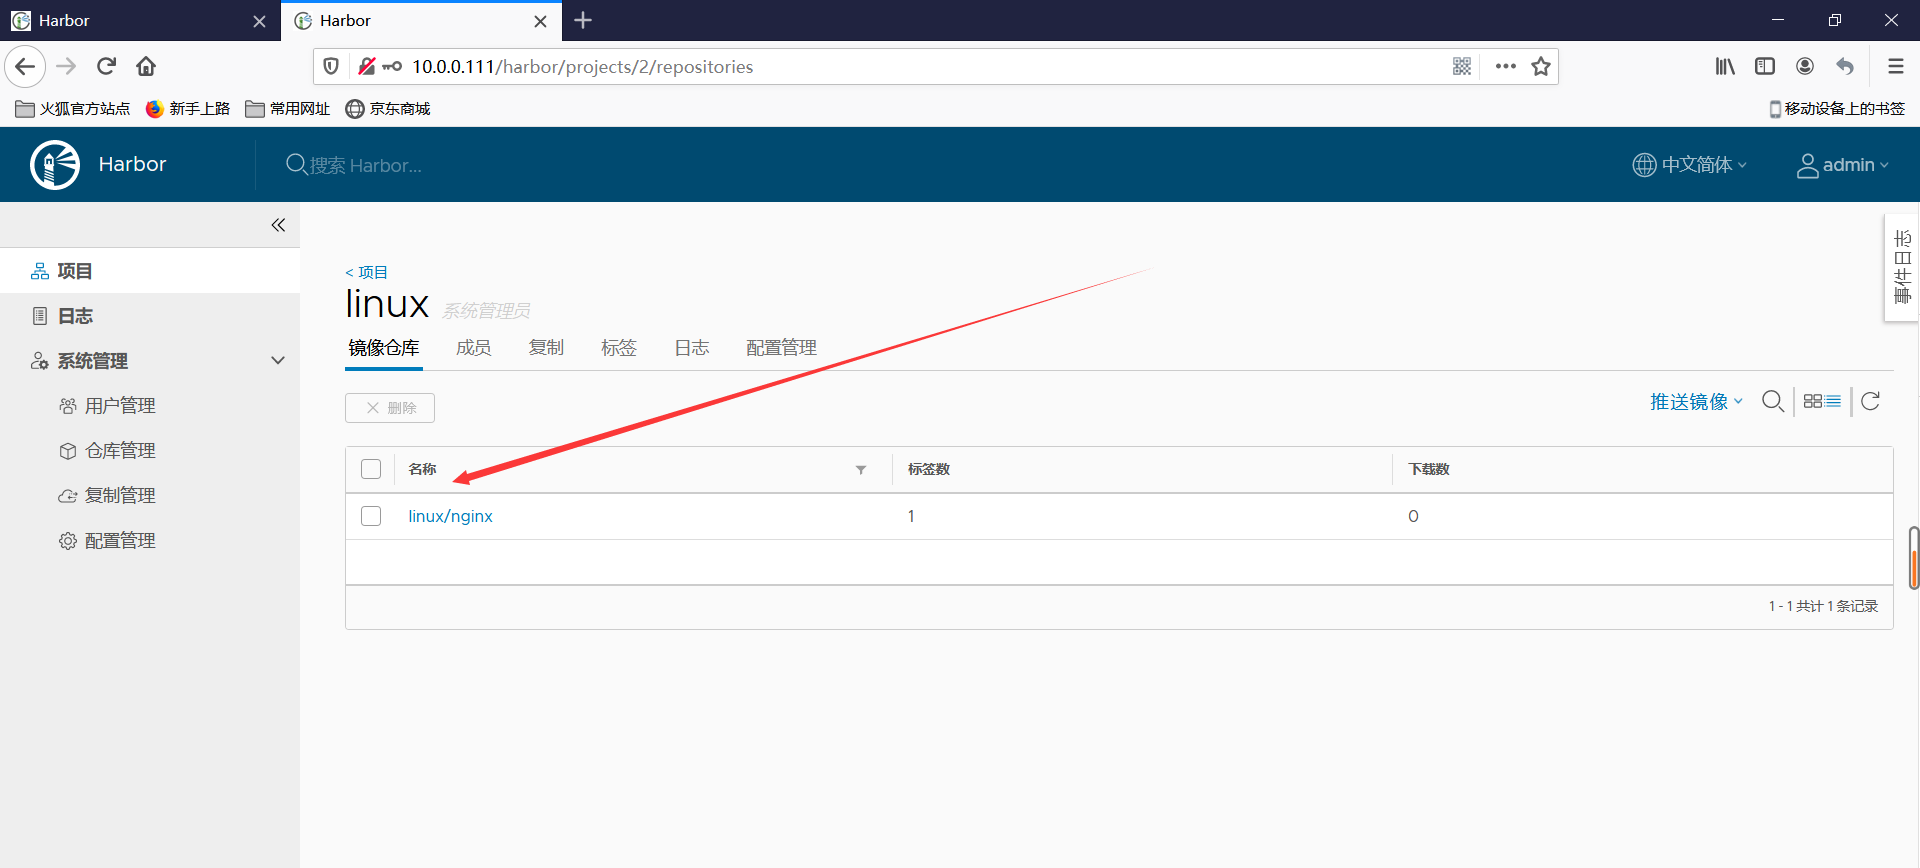
12.测试可以上传和下载
#本次测试我重新开了一台机器

root@ubuntu1804:~# docker pull 10.0.0.110/linux/nginx:latest
latest: Pulling from linux/nginx
45b42c59be33: Pull complete
8acc495f1d91: Pull complete
ec3bd7de90d7: Pull complete
19e2441aeeab: Pull complete
f5a38c5f8d4e: Pull complete
83500d851118: Pull complete
Digest: sha256:b08ecc9f7997452ef24358f3e43b9c66888fadb31f3e5de22fec922975caa75a
Status: Downloaded newer image for 10.0.0.110/linux/nginx:latest
10.0.0.110/linux/nginx:latest
13.现在我在客户机上传一个镜像上传到我的10.0.0.110的harbor上,查看是否会被备份在10.0.0.111的机器

root@ubuntu1804:~# docker tag mysql:latest 10.0.0.110/linux/mysql:latest
root@ubuntu1804:~# docker push 10.0.0.110/linux/mysql:latest
The push refers to repository [10.0.0.110/linux/mysql]
c080af299e3f: Pushed
ab82e085fd82: Pushed
d60ed0726e37: Pushed
9577a2d5d759: Pushed
d35a1217c926: Pushed
98d98806c8ac: Pushed
0394a41efa73: Pushed
c484a3b6d841: Pushed
6d23902c2a54: Pushed
74c86dffd46f: Pushed
ef4a33cee7a0: Pushed
cb42413394c4: Pushed
latest: digest: sha256:43bf7db32d11e75d8463a8bc077f09af5fb5b84b182b1d74124ddca633093bfa size: 2828
14.查看mysql镜像是否被备份
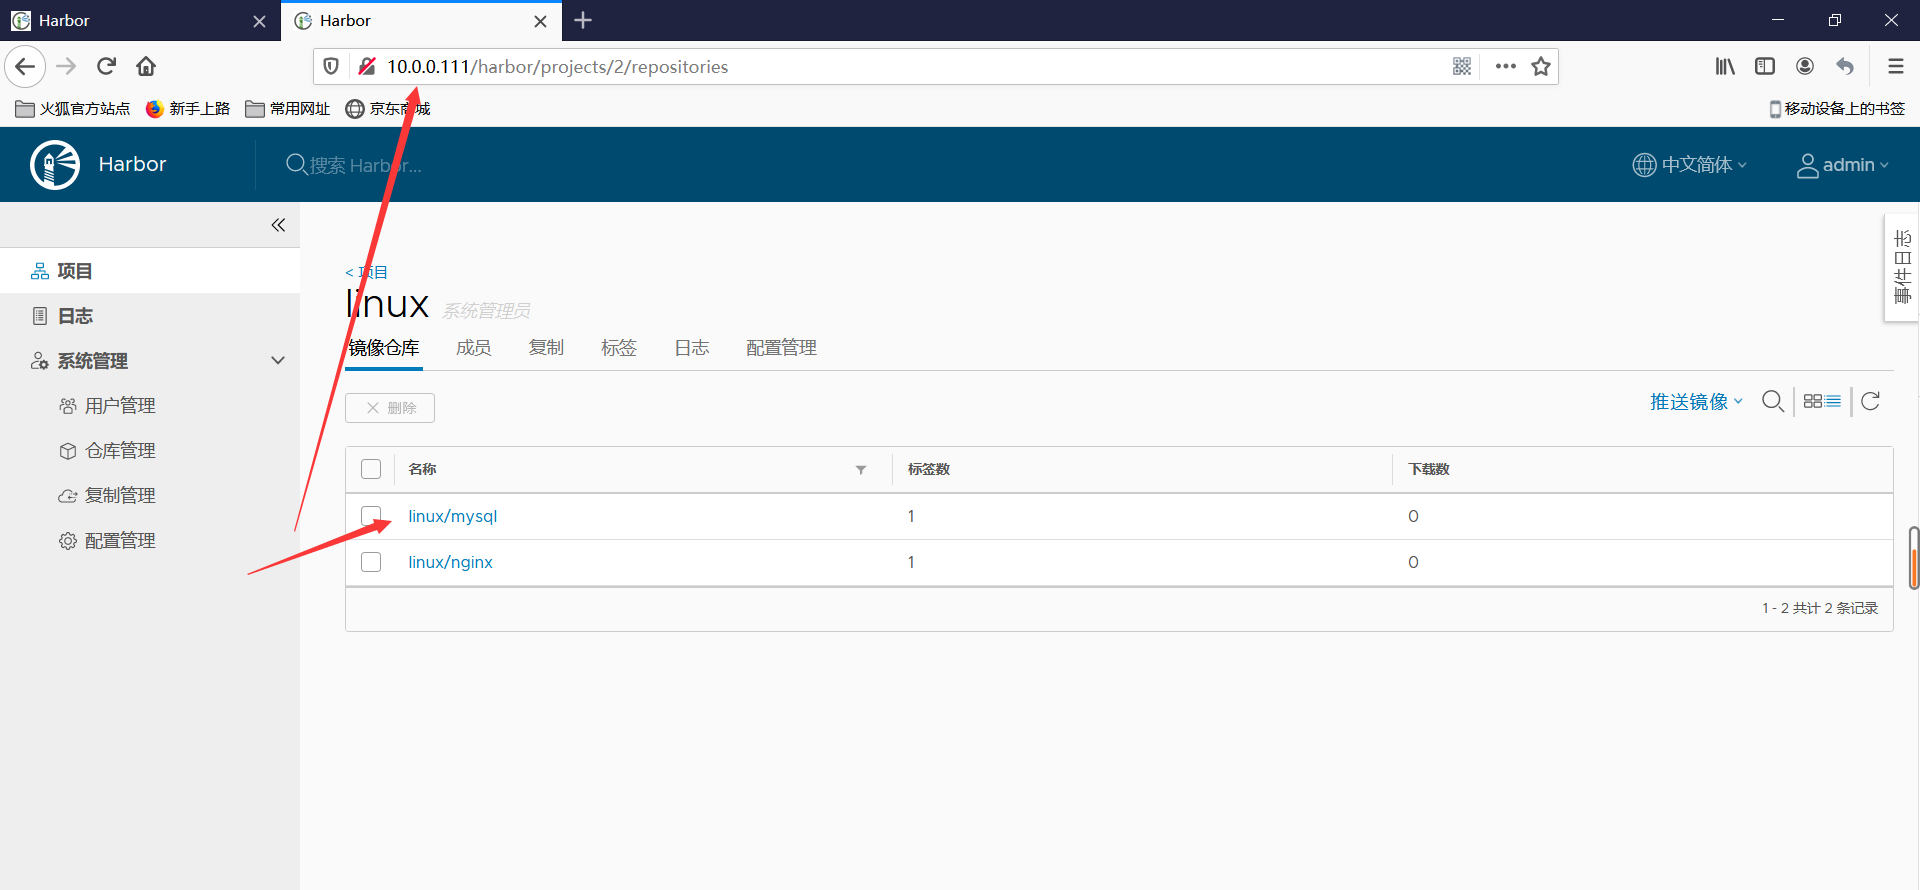
结语:本次harbor的高可用到这里全部OK!!!
标签:创建 engine 虚机 img 安装 and docker 并且 server
原文地址:https://www.cnblogs.com/xunweidezui/p/14453879.html