标签:des style blog http io ar color sp for
在之前的项目中,我们编程都是直接写在一个main.m文件中。类的main()函数,@interface和@implementation部分都塞进一个文件。这种结构对于小程序和简便应用来说还可以。但是项目文件一多,规模一上去。这样就很不好,既不美观,代码也不好管理。
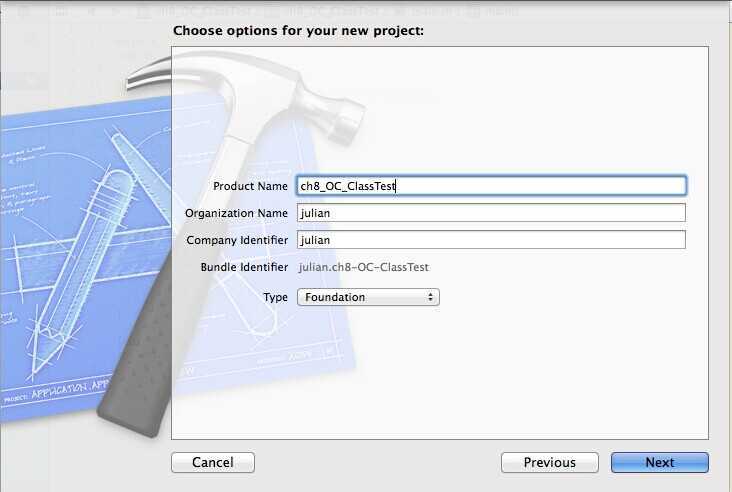
那么,接下来这篇博文,我们就接着上一节的例子。将他定义和实现的代码分开,每个对象一个类。在Objective-c中,定义的文件写在h文件中,实现的代码写在m文件中。于是,我们先新建一个Command Tools项目。

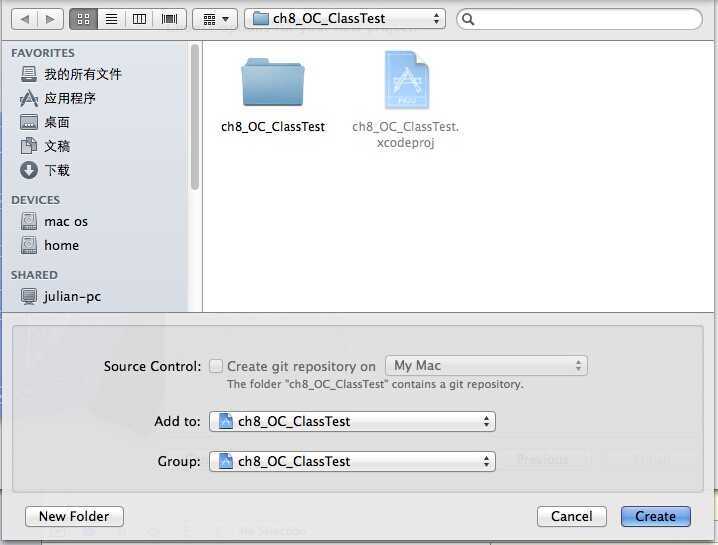
选择项目文件要保存的地方

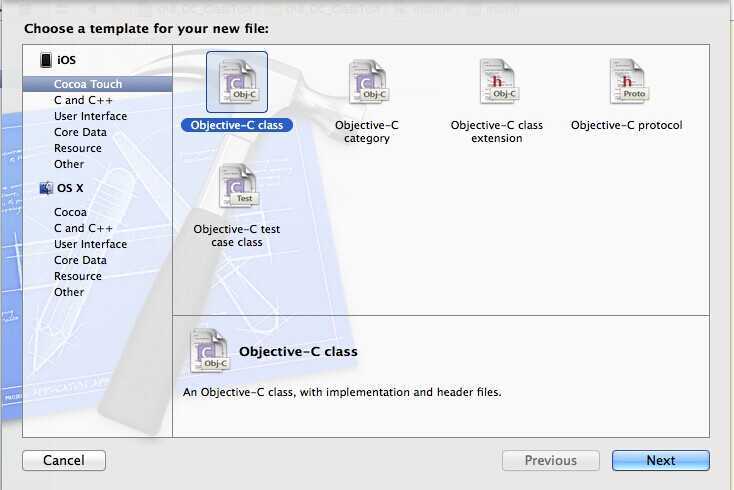
然后在新建的项目中依次新建三个类对象Car,Engine,Tire。每个类建好,都会生成两个文件(.h:写定义方法,.m:写实现方法)。

然后在Engine.m中写实现方法:
1 #import "Engine.h"
2
3 @implementation Engine
4 -(NSString *)description
5 {
6     return (@"I am an engine. Vrooom!");
7 }
8 @end
Tire.m中写实现方法:
1 #import "Tire.h"
2
3 @implementation Tire
4 -(NSString *) description
5 {
6     return (@"I am a tire. I last a while");
7 }
8 @end
接下来修改Car.h文件,写Car类的定义方法:
 1 #import <Foundation/Foundation.h>
 2 #import "Engine.h"
 3 #import "Tire.h"
 4
 5 @interface Car : NSObject
 6 {
 7     Engine *engine;
 8     Tire *tires[4]; //四个轮子,定义一个四个数的数组。
 9 }
10 -(Engine *) engine;
11 -(void) setEngine:(Engine *) newEngine;
12 -(Tire *) tireAtIndex:(int) index;
13 -(void) setTire:(Tire *) tire atIndex:(int) index;
14 -(void) drive;
15 @end // Car
注意:要先在最上面引用“Engine.h”和“Tire.h”。否则,代码就不能编译通过。
然后是修改Car类的实现方法:
 1 #import "Car.h"
 2
 3 @implementation Car
 4 -(void) setEngine:(Engine *) newEngine
 5 {
 6     engine = newEngine;
 7 }
 8
 9 -(Engine *) engine
10 {
11     return (engine);
12 }
13
14 -(void) setTire:(Tire *) tire
15         atIndex:(int) index
16 {
17     if(index<0 || index>3)
18     {
19         NSLog(@"bad index(%d) in setTire:atIndex",
20               index);
21         exit(1);
22     }
23     tires[index] = tire;
24 }
25
26 -(Tire *) tireAtIndex:(int) index
27 {
28     if(index<0 || index>3)
29     {
30         NSLog(@"bad index(%d)in tireAtIndex:",
31               index);
32         exit(1);
33     }
34     return (tires[index]);
35 }
36
37 -(void) drive{
38     NSLog(@"%@",engine);
39     NSLog(@"%@",tires[0]);
40     NSLog(@"%@",tires[1]);
41     NSLog(@"%@",tires[2]);
42     NSLog(@"%@",tires[3]);
43 }
44 @end
最后,只要在main主函数的文件中,引用三个类文件的定义文件就可以了,实现的代码不用变:
 1 #import <Foundation/Foundation.h>
 2 #import "Engine.h"
 3 #import "Tire.h"
 4 #import "Car.h"
 5
 6 int main(int argc, const char * argv[])
 7 {
 8     Car *car = [Car new];
 9     Engine *engine = [Engine new];
10     [car setEngine:engine];
11     for(int i=0;i<4;i++)
12     {
13         Tire *tire = [Tire new];
14         [car setTire:tire atIndex:i];
15     }
16
17     [car drive];
18     return 0;
19 }
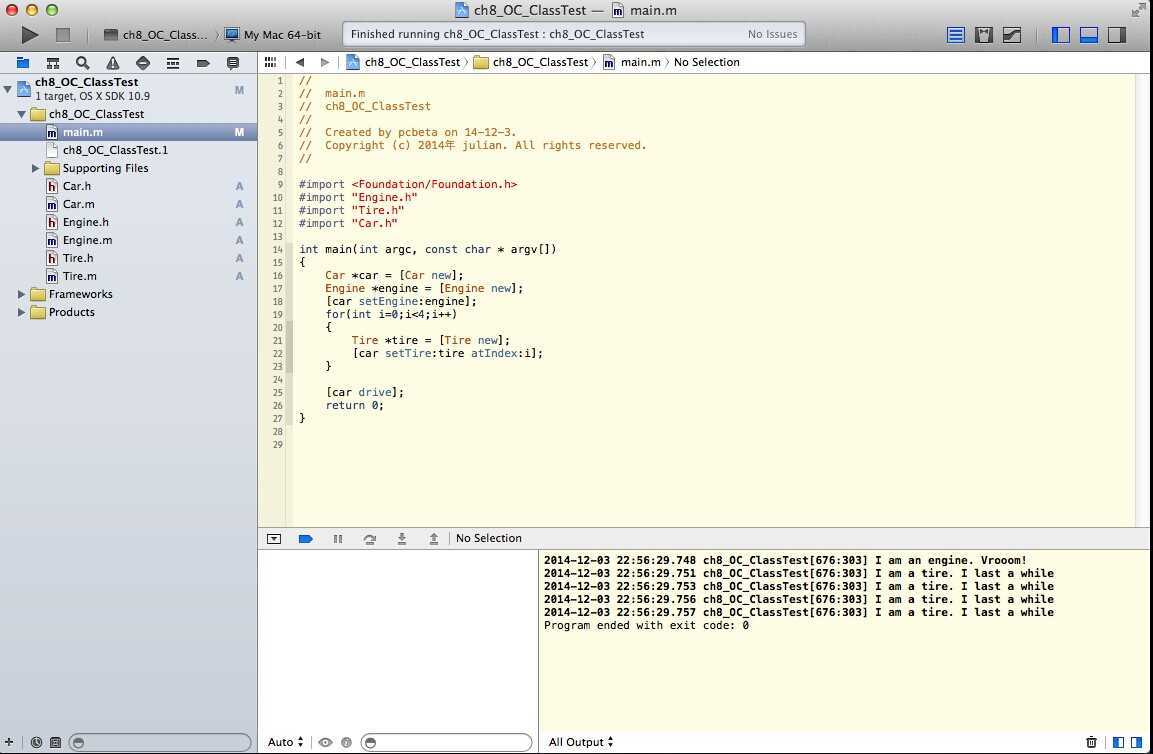
项目文件的基本结构,以及运行的结果如图:

由于本篇博文只是简单的将代码结构重新的整理了下,至于功能代码则和上一篇中介绍的完全相同,这边就不再细说了。如果朋友们感兴趣或者有看不懂的,可以查看上一篇博文,或者给我留言。好了,时间不早了,洗洗早点睡吧。
《objective-c基础教程》学习笔记(八)—— 拆分接口和实现
标签:des style blog http io ar color sp for
原文地址:http://www.cnblogs.com/jianglan/p/4141611.html