标签:style blog http io ar color os 使用 sp
step-1. 安装node 环境
step-2. npm install grunt-cli \ grunt
http://www.gruntjs.net/docs/getting-started/
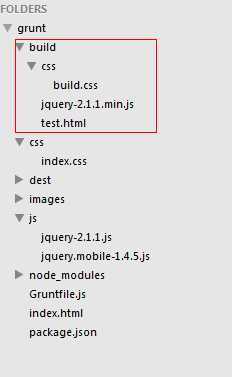
step-3. 创建静态页面文件夹
step-4. 在package.json中配置
 1 {
 2     "name": "test_connect",
 3     "version": "0.0.1",
 4     "devDependencies":
 5
 6    {
 7         "grunt-contrib-connect": "~0.6.0",
 8         "grunt-contrib-watch": "~0.5.3",
 9         "load-grunt-tasks": "~0.3.0"
10     }
11 }
step-5 在Gruntfile.js 中配置
 1 module.exports = function(grunt){
 2
 3   require(‘load-grunt-tasks‘)(grunt); //加载所有的任务
 4   //require(‘time-grunt‘)(grunt); 如果要使用 time-grunt 插件
 5
 6   grunt.initConfig({
 7     connect: {
 8       options: {
 9         port: 9000,
10         hostname: ‘192.168.22.100‘, //默认就是这个值,可配置为本机某个 IP,localhost 或域名
11         livereload: 35729  //声明给 watch 监听的端口
12       },
13
14       server: {
15         options: {
16           open: true, //自动打开网页 http://
17           base: [
18             ‘build/‘  //主目录
19           ]
20         }
21       }
22     },
23
24     watch: {
25       livereload: {
26         options: {
27           livereload: ‘<%=connect.options.livereload%>‘  //监听前面声明的端口  35729
28         },
29
30         files: [  //下面文件的改变就会实时刷新网页
31           ‘build/*.html‘,
32           ‘build/css/{,*/}*.css‘,
33           ‘build/js/{,*/}*.js‘
34         ]
35       }
36     }
37   });
38
39   grunt.registerTask(‘serve‘, [
40     ‘connect:server‘,
41     ‘watch‘
42   ]);
43 }
step-6. 打开cmd, 执行 grunt serve
标签:style blog http io ar color os 使用 sp
原文地址:http://www.cnblogs.com/yiliweichinasoft/p/4149645.html