标签:


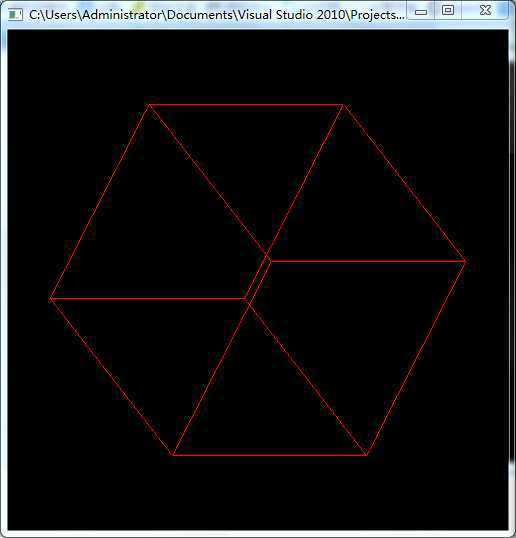
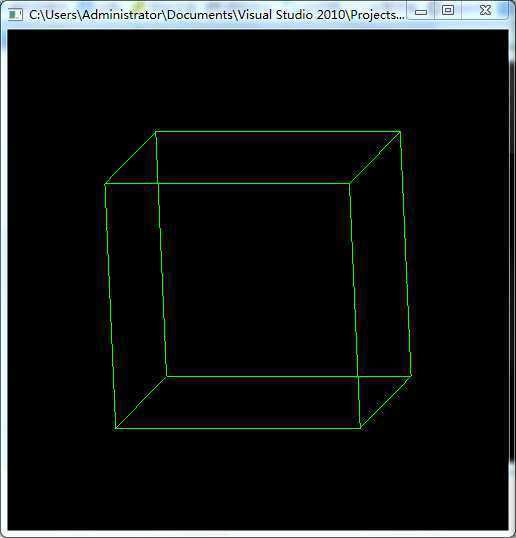
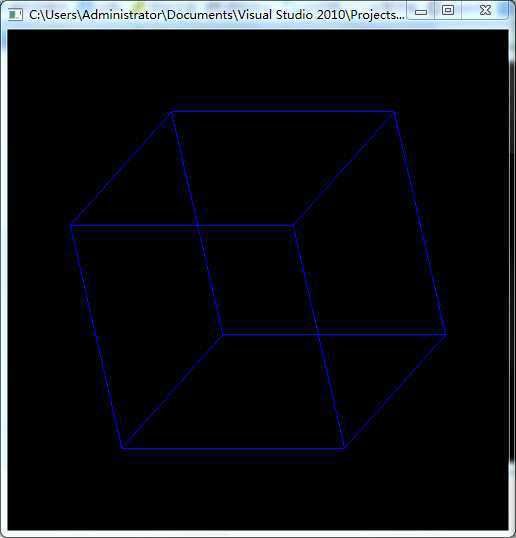
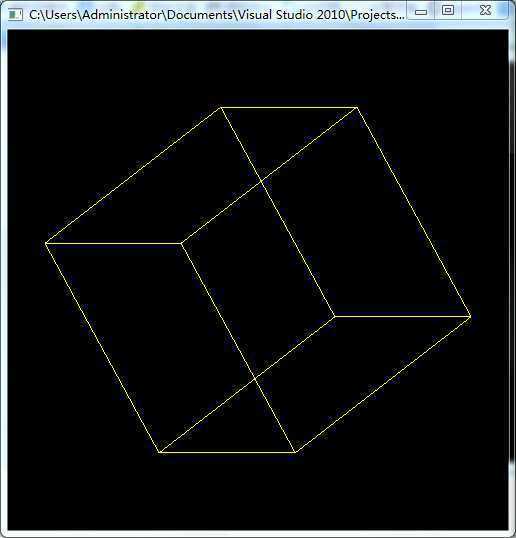
效果图如上。
步骤:首先,变换模型视角;然后,改变颜色;最后,利用顶点数组绘制立方体。
源代码如下:
#include <GL/glut.h>

// 绘制立方体

// 将立方体的八个顶点保存到一个数组里面

static const float vertex_list[][3] =
{
    -0.5f, -0.5f, -0.5f,
    0.5f, -0.5f, -0.5f,
    -0.5f, 0.5f, -0.5f,
    0.5f, 0.5f, -0.5f,
    -0.5f, -0.5f, 0.5f,
    0.5f, -0.5f, 0.5f,
    -0.5f, 0.5f, 0.5f,
    0.5f, 0.5f, 0.5f,
};

// 将要使用的顶点的序号保存到一个数组里面

static const GLint index_list[][2] =
{
    {0, 1},
    {2, 3},
    {4, 5},
    {6, 7},
    {0, 2},
    {1, 3},
    {4, 6},
    {5, 7},
    {0, 4},
    {1, 5},
    {7, 3},
    {2, 6}
};

// 绘制立方体

void DrawCube(void)
{
    int i,j;

    glBegin(GL_LINES);
    for(i=0; i<12; ++i) // 12 条线段
    {
        for(j=0; j<2; ++j) // 每条线段 2个顶点
        {
            glVertex3fv(vertex_list[index_list[i][j]]);
        }
    }
    glEnd();
}

static float rotate = 0;
static int times = 0;

void renderScene(void)
{
    glClear(GL_COLOR_BUFFER_BIT | GL_DEPTH_BUFFER_BIT); // 清理颜色缓冲和深度缓冲

    glMatrixMode(GL_MODELVIEW); // 对模型视景的操作
    glLoadIdentity(); // 重置当前指定的矩阵为单位矩阵
    glPushMatrix(); // 压栈

    //glTranslatef(-0.2, 0, 0); // 平移
    //glScalef(1, 1, 1);    // 缩放

    times++;
    if(times > 100)
    {
        times = 0;
    }

    if(times % 100 == 0) // [0, 100)
    {
        rotate += 0.5; // [0, 20)
    }

    glRotatef(rotate, 0, 1, 0); // 旋转
    glRotatef(rotate, 1, 0, 0);

    // 动态颜色变换--红->绿->蓝->红
    if(rotate == 0)
        glColor3f(1, 0, 0);
    if(rotate ==90)
        glColor3f(0, 1, 0);
    if(rotate ==180)
        glColor3f(0, 0, 1);
    if(rotate ==270)
        glColor3f(1, 1, 0);
    if(rotate ==360)
        rotate = 0;

    DrawCube(); // 绘制立方体

    glPopMatrix();// 出栈
    glutSwapBuffers();
}

int main(int argc, char* argv[])
{
    glutInit(&argc, argv);  // 初始化GLUT
    glutInitDisplayMode(GLUT_DEPTH | GLUT_DOUBLE | GLUT_RGBA);
    glutInitWindowPosition(100, 100);  // 显示窗口在屏幕的相对位置
    glutInitWindowSize(500, 500); // 设置显示窗口大小
    glutCreateWindow(argv[0]); // 创建窗口,附带标题

    glutDisplayFunc(renderScene); // 注册显示用的函数
    glutIdleFunc(renderScene); // 注册空闲用的函数

    glutMainLoop(); // GLUT 状态机

    return 0;

}
标签:
原文地址:http://www.cnblogs.com/yuwl26/p/4218471.html