标签:des style c class blog code
http://www.wwwer.net/archives/proxmark3-introduced.html
Proxmark3固件介绍
Proxmark3是一个开源的安全设备,故此其内置的固件也是因开源而不断的进行升级以及修改,
而我们团购回来的版本是较为稳定的r486,因为每次编译固件生成bin的时候,
我们不仅仅是在编译更新Proxmark3自身的固件也在编译我们PC端使用的客户端。
Proxmark3客户端与固件的关系
因为Proxmark3的原理是PC端只是基于命令的回显以及发送,不存在任何数据运算。
如果我们只是更新固件而不更新客户端的情况下,固件所新增加的命令以及功能都不会在旧版本的客户端当中出现!
就很容易出现类似无法识别命令之类的提示。并且要谨记因为客户端的特殊情况,
所以CTRL+C的操作是不可以停止Proxmark3的运算进程的!
反而你这样子的退出会导致出现不应该出现的情况会影响后续的操作!
Proxmark3驱动安装
wiki当中有关于Proxmark3的驱动安装说明,这里再次要提醒大家的就是Proxmark3驱动必须手动安装,
并且要记住无论是WindowsXP还是Windows7驱动都是一样的!
驱动只有32位和64位的区别,而64位驱动安装的方法和32位一致。
如果驱动安装不正常会影响Proxmark3的运行,开源的Libusb驱动的确是比较麻烦的
测试前需要谨记并且准备好的事情有:
http://blog.csdn.net/jay_hust/article/details/9112871
https://proxmark3.googlecode.com/files/ProxSpace-130613.7z
Step1:
runme.bat的内容修改,主要是根据你的Proxmark3工作目录修改MYPATH这个变量:
@echo off
REM *******************************************
REM CHANGE
THIS PATH TO MATCH YOUR INSTALLATION
REM
*******************************************
set MYPATH=C:\ProxSpace\
echo #Win32_Path Mount_Point >msys/etc/fstab
echo
%MYPATH%mingw /mingw >>msys/etc/fstab
echo
%MYPATH%devkitARM /devkitARM >>msys/etc/fstab
echo
%MYPATH%Qt\4.6.2 /qt >>msys/etc/fstab
echo
%MYPATH%pm3 /pm3 >>msys/etc/fstab
msys\msys.bat
注意:“MYPATH”的地址最后含有一个“\”,因为%MYPATH%后面没有跟“\”。
Step2:
在runme.bat运行后的窗口中执行
make clean
make all
Step3:
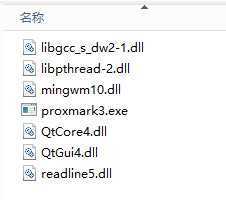
把ProxSpace\pm3\client目录下编译出来的proxmark3.exe放到独立的文件夹下,
并把一些运行proxmark3.exe必须的dll从其他目录拷贝到proxmark3.exe的文件夹
(libgcc_s_dw2-1.dll、libpthread-2.dll、mingwm10.dll、QtCore4.dll、QtGui4.dll、readline5.dll)
Step4: 运行proxmark3.exe(直接双击运行会一闪而过)。
写一个批处理文件,例如 run_proxmark3.bat:
proxmark3 COM1
弹出DOS界面后后即可运行相关指令了,如hw version等。
使用subversion来更新代码,到CollabNet网站下载subversion(需要注册):
http://www.open.collab.net/downloads/ctf/windows.html.
win7下载编译时经常出现perl相关的错误:
6402 [main] perl 596 child_copy: linked dll data write copy failed, 0x252000..0x252370, done 0, windows pid 596, Win32 error 87.
原因是perl.exe版本太低,到perl网站下载安装新的版本(http://www.perl.org/get.html),
复制perl.exe和相关dll到minGW\bin即可。
不想用也可以删除刚安装的perl。重新编译就可以了。
从2012年11月4日起,Proxmark3的Google Code已经将USB CDC分支合并到了官方版本当中,
因此从SVN的630开始,不再使用基于libusb的USB驱动模式,而改为了USB CDC驱动模式,
但是因为相关联的代码修改以及测试等等的原因,所以USB CDC模式并不完善以及稳定,
所以我们不建议各位用户自行更新相关的版本!
以下为基于旧版本libusb驱动模式下的SVN下载源码以及固件编译安装方法。
1、下载官方提供的Windows编译环境Proxspace(官方下载地址)
2、解压Proxspace到任意文件夹。在proxspace的目录下,找到”run.bat“文件,用文本编辑器打开该文件,并且修改以下参数:
 set MYPATH=将此路径改为proxspace现有路径

 若批处理最后一行为: msys/msys.bat,请改为 msys\msys.bat
例如:proxspace解压缩在D盘Proxmark3目录下,修改
MYPATH=D:\Proxmark3\proxspace
保存,并关闭文件。
3、删除Proxspace文件夹下pm3内的所有文件(因为是老版本的源码,不需要了,后面会更新新源码)
4、双击运行”run.bat“,进入终端后执行以下命令更新&编译。
通过SVN命令更新源码到最新版本并编译:
 svn co http://proxmark3.googlecode.com/svn/trunk proxmark3-read-only
 cd proxmark3-read-only
 make all
一般编译都会顺利完成,这时候在Client目录生成的客户端,
在其他目录找到以下固件文件备用:
bootrom.elf
bootrom.s19
fpgaimage.elf
fpgaimage.s19
fullimage.elf
osimage.elf
osimage.s19
此步骤只针对懂得如何使用SVN下载最新固件版本下进行操作!
所有Proxmark3出厂时已经拥有固件!
2013年开始,SVN基于630以上版本全部改为USB CDC驱动,
故此从SVN下载回来的固件版本高于或等于630的,都不可以使用该更新升级方法请切记!
在你不懂得PM3操作的情况下,特别是刚刚得到PM3的童鞋千万不要尝试升级你的PM3固件!
以下固件中bootrom不要轻易的更新,如果中途失败,很可能会导致Proxmark3无法被电脑识别(俗称变成砖头)。
CMD下进入固件解压文件夹内的win32目录并且执行(提前将Firmware目录内的文件拷入win32目录下)
手动更新bootrom (可选)
flasher -b bootrom.elf
手动更新fullimage
flasher fullimage.elf
手动更新osimage
flasher osimage.elf
手动更新fpgaimage
flasher -b fpgaimage.elf
更新成功以上几个就可以了.
不同版本固件和软件使用会导致程序出错,压缩包内有配套相应版本的proxmark3.exe软件,请使用相应版本软件.
R486以后固件配套是proxmark3.exe软件,非prox.exe,直接CMD切换到win32目录下proxmark3.exe
Linux下更新固件过程与windows一样,固件是通用的。
只需要把新的固件文件复制到flasher目录,按照以上命令更新即可!
如果更新固件导致Proxmark3产生不可挽救的后果的话,请使用J-Link进行Jtag固件刷写,这样子就可以恢复了!
请注意,以下操作是基于Proxmark3因bootrom部分固件出现问题、或bootrom部分固件发生重大更新,
需要使用J-link等工具通过JTAG接口进行bootrom部分固件刷写修复。
平常的固件更新只需按住Proxmark3按钮,连上计算机,
使用计算机上的flasher工具更新fpgaimage和osimage部分固件即可。
This document has been created assuming that you have read the relevant getting started guide
and configured your development environment accordingly.
For Windows users - Everything in this document is done from the Minimalist GNU terminal window.
Start by running "runme.bat".
Proxmark firmware is comprised of three logical sections:
bootrom, fpga and operating system.
The bootrom is a relatively small bit of code that performs some basic hardware initialization,
supports reflashing the device over USB and knows how to transfer execution to the operating system.
Due to the limited number of features exposed by the bootrom,
it is not frequently updated and so you should only rarely need to update it when there is a compatibility conflict.
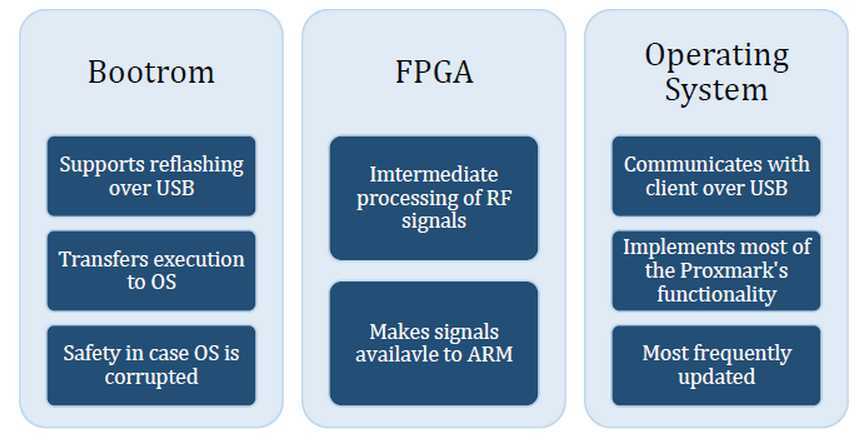
The FPGA code processes analogue signals coming from the antennas and makes those signals available to the ARM.
Like the bootrom code, the FPGA code is not frequently updated.
Presently, the operating system is the most frequently updated portion of Proxmark code.
It is responsible for receiving and executing most of the commands advertised in the client user interface.
Upgrading the bootrom of your Proxmark can brick the device.
Please exercise caution when upgrading the bootloader.
If the bootloader is corrupted, the only way to restore your Proxmark to working order
will be through the use of a JTAG programmer.
An S19 (Motorola S-record) and ELF (Executable and Linkable Format) file is produced for each logical section.
The bootloader (sometimes also called bootrom) is a small piece of code
that enables writing to the flash over USB in the first place.
It‘s updated very infrequently and, due to its importance, should be left alone most of the time.
As long as your bootloader is intact you can recover any firmware error of your proxmark3
with just an USB connection and the provided flash tools.
When you destroy your bootloader, you will need a JTAG connection and associated tools to recover the device.
The FPGA image is the configuration/code that runs on the FPGA that sits on the proxmark3.
Since the FPGA doesn‘t have flash memory of its own,
this configuration is stored in the flash memory of the ARM processor
and downloaded into the FPGA on each boot of the device.
The FPGA code (called bit stream) is updated fairly infrequently,
and special tools are needed to compile the bit stream from the verilog sources.
The proxmark3 firmware source releases and SVN checkouts always contain a compiled bit stream (in fpga/fpga.bit)
which is then simply wrapped into an image file for you to flash onto the proxmark3.
The OS image is the main firmware code that runs on your proxmark3.
It is developed and regularly updated in the SVN, but if you don‘t need the latest features
you are well off using the provided binary releases.
(Note also: since the SVN is considered eternal work-in-progess, a current SVN version might not work or even build.)
The OS image and FPGA image work in tandem, so you should always flash them from the same SVN revision.
As mentioned above, the Proxmark3 is largely a constant work in progress.
Its firmware started off as a big update from the older ProxmarkII project,
and was mainly aimed at demonstrating a few key concepts rather than provide a polished end-user interface.
Over time, and thanks to the many contributions of all the developers on the project,
the firmware has evolved in many ways: new commands and features, more refined firmware architecture, etc.
The original firmware which is the one shipped on some pre-built Proxmark3 devices is now generally considered as outdated.
If your Proxmark3 is loaded with the original firmware, you should consider upgrading to the most recent binary release.
Ensure that you have read the prior section before proceeding.
In order to upgrade to the latest version of firmware,
you will need to first upgrade the Proxmarks bootloader.
The steps below will upgrade the Proxmark bootloader
to the version you checked out previously using the procedure from the getting started guide.
sudo ./flasher -b ../bootrom/obj/bootrom.elf
At this point the bootrom has been updated and the Proxmark is now in a position to have its OS upgraded.
The following steps will upgrade the Proxmark Operating System and FPGA code to your checked revision.
sudo ./flasher ../armsrc/obj/fpgaimage.elf
sudo ./flasher ../armsrc/obj/osimage.elf
Connected units:
1. SN:ChangeMe[bus-0/\\.\libusb0-0001--0x9ac4-0x4b8f]
proxmark3>
If for whatever reason the USB upgrade procedure (section above) failed and the Proxmark will no longer boot,
you will need to load the bootrom on to the Proxmark using the JTAG interface.
This procedure assumes that you have a Segger J-LINK for the recovery process and J-link commander installed.
Plug both the Proxmark and the Segger J-LINK in to the computer. Attach the J-LINK to the Proxmark JTAG port.
Run J-link commander. Then:
exec device = AT91SAM7S256
execEnableFlashDL
h
loadbin "C:\proxmark3\recovery\proxmark3_recovery.bin"0x100000
that is it!
for flashing either the bootrom or firmware, these are the files and addresses:
bootrom.bin =0x100000
fullimage.bin =0x102000
Now un-plug the proxmark USB and JTAG and re-plug the Proxmark USB to the computer.
Proxmark3的固件介绍,编译和烧写,布布扣,bubuko.com
标签:des style c class blog code
原文地址:http://www.cnblogs.com/shangdawei/p/3753249.html