标签:des style c class blog code
步骤一:构建整个解决方案
Service.Interface:用于定义服务契约的类库项目,引用WCF的核心程序集System.ServiceMode.dll
Service:用于定义服务类型的类库项目。
Hosting:作为服务宿主的控制台应用。
Client:一个控制台应用模拟服务的客户端
步骤二:创建服务契约
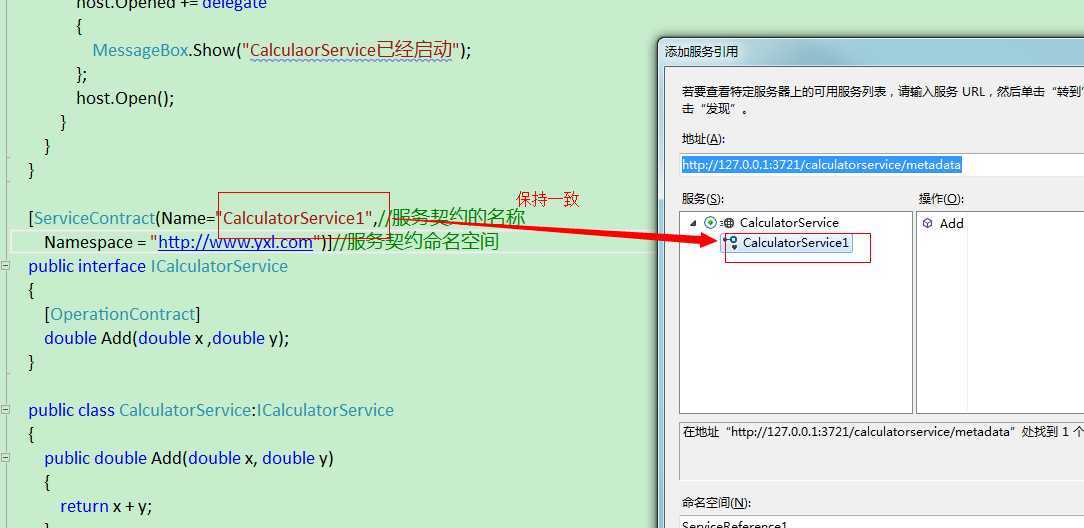
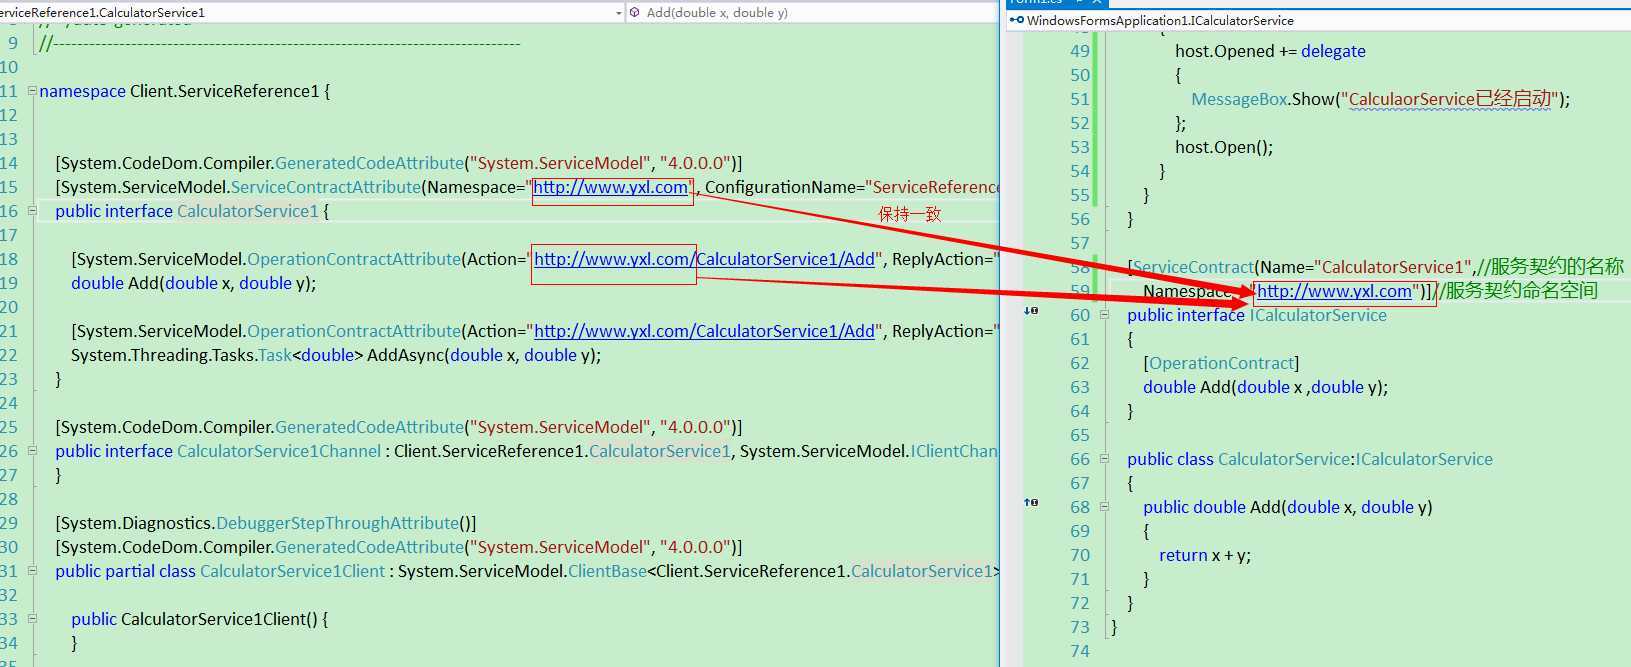
[ServiceContract(Name="CalculatorService1",//服务契约的名称,也就是客户端调用者生成代理类的接口名称
        Namespace = "http://www.yxl.com")]//服务契约命名空间
    public interface ICalculatorService
    {
        [OperationContract]
        double Add(double x ,double y);
    }
步骤三:创建服务
public class CalculatorService:ICalculatorService
    {
        public double Add(double x, double y)
        {
            return x + y;
        }
    }
步骤四:通过自我寄宿的方式寄宿服务
1.代码方式
/// <summary>
        /// 代码方式
        /// </summary>
        /// <param name="sender"></param>
        /// <param name="e"></param>
        private void button1_Click(object sender, EventArgs e)
        {
            using (ServiceHost host = new ServiceHost(typeof(CalculatorService)) )
            {
                host.AddServiceEndpoint(typeof (ICalculatorService), new WSHttpBinding(),
                    "http://127.0.0.1:3721/calculatorservice");
                if (host.Description.Behaviors.Find<ServiceMetadataBehavior>()==null)
                {

                    ServiceMetadataBehavior behavior = new ServiceMetadataBehavior();
                    behavior.HttpGetEnabled = true;
                    behavior.HttpGetUrl = new Uri("http://127.0.0.1:3721/calculatorservice/metadata");//通过该地址获取服务相关的元数据
                    host.Description.Behaviors.Add(behavior);
                }
                host.Opened+= delegate
                {
                    MessageBox.Show("CalculaorService已经启动");

                };
                host.Open();
            }
        }
2.配置文件方式:
<?xml version="1.0" encoding="utf-8" ?>
<configuration>
    <startup>
        <supportedRuntime version="v4.0" sku=".NETFramework,Version=v4.5" />
    </startup>

  <system.serviceModel>
    <behaviors>
      <serviceBehaviors>
        <behavior name="metadataBehavior">
          <serviceMetadata httpGetEnabled="true" httpGetUrl="http://127.0.0.1:3721/calculatorservice/metadata"/><!--调用地址-->
        </behavior>
      </serviceBehaviors>
    </behaviors>
    <services>
      <service name="WindowsFormsApplication1.CalculatorService" behaviorConfiguration="metadataBehavior">
        <endpoint address="http://127.0.0.1:3721/calculatorservice" binding="wsHttpBinding" contract="WindowsFormsApplication1.ICalculatorService" />
      </service>
    </services>
  </system.serviceModel>

</configuration>
 /// <summary>
        /// 配置文件的方式
        /// </summary>
        /// <param name="sender"></param>
        /// <param name="e"></param>
        private void button2_Click(object sender, EventArgs e)
        {
            using (ServiceHost host = new ServiceHost(typeof (CalculatorService)))
            {
                host.Opened += delegate
                {
                    MessageBox.Show("CalculaorService已经启动");
                };
                host.Open();
            }
        }
步骤五:创建客户端调用服务


添加服务引用后调用代码:
private void button1_Click(object sender, EventArgs e)
        {
            using (CalculatorService1Client proxy = new CalculatorService1Client())
            {
                MessageBox.Show(proxy.Add(1, 1).ToString());
            }
        }
步骤六:通过IIS寄宿服务
1.创建Web应用程序,添加.svc文件
将之前的配置文件去掉终结点的地址和访问节点的地址
Web.config
<?xml version="1.0" encoding="utf-8"?>

<!--
  有关如何配置 ASP.NET 应用程序的详细信息,请访问
  http://go.microsoft.com/fwlink/?LinkId=169433
  -->

<configuration>
    <system.web>
      <compilation debug="true" targetFramework="4.5" />
      <httpRuntime targetFramework="4.5" />
    </system.web>
  <system.serviceModel>
    <serviceHostingEnvironment aspNetCompatibilityEnabled="true"
      multipleSiteBindingsEnabled="true" />
    <behaviors>
      <serviceBehaviors>
        <behavior name="metadataBehavior">
          <serviceMetadata httpGetEnabled="true" />
        </behavior>
        <behavior name="">
          <serviceMetadata httpGetEnabled="true" httpsGetEnabled="true" />
          <serviceDebug includeExceptionDetailInFaults="false" />
        </behavior>
      </serviceBehaviors>
    </behaviors>
    <services>
      <service name="WebApplication1.CalculatorService" behaviorConfiguration="metadataBehavior">
        <endpoint binding="wsHttpBinding" contract="WebApplication1.ICalculatorService" />
      </service>
    </services>
  </system.serviceModel>
</configuration>
用浏览器浏览.svc文件,比如“http://localhost:7137/CalculatorService.svc”,客户端添加服务引用就可以了
重温WCF之构建一个简单的WCF(一),布布扣,bubuko.com
标签:des style c class blog code
原文地址:http://www.cnblogs.com/yxlblogs/p/3754510.html