标签:
一 .安装运行ActiveMQ:
1.下载activemq
wget http://archive.apache.org/dist/activemq/apache-activemq/5.9.0/apache-activemq-5.9.0-bin.tar.gz

2.解压
tar -xf apache-activemq-5.9.0-bin.tar.gz

[zcw@g1 ~]$ cd apache-activemq-5.9.0
[zcw@g1 apache-activemq-5.9.0]$ cd bin/
3.运行:
[zcw@g1 bin]$ activemq start

三种运行方式:
(1)普通启动 ./activemq start
(2)启动并指定日志文件 ./activemq
start >tmp/smlog
(3)后台启动方式nohup
./activemq start >/tmp/smlog
前两种方式下在命令行窗口关闭时或者ctrl+c时导致进程退出,采用后台启动方式则可以避免这种情况
管理后台为:
http://ip:8161/admin/

4.检查已经启动
ActiveMQ默认采用61616端口提供JMS服务,使用8161端口提供管理控制台服务,执行以下命令以便检验是否已经成功启动ActiveMQ服务。
打开端口:nc -lp 61616 &
查看哪些端口被打开 netstat -anp
查看61616端口是否打开: netstat -an |
grep 61616
检查是否已经启动:
(1).查看控制台输出或者日志文件
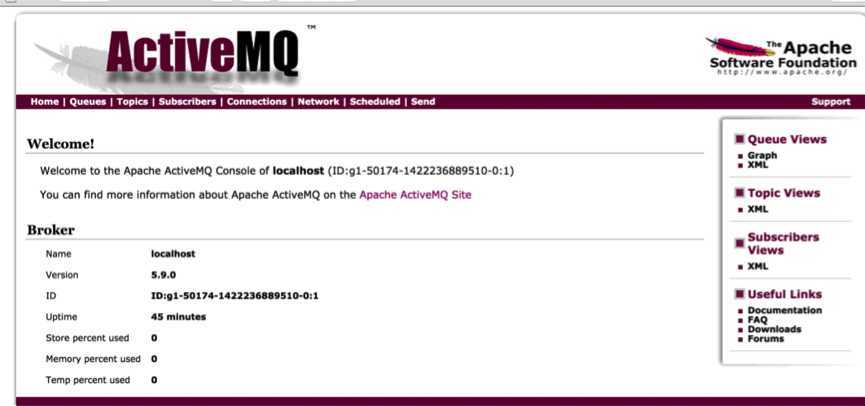
(2).直接访问activemq的管理页面:http://localhost:8161/admin/
5.关闭
如果开启方式是使用(1)或(2),则直接ctrl+c或者关闭对应的终端即可
如果开启方式是(3),则稍微麻烦一点:
先查找到activemq对应的进程:
ps -ef | grep activemq
然后把对应的进程杀掉,假设找到的进程编号为 168168
kill 168168
二.创建ActiveMQ的Eclipse项目并运行
1)P2P方式

到中心仓库(
http://search.maven.org/
)里面找到:activemq-core
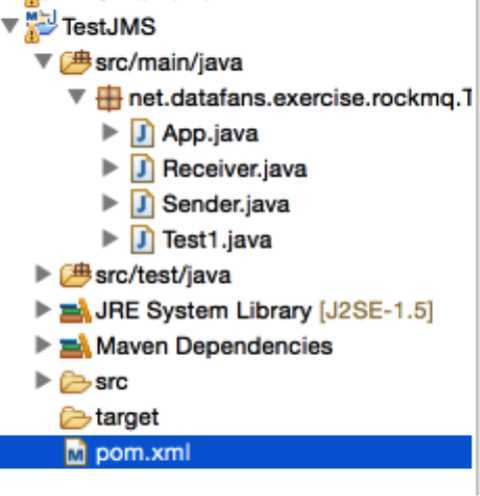
pom.xml:

<project xmlns="http://maven.apache.org/POM/4.0.0" xmlns:xsi="http://www.w3.org/2001/XMLSchema-instance"
  xsi:schemaLocation="http://maven.apache.org/POM/4.0.0 http://maven.apache.org/xsd/maven-4.0.0.xsd">
  <modelVersion>4.0.0</modelVersion>

  <groupId>net.datafans.exercise.rockmq</groupId>
  <artifactId>TestJMS</artifactId>
  <version>0.0.1-SNAPSHOT</version>
  <packaging>jar</packaging>

  <name>TestJMS</name>
  <url>http://maven.apache.org</url>

  <properties>
    <project.build.sourceEncoding>UTF-8</project.build.sourceEncoding>
  </properties>

  <dependencies>
    <dependency>
      <groupId>junit</groupId>
      <artifactId>junit</artifactId>
      <version>3.8.1</version>
      <scope>test</scope>
    </dependency>

    <dependency>
        <groupId>org.apache.activemq</groupId>
        <artifactId>activemq-core</artifactId>
        <version>5.7.0</version>
    </dependency>
  </dependencies>
</project>
Sender:

package net.datafans.exercise.rockmq.TestJMS;

import javax.jms.Connection;
import javax.jms.ConnectionFactory;
import javax.jms.DeliveryMode;
import javax.jms.Destination;
import javax.jms.MessageProducer;
import javax.jms.Session;
import javax.jms.TextMessage;
import org.apache.activemq.ActiveMQConnection;
import org.apache.activemq.ActiveMQConnectionFactory;

public class Sender {
    private static final int SEND_NUMBER = 5;

    public static void main(String[] args) {
        // ConnectionFactory :连接工厂,JMS 用它创建连接
        ConnectionFactory connectionFactory;
        // Connection :JMS 客户端到JMS Provider 的连接
        Connection connection = null;
        // Session: 一个发送或接收消息的线程
        Session session;
        // Destination :消息的目的地;消息发送给谁.
        Destination destination;
        // MessageProducer:消息发送者
        MessageProducer producer;
        // TextMessage message;
        // 构造ConnectionFactory实例对象,此处采用ActiveMq的实现jar
        connectionFactory = new ActiveMQConnectionFactory(
                ActiveMQConnection.DEFAULT_USER,
                ActiveMQConnection.DEFAULT_PASSWORD,
                "tcp://120.132.37.251:61616");
        try {
            // 构造从工厂得到连接对象
            connection = connectionFactory.createConnection();
            // 启动
            connection.start();
            // 获取操作连接
            session = connection.createSession(Boolean.TRUE,
                    Session.AUTO_ACKNOWLEDGE);
            // 获取session注意参数值xingbo.xu-queue是一个服务器的queue,须在在ActiveMq的console配置
            destination = session.createQueue("FirstQueue");
            // 得到消息生成者【发送者】
            producer = session.createProducer(destination);
            // 设置不持久化,此处学习,实际根据项目决定
            producer.setDeliveryMode(DeliveryMode.NON_PERSISTENT);
            // 构造消息,此处写死,项目就是参数,或者方法获取
            sendMessage(session, producer);
            session.commit();
        } catch (Exception e) {
            e.printStackTrace();
        } finally {
            try {
                if (null != connection)
                    connection.close();
            } catch (Throwable ignore) {
            }
        }
    }

    public static void sendMessage(Session session, MessageProducer producer)
            throws Exception {
        for (int i = 1; i <= SEND_NUMBER; i++) {
            TextMessage message = session
                    .createTextMessage("ActiveMq 发送的消息" + i);
            // 发送消息到目的地方
            System.out.println("发送消息:" + "ActiveMq 发送的消息" + i);
            producer.send(message);
        }
    }
}
Receiver:

package net.datafans.exercise.rockmq.TestJMS;

import javax.jms.Connection;
import javax.jms.ConnectionFactory;
import javax.jms.Destination;
import javax.jms.MessageConsumer;
import javax.jms.Session;
import javax.jms.TextMessage;
import org.apache.activemq.ActiveMQConnection;
import org.apache.activemq.ActiveMQConnectionFactory;

public class Receiver {
    public static void main(String[] args) {
        // ConnectionFactory :连接工厂,JMS 用它创建连接
        ConnectionFactory connectionFactory;
        // Connection :JMS 客户端到JMS Provider 的连接
        Connection connection = null;
        // Session: 一个发送或接收消息的线程
        Session session;
        // Destination :消息的目的地;消息发送给谁.
        Destination destination;
        // 消费者,消息接收者
        MessageConsumer consumer;
        connectionFactory = new ActiveMQConnectionFactory(
                ActiveMQConnection.DEFAULT_USER,
                ActiveMQConnection.DEFAULT_PASSWORD,
                "tcp://120.132.37.251:61616");
        try {
            // 构造从工厂得到连接对象
            connection = connectionFactory.createConnection();
            // 启动
            connection.start();
            // 获取操作连接
            session = connection.createSession(Boolean.FALSE,
                    Session.AUTO_ACKNOWLEDGE);
            // 获取session注意参数值xingbo.xu-queue是一个服务器的queue,须在在ActiveMq的console配置
            destination = session.createQueue("FirstQueue");
            consumer = session.createConsumer(destination);
            while (true) {
                //设置接收者接收消息的时间,为了便于测试,这里谁定为100s
                TextMessage message = (TextMessage) consumer.receive(100000);
                if (null != message) {
                    System.out.println("收到消息" + message.getText());
                } else {
                    break;
                }
            }
        } catch (Exception e) {
            e.printStackTrace();
        } finally {
            try {
                if (null != connection)
                    connection.close();
            } catch (Throwable ignore) {
            }
        }
    }
}
测试过程:
发送

接收

标签:
原文地址:http://www.cnblogs.com/super-d2/p/4249768.html