标签:
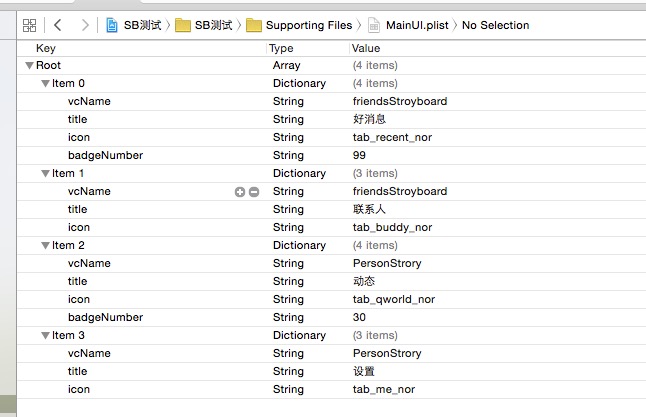
在一般的布局中,我们先使用一个plist文件,做为tabbarVC的的4个选项
pilist文件如下

然后创建多个Storyboard,以及Storyboard关联的文件,
然后删除启动的一些sb界面,让界面启动时候从AppDelegate中启动,
在AppDelegate中写下如下代码
<!-- lang: cpp -->
- (BOOL)application:(UIApplication *)application didFinishLaunchingWithOptions:(NSDictionary *)launchOptions {
// Override point for customization after application launch.

self.window  = [[UIWindow alloc] initWithFrame:[UIScreen mainScreen].bounds];
self.window.backgroundColor = [UIColor whiteColor];
//b不要在主方法中写碎代码
[self setUI];
[self.window makeKeyAndVisible];
return YES;
}
-(void)setUI{
UITabBarController *uiTabBar = [[UITabBarController alloc] init];

NSURL *url = [[NSBundle mainBundle] URLForResource:@"MainUI" withExtension:@"plist"];
NSArray *arr = [NSArray arrayWithContentsOfURL:url];

for (NSDictionary *dic in arr) {

    UIStoryboard *sb = [UIStoryboard storyboardWithName:dic[@"vcName"] bundle:nil];
    UIViewController *uiVC = sb.instantiateInitialViewController;
    uiVC.title = dic[@"title"];
    uiVC.tabBarItem.image = [UIImage imageNamed:dic[@"icon"]];
    uiVC.tabBarItem.badgeValue = dic[@"badgeNumber"];

    [uiTabBar addChildViewController:uiVC];
}

self.window.rootViewController = uiTabBar;
}
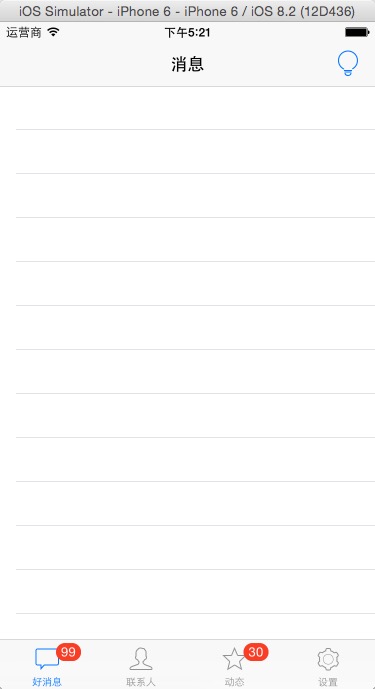
然后就能看到如下功能了,
效果如下

那在SB文件中的按钮点击跳转到其他SB文件中怎么处理呢?如下代码:
<!-- lang: cpp -->
当然我讲的肯定不是很清晰,下面你看下我的源代码吧!嘻嘻,希望对你有用!
下面是我在gitthub上详细地址:https://github.com/pyawkk/SB-.git
标签:
原文地址:http://my.oschina.net/panyong/blog/372385