标签:
我们需要一些工具来开始 Open XML 的开发。
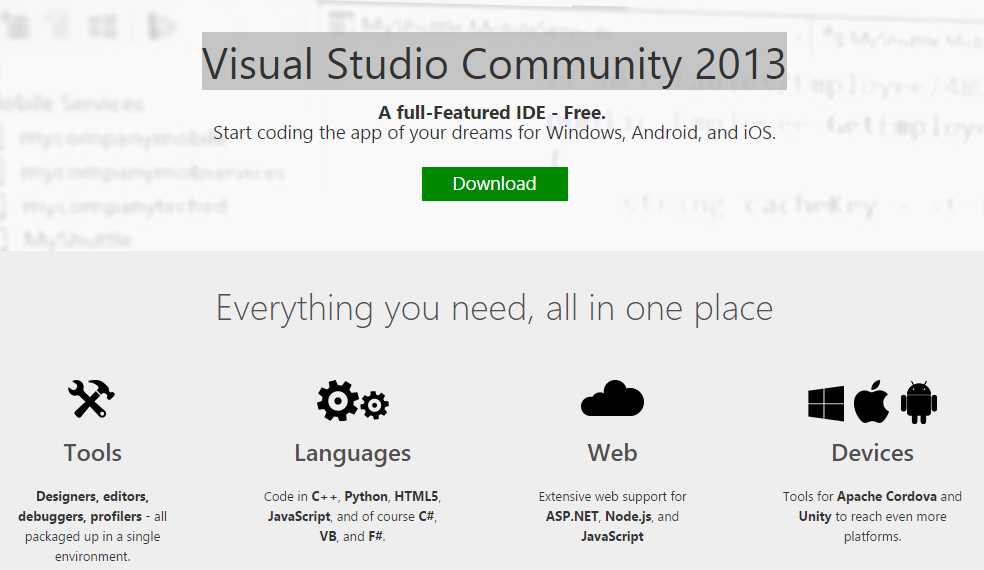
推荐的开发工具是 Visual Studio 社区版。
开发工具:Visual Studio Community 2013
下载地址:http://www.visualstudio.com/en-us/products/visual-studio-community-vs.aspx
包含了 Visual Studio Professional 2013 全部功能,可以在学习环境中、学术研究、参与开源项目中免费使用。

当然,如果你有 Visual Studio 的 2012 版,或者 2013 版也可以使用。
GitHub 项目地址:https://github.com/officedev/open-xml-sdk
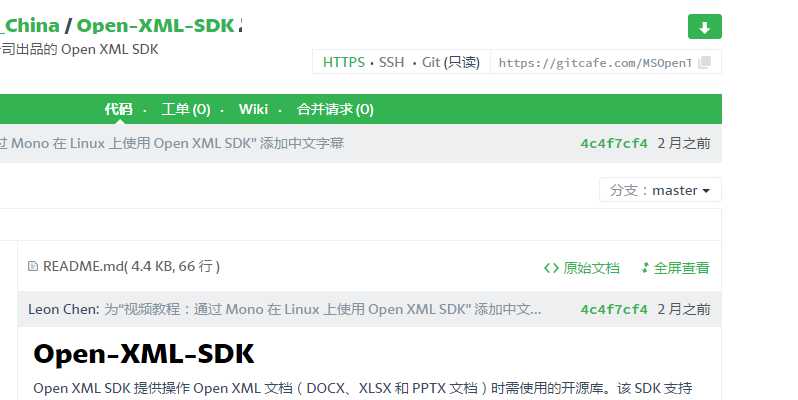
GitCafe 项目地址:https://gitcafe.com/msopentech_china/open-xml-sdk
在 GitCafe 的页面上,右上角的下载图标,可以直接下载源码,或者在它的下面是复制 Git 地址的按钮,灰色的按钮,不太明显,你可以直接通过 Git 来获取源码。

如果你已经使用 VS2013 ,那么直接就可以使用 Git 来获取源码了。
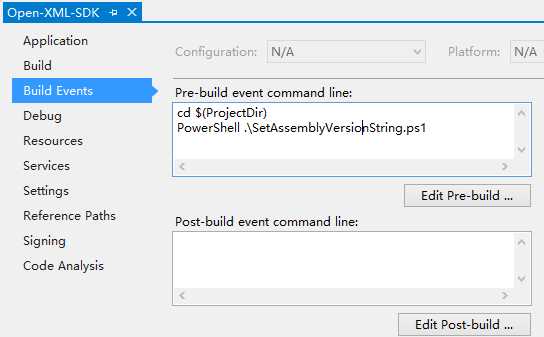
在获取的 Visual Studio 项目中包含预生成命令行,该命令行生成 PowerShell 脚本(和普通命令行生成脚本的方法基本相同),用于设置 AssemblyInfo.cs 版本字符串。要执行此预生成命令行,您必须按照前文所述的方法设置执行策略。如有多个 PowerShell 快捷方式,请确保使用正确的快捷方式进行 Visual Studio 安装。

如果收到错误提示“The command "cd C:\Users\Eric\Documents\Open-Xml-Sdk\ powershell ./SetAssemblyVersionString.ps1" exited with code 1”,那么您需要设置执行策略。您还可以从 Visual Studio 中运行另一个 PowerShell 脚本执行策略。要设置此执行策略:
C:\windows\system32>c:\windows\syswow64\WindowsPowerShell\v1.0\powershell.exe -command set-executionpolicy unrestricted
这一段的工作就是为了自动生成 AssemblyInfo.cs 这个文件,生成的结果如下:
// Copyright (c) Microsoft Open Technologies, Inc.  All rights reserved.  Licensed under the Apache License, Version 2.0.  See License.txt in the project root for license information.
using System;
using System.Reflection;
using System.Runtime.CompilerServices;
using System.Runtime.InteropServices;
using System.Resources;
using System.Security;

// General Information about an assembly is controlled through the following
// set of attributes. Change these attribute values to modify the information
// associated with an assembly.
[assembly: AssemblyTitle("DocumentFormat.OpenXml")]
[assembly: AssemblyDescription("Open XML Format SDK 2.5")]
[assembly: AssemblyConfiguration("")]
[assembly: AssemblyCompany("Microsoft Open Technologies, Inc.")]
[assembly: AssemblyProduct("Open XML Format SDK 2.5")]
[assembly: AssemblyCopyright("© 2014 Microsoft Open Technologies, Inc.  Licensed under the Apache License, Version 2.0.")]
[assembly: AssemblyTrademark("")]
[assembly: AssemblyCulture("")]

// Setting ComVisible to false makes the types in this assembly not visible
// to COM components.  If you need to access a type in this assembly from
// COM, set the ComVisible attribute to true on that type.
[assembly: ComVisible(false)]
[assembly: CLSCompliant(true)]

// The following GUID is for the ID of the typelib if this project is exposed to COM
[assembly: Guid("5439c83f-c709-4487-b979-ce607e81b63e")]

// Version information for an assembly consists of the following four values:
//
//      Major Version
//      Minor Version
//      Build Number
//      Revision
//
// You can specify all the values or you can default the Revision and Build Numbers
// by using the ‘*‘ as shown below:
[assembly: AssemblyVersion("2.5.5893.1380")]
[assembly: AssemblyFileVersion("2.5.5893.1380")]

[assembly: NeutralResourcesLanguageAttribute("en-US")]
[assembly: AllowPartiallyTrustedCallers]
[assembly: SecurityTransparent]
编译完成之后,就可以得到一个名为 DocumentFormat.OpenXml.dll 的程序集了。
在页面 https://msdn.microsoft.com/zh-cn/library/office/gg278308.aspx 中,微软提供了 Word 文件结构的一个简单说明,并提供了一个简单的示例来生成一个基本的 Word 文档。我们可以修改成如下的代码,通过命令行接收两个参数,第一个参数是 Word 文件的名称,第二个参数是文件的内容。
using System;
using System.Collections.Generic;
using System.Linq;
using System.Text;

using DocumentFormat.OpenXml;
using DocumentFormat.OpenXml.Packaging;
using DocumentFormat.OpenXml.Wordprocessing;
using DocumentFormat.OpenXml.Spreadsheet;

namespace OpenXMLSDK_App
{
    class Program
    {
        static void Main(string[] args)
        {
            string path = args[0];
            string msg = args[1];
            CreateWordDoc(path, msg);
        }

        public static void CreateWordDoc(string filepath, string msg)
        {
            using (WordprocessingDocument doc = WordprocessingDocument.Create(filepath, WordprocessingDocumentType.Document))
            {
                // Add a main document part.
                MainDocumentPart mainPart = doc.AddMainDocumentPart();

                // Create the document structure and add some text.
                mainPart.Document = new Document();
                Body body = mainPart.Document.AppendChild(new Body());
                Paragraph para = body.AppendChild(new Paragraph());
                DocumentFormat.OpenXml.Wordprocessing.Run run = para.AppendChild(new DocumentFormat.OpenXml.Wordprocessing.Run());

                // String msg contains the text, "Hello, Word!"
                run.AppendChild(new DocumentFormat.OpenXml.Wordprocessing.Text(msg));
            }
        }
    }
}
我们如下使用生成的程序。
.\OpenXMLSDK_App.exe hello.docx "Hello, world."
这样将会生成一个名为 hello.docx 的文件。生成出来的文件实际上是一个 ZIP 文件,可以将文件的扩展名修改为 .zip,打开之后结构如下。

在 word 文件夹中有一个 document.xml 文件,其中的内容如下所示:
<?xml version="1.0" encoding="utf-8"?>
<w:document xmlns:w="http://schemas.openxmlformats.org/wordprocessingml/2006/main">
  <w:body>
    <w:p>
      <w:r>
        <w:t>Hello, world.</w:t>
      </w:r>
    </w:p>
  </w:body>
</w:document>
w 是 XML 的命名空间,document 表示主文档部件的根元素,body 类似于 HTML 中的 body, 包含主文章的块级别结构集合的容器,p 表示一个段落,r 表示一段连续的文本,t 一段文字。
在页面 https://msdn.microsoft.com/zh-cn/library/office/gg278316.aspx 中,微软提供了 Excel 文档的说明和示例,其中的 CreateSpreasheetWorkbook 静态方法可以直接粘贴到刚才的类中。
public static void CreateSpreadsheetWorkbook(string filepath)
{
    // Create a spreadsheet document by supplying the filepath.
    // By default, AutoSave = true, Editable = true, and Type = xlsx.
    SpreadsheetDocument spreadsheetDocument = SpreadsheetDocument.Create(filepath, SpreadsheetDocumentType.Workbook);

    // Add a WorkbookPart to the document.
    WorkbookPart workbookpart = spreadsheetDocument.AddWorkbookPart();
    workbookpart.Workbook = new Workbook();

    // Add a WorksheetPart to the WorkbookPart.
    WorksheetPart worksheetPart = workbookpart.AddNewPart<WorksheetPart>();
    worksheetPart.Worksheet = new Worksheet(new SheetData());

    // Add Sheets to the Workbook.
    Sheets sheets = spreadsheetDocument.WorkbookPart.Workbook.AppendChild<Sheets>(new Sheets());

    // Append a new worksheet and associate it with the workbook.
    Sheet sheet = new Sheet() { Id = spreadsheetDocument.WorkbookPart.GetIdOfPart(worksheetPart), SheetId = 1, Name = "mySheet" };
    sheets.Append(sheet);

    workbookpart.Workbook.Save();

    // Close the document.
    spreadsheetDocument.Close();
}
写一段程序调用这个方法,就会得到一个 xlsx 文件,其中包含了一个 mySheet 的页面。
生成的 XML 内容如下:
<?xml version="1.0" encoding="utf-8"?>
<x:workbook xmlns:x="http://schemas.openxmlformats.org/spreadsheetml/2006/main">
    <x:sheets>
        <x:sheet name="mySheet" sheetId="1" r:id="Rddc7711f116045e5" xmlns:r="http://schemas.openxmlformats.org/officeDocument/2006/relationships" />
    </x:sheets>
</x:workbook>
程序很容易读懂,我们通过简单的代码就可以生成 Word 或者 Excel 文件了。
标签:
原文地址:http://www.cnblogs.com/haogj/p/4294669.html