标签:des c style class blog code
安装本机库http://wiki.apache.org/hadoop/HowToContribute
sudo apt-get -y install maven build-essential autoconf automake libtool cmake zlib1g-dev pkg-config libssl-dev
sudo tar -zxvf jdk-7u51-linux-x64.tar.gz /usr/lib/jvm/
sudo gedit /etc/profile
添加
#set Java Environment

export JAVA_HOME=/usr/lib/jvm/jdk1.7.0_51
export CLASSPATH=.:$JAVA_HOME/lib:$CLASSPATH
export PATH=$JAVA_HOME/bin:$PATH
source /etc/profile2 、安装ProtocolBuffer
下载https://protobuf.googlecode.com/files/protobuf-2.5.0.tar.gz
tar -zxvf protobuf-2.5.0.tar.gz
cd protobuf-2.5.0
sudo ./configure
sudo make
sudo make check
sudo make install
sudo ldconfig
protoc --version
3 、安装FindBugs
下载http://sourceforge.net/projects/findbugs/files/findbugs/2.0.3/findbugs-2.0.3.tar.gz
解压
|
1
2 |
tar -zxvf findbugs-2.0.3.tar.gzsudo gedit /etc/profile |
添加
#set Findbugs Environment

export FINDBUGS_HOME=/home/hadoop/findbugs-2.0.3
export PATH=$FINDBUGS_HOME/bin:$PATH
source /etc/profile
4 、编译Hadoop-2.2.0
①下载http://mirrors.cnnic.cn/apache/hadoop/common/hadoop-2.2.0/hadoop-2.2.0.tar.gz
②解压tar -zxvf hadoop-2.2.0-src.tar.gz
在
<dependency>
      <groupId>org.mortbay.jetty</groupId>
       <artifactId>jetty</artifactId>
       <scope>test</scope>
</dependency>
前添加
<dependency>
       <groupId>org.mortbay.jetty</groupId>
      <artifactId>jetty-util</artifactId>
      <scope>test</scope>
</dependency>
④执行编译
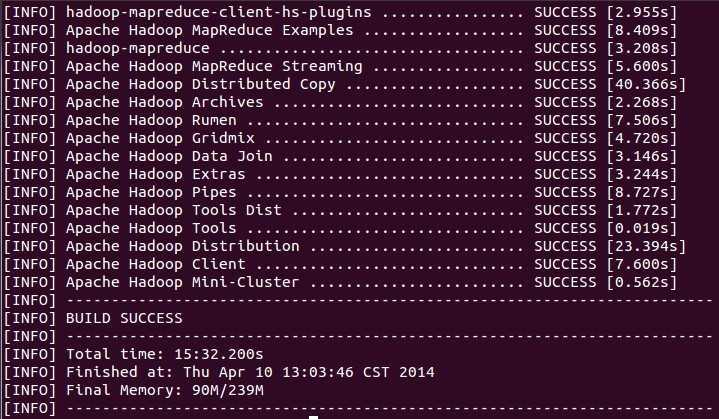
cd hadoop-2.2.0-src
mvn clean package -Pdist,native -DskipTests -Dtar -e -X
(可以不要clean、-e -X)

5、安装Hadoop集群
①这里总共2台主机,在2台主机上创建相同的用户hadoop,在每一台主机上,配置主机名和IP地址,打开每个主机的/etc/hosts文件,输入(这里IP地址根据每台主机的具体IP地址进行设定,可以设置静态IP,可以在master上ping一下slave的地址,看看是否能通信。把ipv6等设置删去)
127.0.0.1      localhost
192.168.116.133      master
192.168.116.134 slave1
并分别修改各自的/etc/hostname文件内容为master、slave1
②安装SSH,设置SSH免密码登录(JDK安装在这里不详述了)
sudo apt-get install ssh
ssh-keygen -t dsa -P ‘’ -f ~/.ssh/id_dsa
cat ~/.ssh/id_dsa.pub >> ~/.ssh/authorized_keys
ssh -version
ssh localhost
将文件从master复制到slave主机的相同文件夹内
cd .ssh
scp authorized_keys slave1:~/.ssh/
(输入ssh slave1查看是否可以从master主机免密码登录slave1
可以从master上切换到slave1主机,输入exit返回到master主机)
③解压编译好的hadoop
tar -zxvf hadooop-2.2.0.tar.gz
添加环境变量
sudo gedit /etc/profile
添加代码
export HADOOP_HOME=/home/hadoop/hadoop-2.2.0
export PATH=$PATH:$HADOOP_HOME/bin:$HADOOP_HOME/sbin
使配置生效
sudo source /etc/profile
④修改配置文件
这些配置参考过官网
cd /hadoop-2.2.0/etc/hadoop
文件hadoop-env.sh
替换export JAVA_HOME=${JAVA_HOME}为自己的JDK安装目录
export JAVA_HOME=/usr/lib/jvm/jdk1.7.0_51
文件mapred-env.sh
添加
export JAVA_HOME=/usr/lib/jvm/jdk1.7.0_51
文件yarn-env.sh
添加
export JAVA_HOME=/usr/lib/jvm/jdk1.7.0_51
文件core-site.xml
  <property>
        <name>fs.defaultFS</name>
        <value>hdfs://master:9000/</value>
  </property>
  <property>
         <name>hadoop.tmp.dir</name>
         <value>file:///home/hadoop/hadoop-2.2.0/tmp</value>
  </property>
文件hdfs-site.xml
  <property>
          <name>dfs.namenode.name.dir</name>
           <value>${hadoop.tmp.dir}/dfs/name</value>
  </property>
  <property>
            <name>dfs.datanode.data.dir</name>
             <value>${hadoop.tmp.dir}/dfs/data</value>
  </property>
  <property>
              <name>dfs.replication</name>
              <value>1</value>
   </property>
文件mapred-site.xml
cp mapred-site.xml.template mapred-site.xml
  <property>
              <name>mapreduce.framework.name</name>
              <value>yarn</value>
   </property>

   <property>
              <name>mapreduce.jobtracker.system.dir</name>
              <value>${hadoop.tmp.dir}/mapred/system</value>
   </property>

   <property>
              <name>mapreduce.cluster.local.dir</name>
              <value>${hadoop.tmp.dir}/mapred/local</value>
    </property>

    <property>
              <name>mapreduce.cluster.temp.dir</name>
              <value>${hadoop.tmp.dir}/mapred/temp</value>
    </property>

    <property>
               <name>mapreduce.jobtracker.address</name>
               <value>master:9001</value>
    </property>
文件yarn-site.xml
<property>
           <name>yarn.resourcemanager.resource-tracker.address</name>
           <value>master:8031</value>
           <description>host is the hostname of the resource manager and port is the port on which the NodeManagers contact the Resource Manager.</description>
  </property>

  <property>
           <name>yarn.resourcemanager.scheduler.address</name>
           <value>master:8030</value>
           <description>host is the hostname of the resourcemanager and port is the port on which the Applications in the cluster talk to the Resource Manager.</description>
  </property>

  <property>
    <name>yarn.resourcemanager.scheduler.class</name>
   <value>org.apache.hadoop.yarn.server.resourcemanager.scheduler.capacity.CapacityScheduler</value>
    <description>In case you do not want to use the default scheduler</description>
  </property>

  <property>
           <name>yarn.resourcemanager.address</name>
           <value>master:8032</value>
           <description>the host is the hostname of the ResourceManager and the port is the port on which the clients can talk to the Resource Manager. </description>
  </property>

  <property>
           <name>yarn.nodemanager.local-dirs</name>
           <value>${hadoop.tmp.dir}/nm-local-dir</value>
           <description>the local directories used by the nodemanager</description>
  </property>

  <property>
           <name>yarn.nodemanager.address</name>
           <value>0.0.0.0:8034</value>
           <description>the nodemanagers bind to this port</description>
  </property>

  <property>
           <name>yarn.nodemanager.resource.memory-mb</name>
           <value>10240</value>
           <description>the amount of memory on the NodeManager in GB</description>
  </property>

  <property>
           <name>yarn.nodemanager.remote-app-log-dir</name>
           <value>${hadoop.tmp.dir}/app-logs</value>
           <description>directory on hdfs where the application logs are moved to </description>
  </property>

   <property>
           <name>yarn.nodemanager.log-dirs</name>
           <value>${hadoop.tmp.dir}/userlogs</value>
           <description>the directories used by Nodemanagers as log directories</description>
  </property>

  <property>
           <name>yarn.nodemanager.aux-services</name>
           <value>mapreduce_shuffle</value>
           <description>shuffle service that needs to be set for Map Reduce to run </description>
  </property>
文件slaves
slave1
⑤在master主机上配置完成,将Hadoop目录复制到slave1主机
scp -r hadoop-2.2.0 slave1:~/
在master主机上格式化namenode
cd hadoop-2.2.0
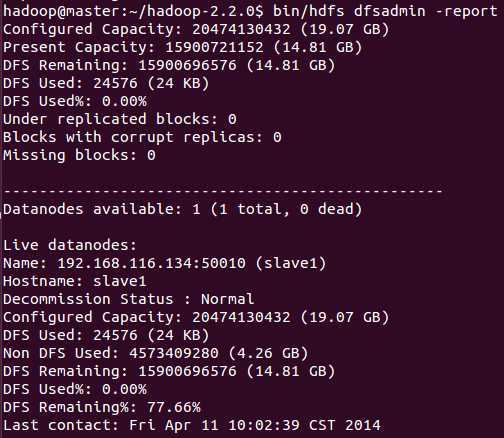
bin/hdfs namenode -format
在master主机上启动集群
sbin/start-all.shjps


在浏览器中输入http://master:50070查看namenode状态
在浏览器中输入http://master:50090查看secondnamenode状态
在浏览器中输入http://master:8088 查看job状态
6 、生成Eclipse插件
https://github.com/winghc/hadoop2x-eclipse-plugin
下载hadoop2x-eclipse-plugin-master
cd src/contrib/eclipse-plugin

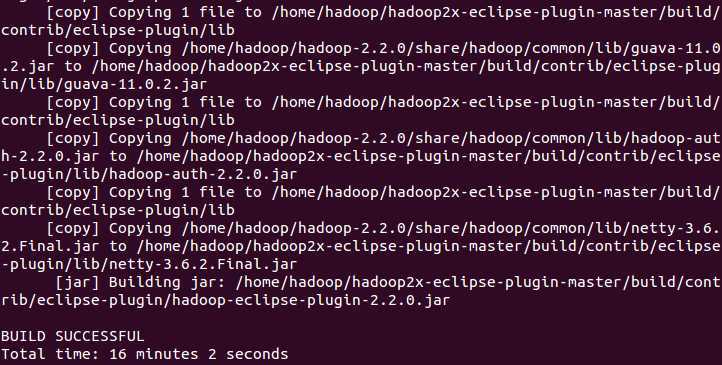
ant jar -Dversion=2.2.0 -Declipse.home=/home/hadoop/eclipse -Dhadoop.home=/home/hadoop/hadoop-2.2.0
jar包生成在目录
/build/contrib/eclipse-plugin/hadoop-eclipse-plugin-2.2.0.jar

Ubuntu12.04-x64编译Hadoop2.2.0和安装Hadoop2.2.0集群,布布扣,bubuko.com
Ubuntu12.04-x64编译Hadoop2.2.0和安装Hadoop2.2.0集群
标签:des c style class blog code
原文地址:http://www.cnblogs.com/fesh/p/3766656.html