标签:
| 题目要求 |
| 程序代码 |
| 结果图片 |
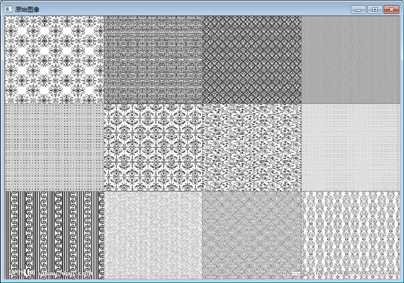
加载一副多细节图像
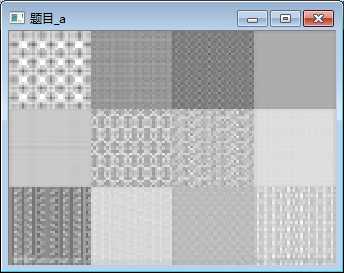
a、利用cvResize函数缩小图像,每个维度上比例为2,重复三次并显示结果
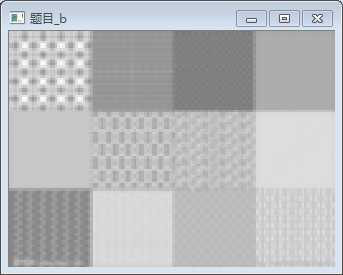
b、利用cvPyrDown函数在原始图像上进行三次降采样,显示结果
  1 // OpenCVExerciseTesting.cpp : 定义控制台应用程序的入口点。
  2 //
  3 //D:\\Work\\Work_Programming\\Source\\Image\\lena.jpg
  4
  5
  6 #include "stdafx.h"
  7 #include <cv.h>
  8 #include <highgui.h>
  9 #include <iostream>
 10 #include <math.h>
 11 #include <stdlib.h>
 12 using namespace cv;
 13 using namespace std;
 14 //函数声明-->--->-->--->-->--->-->--->//
 15
 16 bool IsCanBeUsedForImagePyramid(IplImage * img, uint32_t layerCount, int PyrType = 0);
 17
 18 //<--<--<--<--<--<--<--<--<--函数声明//
 19
 20 int _tmain(int argc, _TCHAR* argv[])
 21 {
 22     const char * fileName1 = "D:\\Work\\Work_Programming\\Source\\Image\\优秀图片\\纹理\\纹理_灰度.jpg";
 23     IplImage * src1 = cvLoadImage(fileName1, CV_LOAD_IMAGE_GRAYSCALE);
 24     assert(src1);
 25
 26     cvNamedWindow("原始图像", 0);
 27     cvNamedWindow("题目_a", 0);
 28     cvNamedWindow("题目_b", 0);
 29
 30     cvShowImage("原始图像", src1);
 31
 32     //---------------------------a:开始--------------------------------//
 33
 34     IplImage * temp_a1 = cvCreateImage(cvSize((src1->width) / 2, (src1->height) / 2), src1->depth, src1->nChannels);
 35     cvZero(temp_a1);
 36
 37     cvResize(src1, temp_a1);
 38
 39     IplImage * temp_a2 = cvCreateImage(cvSize((temp_a1->width) / 2, (temp_a1->height) / 2), temp_a1->depth, temp_a1->nChannels);
 40     cvZero(temp_a2);
 41
 42     cvResize(temp_a1, temp_a2);
 43
 44     IplImage * image_a = cvCreateImage(cvSize((temp_a2->width) / 2, (temp_a2->height) / 2), temp_a2->depth, temp_a2->nChannels);
 45
 46     cvResize(temp_a2, image_a);
 47
 48     cvShowImage("题目_a", image_a);
 49
 50     //---------------------------a:结束--------------------------------//
 51
 52     //---------------------------b:开始--------------------------------//
 53
 54     bool isTheImageCanUsed = IsCanBeUsedForImagePyramid(src1, 3);
 55
 56     IplImage * temp_b1;
 57     IplImage * temp_b2;
 58     IplImage * image_b;
 59
 60     if (isTheImageCanUsed == false)
 61     {
 62         cout << "图像不符合要求" << endl;
 63     }
 64     else
 65     {
 66         temp_b1 = cvCreateImage(cvSize((src1->width) / 2, (src1->height) / 2), src1->depth, src1->nChannels);
 67         cvZero(temp_b1);
 68
 69         cvPyrDown(src1, temp_b1);
 70
 71         temp_b2 = cvCreateImage(cvSize((temp_b1->width) / 2, (temp_b1->height) / 2), temp_b1->depth, temp_b1->nChannels);
 72         cvZero(temp_b2);
 73
 74         cvPyrDown(temp_b1, temp_b2);
 75
 76         image_b = cvCreateImage(cvSize((temp_b2->width) / 2, (temp_b2->height) / 2), temp_b2->depth, temp_b2->nChannels);
 77         cvZero(image_b);
 78
 79         cvPyrDown(temp_b2, image_b);
 80         cvShowImage("题目_b", image_b);
 81     }
 82
 83     //---------------------------b:结束--------------------------------//
 84
 85     cvWaitKey(0);
 86
 87     cvReleaseImage(&src1);
 88     cvReleaseImage(&temp_a1);
 89     cvReleaseImage(&temp_a2);
 90     cvReleaseImage(&image_a);
 91
 92     cvReleaseImage(&temp_b1);
 93     cvReleaseImage(&temp_b2);
 94     cvReleaseImage(&image_b);
 95
 96     cvDestroyWindow("原始图像");
 97     cvDestroyWindow("题目_a");
 98     cvDestroyWindow("题目_b");
 99
100     return 0;
101 }
102
103
104 //cvPyrType表示操作类型,cvPyrDown和cvPyrUp,0代表cvPyrDown,暂时只针对cvPyrDown判断层数
105 bool IsCanBeUsedForImagePyramid(IplImage * img, uint32_t layerCount, int PyrType)
106 {
107     int imgWidth = img->width;
108     int imgHeight = img->height;
109
110     if (imgWidth % 2 != 0 || imgHeight & 2 != 0)
111     {
112         return false;
113     }
114
115     uint32_t tempWidth = imgWidth / 2;
116     uint32_t tempHeight = imgHeight / 2;
117     uint32_t canUsedCount = 0;
118
119     while (tempWidth % 2 == 0)
120     {
121         canUsedCount++;
122         tempWidth = tempWidth / 2;
123     }
124
125     if (canUsedCount < layerCount)
126     {
127         return false;
128     }
129
130     canUsedCount = 0;
131
132     while (tempHeight % 2 == 0)
133     {
134         canUsedCount++;
135         tempHeight = tempHeight / 2;
136     }
137
138     if (canUsedCount < layerCount)
139     {
140         return false;
141     }
142
143     return true;
144 }
 |
|
 |
 |
标签:
原文地址:http://www.cnblogs.com/tingshuixuan2012/p/4448116.html