标签:
20150424 adapter实现i2c驱动程序编写
2015-04-24 Lover雪儿
i2c的驱动程序可以由旧探测方法(adapt)和新探测方法(probe)这两种方法实现.
在i2c_driver中,adapt老方法使用的是attach_adapter作为探测函数,而在新方法中使用的是probe作为探测函数。
 1 I2C设备驱动结构:
 2 struct i2c_driver {
 3     unsigned int class;
 4
 5     /* 添加和卸载I2C设备,老版本*/
 6     int (*attach_adapter)(struct i2c_adapter *) __deprecated;
 7     int (*detach_adapter)(struct i2c_adapter *) __deprecated;
 8
 9     /* 添加和卸载I2C设备,新版本*/
10     int (*probe)(struct i2c_client *, const struct i2c_device_id *);
11     int (*remove)(struct i2c_client *);
12
13     /*休眠和唤醒 */
14     void (*shutdown)(struct i2c_client *);
15     int (*suspend)(struct i2c_client *, pm_message_t mesg);
16     int (*resume)(struct i2c_client *);
17     void (*alert)(struct i2c_client *, unsigned int data);
18     int (*command)(struct i2c_client *client, unsigned int cmd, void *arg);
19     struct device_driver driver;
20     const struct i2c_device_id *id_table;
21
22     /* Device detection callback for automatic device creation */
23     int (*detect)(struct i2c_client *, struct i2c_board_info *);
24     const unsigned short *address_list;
25     struct list_head clients;
26 };
从简单开始学习,我们今天从旧探测方法adapt开始学习实现存储芯片at24cxx的i2c驱动程序,注意本试验的实现必须在linux-2.6.22.6或者更低版本的内核上编译,原因是linux-2.6.30以后的内核i2c.c文件中已经取消了统一的i2c_probe()这个函数了,所以本实验再高版本的内核中是无法实现的.
一、一个简单的I2C驱动
1.定义i2c_client_address_data结构体用于设置设备地址

i2c_client_address_data是在include/linux/i2c.h中定义或者自己定义的一个结构体(如上图所示)。它的一个最主要的作用就是定义设备地址。
在设备地址数组中,I2C_CLIENT_END是指设备地址结束,一旦系统检测到这个值,就会停止扫描。
如上图中所示:
在normal_addr[]数组中填入我们的设备地址(注意设备地址为7位),然后使用I2C_CLIENT_END结束。
如果自己未定义,则会使用i2c.h中默认定义的结构体。
1 struct i2c_client_address_data {
2     unsigned short *normal_i2c;
3     unsigned short *probe;
4     unsigned short *ignore;
5     unsigned short **forces;
6 };
一般来说,采用默认定义的是不会工作的,因为i2c-core是不可能知道设备地址的,i2c-probe探测函数也是不可能找到设备地址,i2c-probe如果能传入地址的话,是很容易导致系统混乱的从而一起未知的错误。
2.定义i2c_driver结构体

如图所示:
在i2c_driver结构体中定义了i2c设备的名字,探测函数attach_adapter,卸载函数detach_adapter这三个属性。
3.完善探测函数等
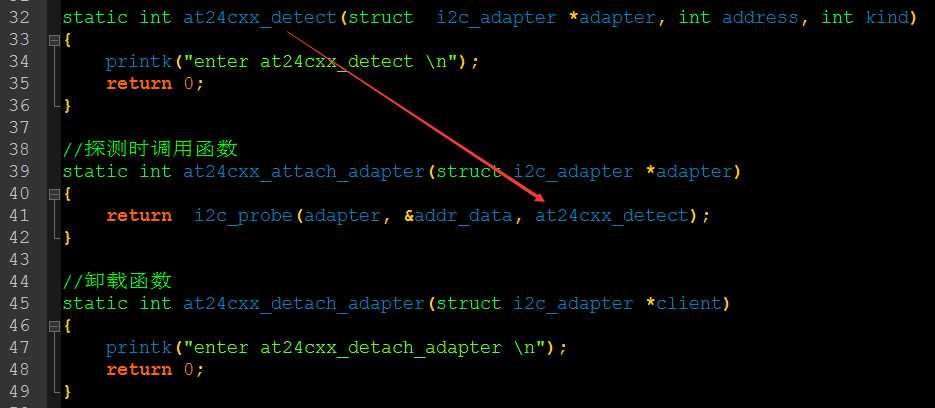
如图所示:分别实现了前面i2c_driver结构体中定义的三个属性。
在探测函数中调用i2c.h(linux2.6.22内核以前)中的的i2c_probe函数进行匹配探测。
4.在入口函数中注册i2c驱动

I2C的设备驱动是通过i2c_add_driver(&at24cxx_i2c_driver)向i2c-core注册的,my_driver中的核心是detach和attach函数,在attach中通过i2c_probe探测到总线上的设备并把设备和驱动建立连接以完成设备的初始化。
static int my_attach(struct i2c_adapter *adapter){
return i2c_probe(adapter, &addr_data, my_probe);
}
5.在出口函数中删除i2c-driver驱动。

6.在linux下编译结果
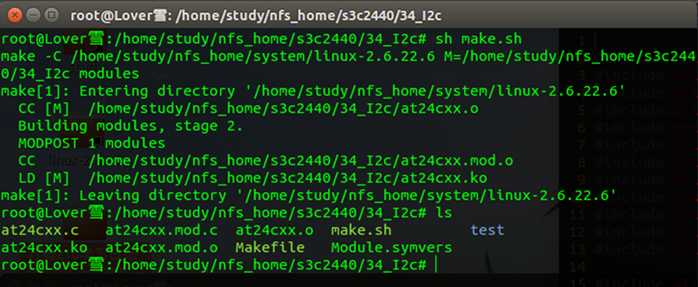
7.总结i2c程序的工作流程
简单的来说i2c的实现驱动就分为三个步骤:定义设备地址i2c_client_address_data、定义i2c_driver结构体实现探测、在入口函数中注册i2c_driver结构体。
接下来就细细讲述一下工作流程吧。
①首先,在i2c_client_address_data的normal_i2c属性中定义好我们设备的设备地址。
②接下来,i2c_driver就出场了,它的功能是定义i2c设备的名字,探测函数,卸载函数三个属性。
③当程序在入口函数中注册i2c-driver驱动之后,系统就会根据我们第一步中定义的设备地址,调用attach_adapter函数进行匹配设备地址是否支持,在attach_adapter函数中主要的功能是在调用i2c_probe函数,当系统检测到设备地址匹配时,就会进入i2c_probe函数中干一些重要的事,接着就进入i2c-probe传入的at24cxx_detect函数中实现我们自己的事。
其实总结一下就下面一个流程:at24cxx_attach_adapter -> i2c_probe -> at24cxx_detect
④当我们卸载设备时,会自动调用i2c_driver中定义的卸载函数at24cxx_detach_adapter进行卸载设备。
⑤最后一步自然就是在出口函数中卸载i2c-driver驱动拉。
附上驱动程序1:

  1 #include <linux/kernel.h>
  2 #include <linux/init.h>
  3 #include <linux/module.h>
  4 #include <linux/slab.h>
  5 #include <linux/jiffies.h>
  6 #include <linux/mutex.h>
  7 #include <linux/i2c.h>
  8 #include <linux/fs.h>
  9 #include <asm/uaccess.h>
 10 #include <linux/i2c-id.h>
 11 #include <linux/device.h>    /* for struct device */
 12 #include <linux/sched.h>    /* for completion */
 13
 14 #include <linux/ctype.h>
 15 #include <linux/types.h>
 16 #include <linux/delay.h>
 17
 18
 19
 20 static unsigned short ignore[]         = {I2C_CLIENT_END};
 21 static unsigned short normal_addr[] = {0X50, I2C_CLIENT_END};    //设备地址:01010000(0x50) 七位
 22
 23 static struct i2c_client_address_data addr_data = {
 24     .normal_i2c    = normal_addr,     //要发出地址信号,并且得到ACK信号,才能确定是否存在这个设备
 25     .probe        = ignore,
 26     .ignore        = ignore,
 27     //.forces                    //强制认为存在这个设备
 28 };
 29
 30
 31 static int at24cxx_detect(struct  i2c_adapter *adapter, int address, int kind)
 32 {
 33     printk("enter at24cxx_detect \n");
 34     return 0;
 35 }
 36
 37 //探测时调用函数
 38 static int at24cxx_attach_adapter(struct i2c_adapter *adapter)
 39 {
 40     return  i2c_probe(adapter, &addr_data, at24cxx_detect);
 41 }
 42
 43 //卸载函数
 44 static int at24cxx_detach_adapter(struct i2c_adapter *client)
 45 {
 46     printk("enter at24cxx_detach_adapter \n");
 47     return 0;
 48 }
 49
 50 //定义i2c_driver结构体
 51 static struct i2c_driver at24cxx_i2c_driver = {
 52     .driver = {
 53         .name = "at24cxx",
 54     },
 55     .attach_adapter = at24cxx_attach_adapter,
 56     .detach_adapter = at24cxx_detach_adapter,
 57 };
 58
 59 static int at24cxx_init(void)
 60 {
 61     /* 1.分配一个i2c_driver结构体 */
 62     /* 2.设置 */
 63     i2c_add_driver(&at24cxx_i2c_driver);    //注册i2c驱动
 64
 65     return 0;
 66 }
 67
 68 void at24cxx_exit(void)
 69 {
 70     i2c_del_driver(&at24cxx_i2c_driver);
 71 }
 72
 73 module_init(at24cxx_init);
 74 module_exit(at24cxx_exit);
 75 MODULE_LICENSE("GPL");
 76
 77
 78 /*
 79
 80 1.在I2C中总共有两条线,SDA,SCL,分别是负责数据的发送,时钟脉冲线
 81 起始信号,SCL变为低电平,SDA由低电平变为高电平
 82 ------------------------------------------------------------------------------
 83 | 起始位S | 7位设备地址 | R/W | 8B数据 | ACK (注8b数据和ACK可以周而复始) | P |
 84 ------------------------------------------------------------------------------
 85 设备地址最后一位表示的是读还是写
 86
 87     刚开始前8个clk里SDA由主机驱动,发送从机设备地址,当从机发现设备地址为自己的时,
 88     便会在第9个时钟里SDA由从机驱动,I2C主机释放SDA,由从机驱动SDA
 89 写数据:前8个CLK,SDA由主机驱动
 90         第9个CLK,SDA由从机驱动
 91 写数据:前8个CLK,SDA由从机驱动
 92         第9个CLK,SDA由主机驱动
 93 停止信号,SCL变为高电平,SDA由低电平变为高电平
 94
 95 2.i2c驱动框架
 96 ----------------------------------------------------------------------
 97 APP:  open,read,write
 98 ----------------------------------------------------------------------
 99 I2c设备驱动程序:drv_open,drv_read,drv_write,     知道数据的含义
100 ----------------------------------------------------------------------
101 I2c总线驱动程序:①识别②提供读写函数,            知道如何收发数据
102 ----------------------------------------------------------------------
103
104 drivers/chip/                            //设备驱动程序
105 drivers/i2c/busses/i2c-s3c2410.c        //总线驱动程序
106 drivers/i2c/algos                        //算法
107 ----------------------------------------------------------------------------------------------
108                             BUS
109             i2c_add    /                    \ i2c_add_diver
110        i2c_adapter /                      \    i2c_driver    .id 表示能支持哪些设备
111                   /    插槽(适配器)          \设备驱动程序    .attach_adapter 接到适配器上去
112 ----------------------------------------------------------------------------------------------
113 i2c总线驱动程序:
114 1.分配一个i2c_adapter    插槽
115 2.设置,algo结构体,核心算法,.master_xfer,
116 3.注册i2c_add_adapter     .master_xfer:发I2C信号的函数
117 ----------------------------------------------------------------------------------------------
118 i2c_add_adapter    ①把结构体放入链表
119                 ②从driver链表取出每一项,得到其ID(设备地址)
120                 ③使用master_xfer函数发start信号,发设备地址
121                 ④如果收到ACK则发现了一个设备client
122 ---------------------------------------------------------------------------------------------
123 i2c设备驱动程序:
124 i2c_add_driver: ①把I2C_driver放入链表
125                 ②使用从adapter链表取出”适配器“,使用它的mater_xfer函数法start信号,发设备地址(.id里面)
126                 如果能收到ACK信号,则表示发现了一个设备client
127 --------------------------------------------------------------------------------------------
128
129 写I2C的driver驱动程序:
130 ①分配一个i2c_driver结构体
131 ②设置
132     attach_adapter  //它直接调用i2c_probe(adap,设备地址,发现这个设备后要调用的函数)
133     detach_client    //卸载驱动后,如果之前有能支持的,则调用它来清理
134 ③注册
135
136
137
138 4.测试1th
139 insmod at24cxx.ko   观察输出信息
140 修改normal_addr为0x60,加载观察输出信息。
141
142
143 */
二、增加I2C设备地址的force属性
不知道大家注意到没有,在i2c_client_address_data结构体中还有一个我们没有使用到的属性.forces,它是用于强制找到设备地址的,现在我们就在前面已经实现好的驱动程序中实现forces属性。
当我们设备不存在时,可以使用.froces属性强制系统认为存在设备,进入probe函数中进行匹配,从而调用at24cxx_detect函数。
编写forces数组
由于.forces属性对应的数据类型为**,即指针的指针,所以此处我们的forces结构体就必须定义为二维数组了,

如图所示,首先我们定义一个force_addr数组,数组中三个元素的意思分别为,
ANY_I2C_BUS:适用于任何总线。
0x60:我们伪造的设备地址。
I2C_CLIENT_END:设备地址结束。
接下来,用unsigned shor类型的指针数组进行封装一下,赋值给.forces属性。
编译加载,可以发现我们的probe函数被正常调用了,说明系统已经强制认识这个设备了。
附上驱动程序2:

  1 #include <linux/kernel.h>
  2 #include <linux/init.h>
  3 #include <linux/module.h>
  4 #include <linux/slab.h>
  5 #include <linux/jiffies.h>
  6 #include <linux/mutex.h>
  7 #include <linux/i2c.h>
  8 #include <linux/fs.h>
  9 #include <asm/uaccess.h>
 10
 11
 12 static unsigned short ignore[]         = {I2C_CLIENT_END};
 13 static unsigned short normal_addr[] = {0X50, I2C_CLIENT_END};    //设备地址:01010000(0x50) 七位
 14                                     /* 改为0x60的话,由于不存在设备地址为0x60的设备,at24cxx_detect不被调用 */
 15
 16 /*static unsigned short force_addr[2][3]  = { {ANY_I2C_BUS, 0x60, I2C_CLIENT_END}, // 强制调用at24cxx_detect
 17                                             {ANY_I2C_BUS, 0x60, I2C_CLIENT_END},
 18                                             };*/
 19 static unsigned short force_addr[] = {ANY_I2C_BUS, 0x60, I2C_CLIENT_END};
 20 static unsigned short * forces[] = {force_addr,NULL};
 21
 22
 23 static struct i2c_client_address_data addr_data = {
 24     .normal_i2c    = normal_addr,     //要发出地址信号,并且得到ACK信号,才能确定是否存在这个设备
 25     .probe        = ignore,
 26     .ignore        = ignore,
 27     .forces        = forces,    //在probe函数中查找,强制认为存在这个设备,从会调用at24cxx_detect
 28 };
 29
 30 static int at24cxx_detect(struct  i2c_adapter *adapter, int address, int kind)
 31 {
 32     printk("enter at24cxx_detect \n");
 33     return 0;
 34 }
 35
 36 //探测时调用函数
 37 static int at24cxx_attach_adapter(struct  i2c_adapter *adapter)
 38 {
 39     return i2c_probe(adapter, &addr_data, at24cxx_detect);
 40 }
 41
 42 //卸载函数
 43 static int at24cxx_detach_adapter(struct i2c_client *client)
 44 {
 45     printk("enter at24cxx_detach_adapter \n");
 46     return 0;
 47 }
 48
 49 //定义i2c_driver结构体
 50 static struct i2c_driver at24cxx_i2c_driver = {
 51     .driver = {
 52         .name = "at24cxx",
 53     },
 54     .attach_adapter = at24cxx_attach_adapter,
 55     .detach_client = at24cxx_detach_adapter,
 56 };
 57
 58 static int at24cxx_init(void)
 59 {
 60     /* 1.分配一个i2c_driver结构体 */
 61     /* 2.设置 */
 62     i2c_add_driver(&at24cxx_i2c_driver);    //注册i2c驱动
 63
 64     return 0;
 65 }
 66
 67 void at24cxx_exit(void)
 68 {
 69     i2c_del_driver(&at24cxx_i2c_driver);
 70 }
 71
 72 module_init(at24cxx_init);
 73 module_exit(at24cxx_exit);
 74 MODULE_LICENSE("GPL");
 75
 76
 77 /*
 78
 79 1.在I2C中总共有两条线,SDA,SCL,分别是负责数据的发送,时钟脉冲线
 80 起始信号,SCL变为低电平,SDA由低电平变为高电平
 81 ------------------------------------------------------------------------------
 82 | 起始位S | 7位设备地址 | R/W | 8B数据 | ACK (注8b数据和ACK可以周而复始) | P |
 83 ------------------------------------------------------------------------------
 84 设备地址最后一位表示的是读还是写
 85
 86     刚开始前8个clk里SDA由主机驱动,发送从机设备地址,当从机发现设备地址为自己的时,
 87     便会在第9个时钟里SDA由从机驱动,I2C主机释放SDA,由从机驱动SDA
 88 写数据:前8个CLK,SDA由主机驱动
 89         第9个CLK,SDA由从机驱动
 90 写数据:前8个CLK,SDA由从机驱动
 91         第9个CLK,SDA由主机驱动
 92 停止信号,SCL变为高电平,SDA由低电平变为高电平
 93
 94 2.i2c驱动框架
 95 ----------------------------------------------------------------------
 96 APP:  open,read,write
 97 ----------------------------------------------------------------------
 98 I2c设备驱动程序:drv_open,drv_read,drv_write,     知道数据的含义
 99 ----------------------------------------------------------------------
100 I2c总线驱动程序:①识别②提供读写函数,            知道如何收发数据
101 ----------------------------------------------------------------------
102
103 drivers/chip/                            //设备驱动程序
104 drivers/i2c/busses/i2c-s3c2410.c        //总线驱动程序
105 drivers/i2c/algos                        //算法
106 ----------------------------------------------------------------------------------------------
107                             BUS
108             i2c_add    /                    \ i2c_add_diver
109        i2c_adapter /                      \    i2c_driver    .id 表示能支持哪些设备
110                   /    插槽(适配器)          \设备驱动程序    .attach_adapter 接到适配器上去
111 ----------------------------------------------------------------------------------------------
112 i2c总线驱动程序:
113 1.分配一个i2c_adapter    插槽
114 2.设置,algo结构体,核心算法,.master_xfer,
115 3.注册i2c_add_adapter     .master_xfer:发I2C信号的函数
116 ----------------------------------------------------------------------------------------------
117 i2c_add_adapter    ①把结构体放入链表
118                 ②从driver链表取出每一项,得到其ID(设备地址)
119                 ③使用master_xfer函数发start信号,发设备地址
120                 ④如果收到ACK则发现了一个设备client
121 ---------------------------------------------------------------------------------------------
122 i2c设备驱动程序:
123 i2c_add_driver: ①把I2C_driver放入链表
124                 ②使用从adapter链表取出”适配器“,使用它的mater_xfer函数法start信号,发设备地址(.id里面)
125                 如果能收到ACK信号,则表示发现了一个设备client
126 --------------------------------------------------------------------------------------------
127
128 写I2C的driver驱动程序:
129 ①分配一个i2c_driver结构体
130 ②设置
131     attach_adapter  //它直接调用i2c_probe(adap,设备地址,发现这个设备后要调用的函数)
132     detach_client    //卸载驱动后,如果之前有能支持的,则调用它来清理
133 ③注册
134
135
136
137 4.测试1th
138 insmod at24cxx.ko   观察输出信息
139 修改normal_addr为0x60,加载观察输出信息。
140
141
142 */
三、完善i2c_probe函数里的参数at24cxx_detect函数
在at24cxx_detect函数中,它的主要功能就是构建一个i2c_client结构体
 1 struct i2c_client {
 2     unsigned short flags;
 3     unsigned short addr;
 4     char name[I2C_NAME_SIZE];
 5     struct i2c_adapter *adapter; //定义adapter适配器
 6     struct i2c_driver *driver;
 7     struct device dev;
 8     int irq;
 9     char driver_name[KOBJ_NAME_LEN];
10     struct list_head list;
11     struct completion released;
12 };
13
14 struct i2c_client代表一个挂载到i2c总线上的i2c从设备,该设备所需要的数据结构,其中包括
15 该i2c从设备所依附的i2c主设备 struct i2c_adapter *adapter
16 该i2c从设备的驱动程序struct i2c_driver *driver
17 作为i2c从设备所通用的成员变量,比如addr, name等
18 该i2c从设备驱动所特有的数据,依附于dev->driver_data下

如图所示。
首先定义一个全局的i2c_client结构体,然后再at24cxx_detect函数中对其进行设置。
61行:分配一个i2c_client
62行:设置设备地址
63行:设置I2C适配器
64行:设置连接i2c_driver结构体
65行:设置client的名字
66行:加载client结构体,当要卸载驱动时,便会调用detach函数,如下图所示:

在卸载函数中,首先卸载client结构体,然后再释放client结构体的内存。
附上驱动程序3:

  1 #include <linux/kernel.h>
  2 #include <linux/init.h>
  3 #include <linux/module.h>
  4 #include <linux/slab.h>
  5 #include <linux/jiffies.h>
  6 #include <linux/mutex.h>
  7 #include <linux/i2c.h>
  8
  9
 10 static unsigned short ignore[]         = {I2C_CLIENT_END};
 11 static unsigned short normal_addr[] = {0X50, I2C_CLIENT_END};    //设备地址:01010000(0x50) 七位
 12                                     /* 改为0x60的话,由于不存在设备地址为0x60的设备,at24cxx_detect不被调用 */
 13
 14 /*static unsigned short force_addr[2][3]  = { {ANY_I2C_BUS, 0x60, I2C_CLIENT_END}, // 强制调用at24cxx_detect
 15                                             {ANY_I2C_BUS, 0x60, I2C_CLIENT_END},
 16                                             };*/
 17 static unsigned short force_addr[] = {ANY_I2C_BUS, 0x60, I2C_CLIENT_END};
 18 static unsigned short * forces[] = {force_addr,NULL};
 19
 20
 21 static struct i2c_client_address_data addr_data = {
 22     .normal_i2c    = normal_addr,     //要发出地址信号,并且得到ACK信号,才能确定是否存在这个设备
 23     .probe        = ignore,
 24     .ignore        = ignore,
 25     .forces        = forces,    //在probe函数中查找,强制认为存在这个设备,从会调用at24cxx_detect
 26 };
 27
 28 static struct i2c_driver at24cxx_i2c_driver;
 29
 30 static int at24cxx_detect(struct  i2c_adapter *adapter, int address, int kind)
 31 {
 32     struct i2c_client *new_client;
 33     printk("enter at24cxx_detect \n");
 34
 35     /* ④构造一个i2c_client结构体:以后收发数据靠它,里面有.address .adapter  .driver */
 36     new_client = kzalloc(sizeof(struct i2c_client),GFP_KERNEL);
 37     new_client->addr     = address;
 38     new_client->adapter = adapter;
 39     new_client->driver  = &at24cxx_i2c_driver;
 40     strcpy( new_client->name, "at24cxx" );
 41     i2c_attach_client(new_client);  //等要卸载驱动时,会调用at24cxx_detach_adapter函数
 42
 43     return 0;
 44 }
 45
 46 //探测时调用函数
 47 static int at24cxx_attach_adapter(struct  i2c_adapter *adapter)
 48 {
 49     return i2c_probe(adapter, &addr_data, at24cxx_detect);
 50 }
 51
 52 //卸载函数
 53 static int at24cxx_detach_adapter(struct i2c_client *client)
 54 {
 55     printk("enter at24cxx_detach_adapter \n");
 56
 57     if(client){
 58         i2c_detach_client(client);                    //client结构体
 59         kfree(i2c_get_clientdata(client));            //释放client的内存
 60     }
 61     return 0;
 62 }
 63
 64 //定义i2c_driver结构体
 65 static struct i2c_driver at24cxx_i2c_driver = {
 66     .driver = {
 67         .name = "at24cxx",
 68     },
 69     .attach_adapter = at24cxx_attach_adapter,
 70     .detach_client = at24cxx_detach_adapter,
 71 };
 72
 73 static int at24cxx_init(void)
 74 {
 75     /* 1.分配一个i2c_driver结构体 */
 76     /* 2.设置 */
 77     i2c_add_driver(&at24cxx_i2c_driver);    //注册i2c驱动
 78
 79     return 0;
 80 }
 81
 82 void at24cxx_exit(void)
 83 {
 84     i2c_del_driver(&at24cxx_i2c_driver);
 85 }
 86
 87 module_init(at24cxx_init);
 88 module_exit(at24cxx_exit);
 89 MODULE_LICENSE("GPL");
 90
 91
 92 /*
 93
 94 1.在I2C中总共有两条线,SDA,SCL,分别是负责数据的发送,时钟脉冲线
 95 起始信号,SCL变为低电平,SDA由低电平变为高电平
 96 ------------------------------------------------------------------------------
 97 | 起始位S | 7位设备地址 | R/W | 8B数据 | ACK (注8b数据和ACK可以周而复始) | P |
 98 ------------------------------------------------------------------------------
 99 设备地址最后一位表示的是读还是写
100
101     刚开始前8个clk里SDA由主机驱动,发送从机设备地址,当从机发现设备地址为自己的时,
102     便会在第9个时钟里SDA由从机驱动,I2C主机释放SDA,由从机驱动SDA
103 写数据:前8个CLK,SDA由主机驱动
104         第9个CLK,SDA由从机驱动
105 写数据:前8个CLK,SDA由从机驱动
106         第9个CLK,SDA由主机驱动
107 停止信号,SCL变为高电平,SDA由低电平变为高电平
108
109 2.i2c驱动框架
110 ----------------------------------------------------------------------
111 APP:  open,read,write
112 ----------------------------------------------------------------------
113 I2c设备驱动程序:drv_open,drv_read,drv_write,     知道数据的含义
114 ----------------------------------------------------------------------
115 I2c总线驱动程序:①识别②提供读写函数,            知道如何收发数据
116 ----------------------------------------------------------------------
117
118 drivers/chip/                            //设备驱动程序
119 drivers/i2c/busses/i2c-s3c2410.c        //总线驱动程序
120 drivers/i2c/algos                        //算法
121 ----------------------------------------------------------------------------------------------
122                             BUS
123             i2c_add    /                    \ i2c_add_diver
124        i2c_adapter /                      \    i2c_driver    .id 表示能支持哪些设备
125                   /    插槽(适配器)          \设备驱动程序    .attach_adapter 接到适配器上去
126 ----------------------------------------------------------------------------------------------
127 i2c总线驱动程序:
128 1.分配一个i2c_adapter    插槽
129 2.设置,algo结构体,核心算法,.master_xfer,
130 3.注册i2c_add_adapter     .master_xfer:发I2C信号的函数
131 ----------------------------------------------------------------------------------------------
132 i2c_add_adapter    ①把结构体放入链表
133                 ②从driver链表取出每一项,得到其ID(设备地址)
134                 ③使用master_xfer函数发start信号,发设备地址
135                 ④如果收到ACK则发现了一个设备client
136 ---------------------------------------------------------------------------------------------
137 i2c设备驱动程序:
138 i2c_add_driver: ①把I2C_driver放入链表
139                 ②使用从adapter链表取出”适配器“,使用它的mater_xfer函数法start信号,发设备地址(.id里面)
140                 如果能收到ACK信号,则表示发现了一个设备client
141 --------------------------------------------------------------------------------------------
142
143 写I2C的driver驱动程序:
144 ①分配一个i2c_driver结构体
145 ②设置
146     attach_adapter  //它直接调用i2c_probe(adap,设备地址,发现这个设备后要调用的函数)
147     detach_client    //卸载驱动后,如果之前有能支持的,则调用它来清理
148 ③注册
149
150
151
152 4.测试1th
153 insmod at24cxx.ko   观察输出信息
154 修改normal_addr为0x60,加载观察输出信息。
155
156
157 */
四、创建I2C的字符设备,并且创建字符设备节点
前面我们虽然写好了i2c的最简单驱动,但是我们却无法访问,所以,为了便于我们访问i2c设备,此处我们将i2c设备注册为一个字符设备,以便读写。
创建字符设备大概的流程想必大家已经都很了解,此处不再赘述,就讲一下大概的步骤。
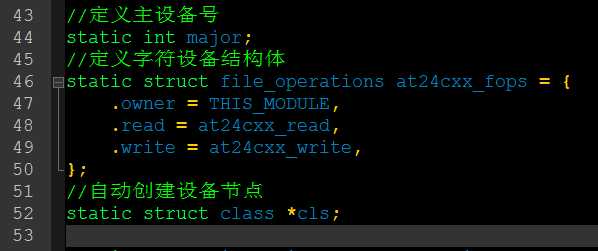
①定义主设备号,以及字符设备的file_operation结构体,为了自动创建设备节点,还需定义一个class结构体,如下图所示:
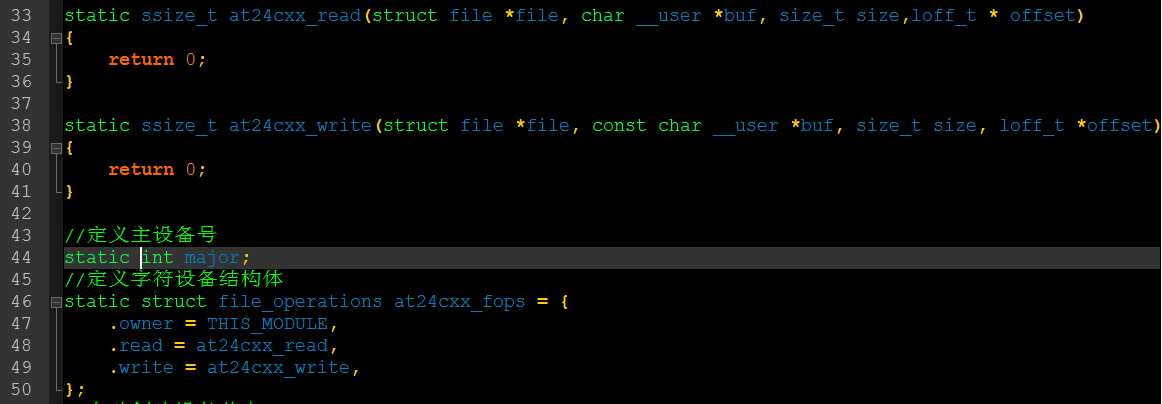
②实现file_operation结构体中的read、write函数。
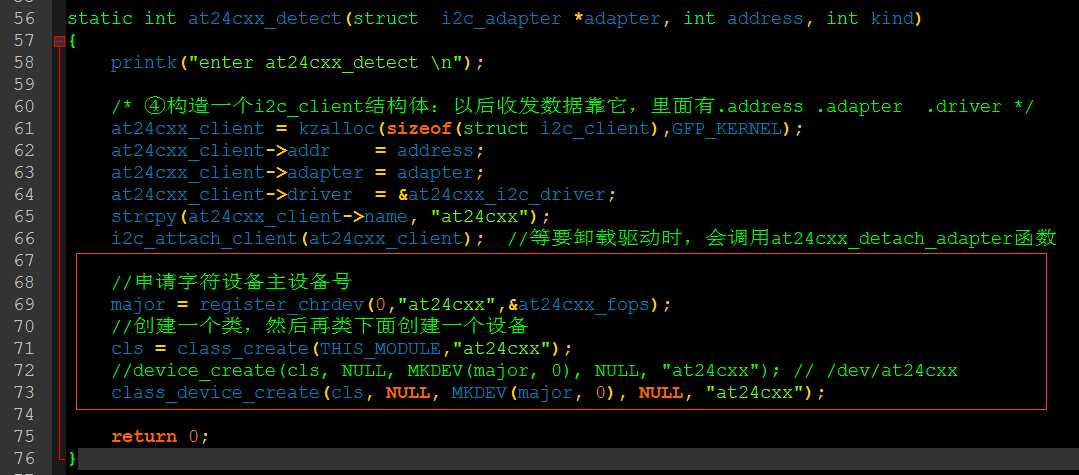
③在at24cxx_detect函数中申请字符设备,创建类,然后自动创建设备节点,如下图所示:
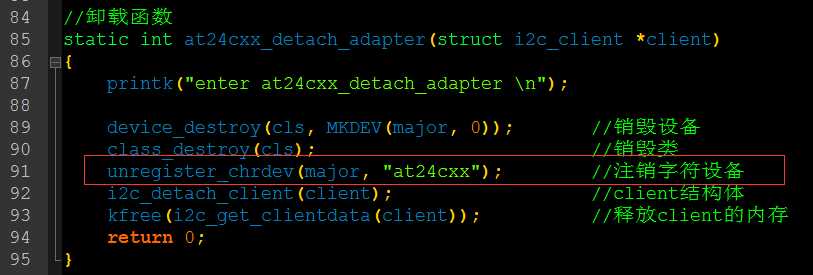
④最后自然就是在at24cxx_detach_adapter函数中注销字符设备咯
附上驱动程序4:

  1 #include <linux/kernel.h>
  2 #include <linux/init.h>
  3 #include <linux/module.h>
  4 #include <linux/slab.h>
  5 #include <linux/jiffies.h>
  6 #include <linux/mutex.h>
  7 #include <linux/i2c.h>
  8 #include <linux/fs.h>
  9
 10
 11 static unsigned short ignore[]         = {I2C_CLIENT_END};
 12 static unsigned short normal_addr[] = {0X50, I2C_CLIENT_END};    //设备地址:01010000(0x50) 七位
 13                                     /* 改为0x60的话,由于不存在设备地址为0x60的设备,at24cxx_detect不被调用 */
 14
 15 /*static unsigned short force_addr[2][3]  = { {ANY_I2C_BUS, 0x60, I2C_CLIENT_END}, // 强制调用at24cxx_detect
 16                                             {ANY_I2C_BUS, 0x60, I2C_CLIENT_END},
 17                                             };*/
 18 static unsigned short force_addr[] = {ANY_I2C_BUS, 0x60, I2C_CLIENT_END};
 19 static unsigned short * forces[] = {force_addr,NULL};
 20
 21
 22 static struct i2c_client_address_data addr_data = {
 23     .normal_i2c    = normal_addr,     //要发出地址信号,并且得到ACK信号,才能确定是否存在这个设备
 24     .probe        = ignore,
 25     .ignore        = ignore,
 26     .forces        = forces,    //在probe函数中查找,强制认为存在这个设备,从会调用at24cxx_detect
 27 };
 28
 29 static struct i2c_driver at24cxx_i2c_driver;
 30
 31
 32 static ssize_t at24cxx_read(struct file *file, char __user *buf, size_t size,loff_t * offset)
 33 {
 34     return 0;
 35 }
 36
 37 static ssize_t at24cxx_write(struct file *file, const char __user *buf, size_t size, loff_t *offset)
 38 {
 39     return 0;
 40 }
 41
 42 //定义主设备号
 43 static int major;
 44 //定义字符设备结构体
 45 static struct file_operations at24cxx_fops = {
 46     .owner = THIS_MODULE,
 47     .read = at24cxx_read,
 48     .write = at24cxx_write,
 49 };
 50 //自动创建设备节点
 51 static struct class *cls;
 52
 53 static struct i2c_client *at24cxx_client;
 54
 55 static int at24cxx_detect(struct  i2c_adapter *adapter, int address, int kind)
 56 {
 57     printk("enter at24cxx_detect \n");
 58
 59     /* ④构造一个i2c_client结构体:以后收发数据靠它,里面有.address .adapter  .driver */
 60     at24cxx_client = kzalloc(sizeof(struct i2c_client),GFP_KERNEL);
 61     at24cxx_client->addr     = address;
 62     at24cxx_client->adapter = adapter;
 63     at24cxx_client->driver  = &at24cxx_i2c_driver;
 64     strcpy(at24cxx_client->name, "at24cxx");
 65     i2c_attach_client(at24cxx_client);  //等要卸载驱动时,会调用at24cxx_detach_adapter函数
 66
 67     //申请字符设备主设备号
 68     major = register_chrdev(0,"at24cxx",&at24cxx_fops);
 69     //创建一个类,然后再类下面创建一个设备
 70     cls = class_create(THIS_MODULE,"at24cxx");
 71     //device_create(cls, NULL, MKDEV(major, 0), NULL, "at24cxx"); // /dev/at24cxx
 72     class_device_create(cls, NULL, MKDEV(major, 0), NULL, "at24cxx");
 73
 74     return 0;
 75 }
 76
 77 //探测时调用函数
 78 static int at24cxx_attach_adapter(struct  i2c_adapter *adapter)
 79 {
 80     return i2c_probe(adapter, &addr_data, at24cxx_detect);
 81 }
 82
 83 //卸载函数
 84 static int at24cxx_detach_adapter(struct i2c_client *client)
 85 {
 86     printk("enter at24cxx_detach_adapter \n");
 87
 88     device_destroy(cls, MKDEV(major, 0));        //销毁设备
 89     class_destroy(cls);                            //销毁类
 90     unregister_chrdev(major, "at24cxx");        //注销字符设备
 91     i2c_detach_client(client);                    //client结构体
 92     kfree(i2c_get_clientdata(client));            //释放client的内存
 93     return 0;
 94 }
 95
 96 //定义i2c_driver结构体
 97 static struct i2c_driver at24cxx_i2c_driver = {
 98     .driver = {
 99         .name = "at24cxx",
100     },
101     .attach_adapter = at24cxx_attach_adapter,
102     .detach_client = at24cxx_detach_adapter,
103 };
104
105 static int at24cxx_init(void)
106 {
107     /* 1.分配一个i2c_driver结构体 */
108     /* 2.设置 */
109     i2c_add_driver(&at24cxx_i2c_driver);    //注册i2c驱动
110
111     return 0;
112 }
113
114 void at24cxx_exit(void)
115 {
116     i2c_del_driver(&at24cxx_i2c_driver);
117 }
118
119 module_init(at24cxx_init);
120 module_exit(at24cxx_exit);
121 MODULE_LICENSE("GPL");
122
123
124 /*
125
126 1.在I2C中总共有两条线,SDA,SCL,分别是负责数据的发送,时钟脉冲线
127 起始信号,SCL变为低电平,SDA由低电平变为高电平
128 ------------------------------------------------------------------------------
129 | 起始位S | 7位设备地址 | R/W | 8B数据 | ACK (注8b数据和ACK可以周而复始) | P |
130 ------------------------------------------------------------------------------
131 设备地址最后一位表示的是读还是写
132
133     刚开始前8个clk里SDA由主机驱动,发送从机设备地址,当从机发现设备地址为自己的时,
134     便会在第9个时钟里SDA由从机驱动,I2C主机释放SDA,由从机驱动SDA
135 写数据:前8个CLK,SDA由主机驱动
136         第9个CLK,SDA由从机驱动
137 写数据:前8个CLK,SDA由从机驱动
138         第9个CLK,SDA由主机驱动
139 停止信号,SCL变为高电平,SDA由低电平变为高电平
140
141 2.i2c驱动框架
142 ----------------------------------------------------------------------
143 APP:  open,read,write
144 ----------------------------------------------------------------------
145 I2c设备驱动程序:drv_open,drv_read,drv_write,     知道数据的含义
146 ----------------------------------------------------------------------
147 I2c总线驱动程序:①识别②提供读写函数,            知道如何收发数据
148 ----------------------------------------------------------------------
149
150 drivers/chip/                            //设备驱动程序
151 drivers/i2c/busses/i2c-s3c2410.c        //总线驱动程序
152 drivers/i2c/algos                        //算法
153 ----------------------------------------------------------------------------------------------
154                             BUS
155             i2c_add    /                    \ i2c_add_diver
156        i2c_adapter /                      \    i2c_driver    .id 表示能支持哪些设备
157                   /    插槽(适配器)          \设备驱动程序    .attach_adapter 接到适配器上去
158 ----------------------------------------------------------------------------------------------
159 i2c总线驱动程序:
160 1.分配一个i2c_adapter    插槽
161 2.设置,algo结构体,核心算法,.master_xfer,
162 3.注册i2c_add_adapter     .master_xfer:发I2C信号的函数
163 ----------------------------------------------------------------------------------------------
164 i2c_add_adapter    ①把结构体放入链表
165                 ②从driver链表取出每一项,得到其ID(设备地址)
166                 ③使用master_xfer函数发start信号,发设备地址
167                 ④如果收到ACK则发现了一个设备client
168 ---------------------------------------------------------------------------------------------
169 i2c设备驱动程序:
170 i2c_add_driver: ①把I2C_driver放入链表
171                 ②使用从adapter链表取出”适配器“,使用它的mater_xfer函数法start信号,发设备地址(.id里面)
172                 如果能收到ACK信号,则表示发现了一个设备client
173 --------------------------------------------------------------------------------------------
174
175 写I2C的driver驱动程序:
176 ①分配一个i2c_driver结构体
177 ②设置
178     attach_adapter  //它直接调用i2c_probe(adap,设备地址,发现这个设备后要调用的函数)
179     detach_client    //卸载驱动后,如果之前有能支持的,则调用它来清理
180 ③注册
181
182
183
184 4.测试1th
185 insmod at24cxx.ko   观察输出信息
186 修改normal_addr为0x60,加载观察输出信息。
187
188
189 */
五、实现字符设备的读写函数
前面在第四节中我们已经实现了注册i2c的字符设备,接下来最后一步就是实现读写函数了。
1.at24cxx_write(含详细注释)
 1 static ssize_t at24cxx_write(struct file *file, const char __user *buf, size_t size,loff_t *offset )
 2 {
 3     unsigned char val[2] ;        //定义val用于保存数据
 4     struct i2c_msg msg[1];        //定义一个i2c_msg用于发送msg
 5     int ret;                    //用于保存返回值
 6
 7     /* 写 addr = buf[0]   data = buf[1]*/
 8     if(size != 2)                //如果数据的大小不等于2则退出
 9         return -EINVAL;
10
11     if(copy_from_user(val,buf,2));        //读取应用程序要发送的数据
12
13     //构造I2C消息,数据传输三要素:源,目的,长度
14     msg[0].addr = at24cxx_client->addr;    //目的:从设备地址
15     msg[0].buf  = val;                    //源,目的,长度
16     msg[0].len    = 2;                    //长度:地址+数据=2byte
17     msg[0].flags = 0;                    //0:表示写数据
18
19     //传输消息
20     ret = i2c_transfer(at24cxx_client->adapter, msg, 1);    //发送i2c消息
21
22     if(ret == 1)
23         return size;                    //若是发送成功则返回发送数据的大小
24     else
25         return -EIO;
26 }
2. at24cxx_read(含详细注释)
 1 static ssize_t at24cxx_read(struct file *file, char __user *buf, size_t size,loff_t * offset)
 2 {
 3     unsigned char address;            //定义要读取数据的地址
 4     unsigned char data;                //保存数据的内容
 5     struct i2c_msg msg[1];            //定义i2c_msg结构体用于读取数据
 6     int ret;
 7
 8     /* 读 addr = buf[0]   data = buf[1]*/
 9     if(size != 1)                    //如果大小不为1则退出
10         return -EINVAL;
11
12     if(copy_from_user(&address,buf,1));
13
14     //构造I2C消息,数据传输三要素:源,目的,长度]
15     /* 读at24cxx时,要先把要读的存储空间发给它 */
16     msg[0].addr = at24cxx_client->addr;    //目的:从设备地址
17     msg[0].buf  = &address;                //源,
18     msg[0].len    = 1;                    //长度:地址+数据=2byte
19     msg[0].flags = 0;                    //0:表示写数据
20
21     //然后启动读操作
22     msg[1].addr = at24cxx_client->addr;    //源:从设备地址
23     msg[1].buf  = &data;                //目的,
24     msg[1].len    = 1;                    //长度:地址+数据=1byte
25     msg[1].flags = 0;                    //1:表示读数据
26
27     //传输消息
28     ret = i2c_transfer(at24cxx_client->adapter, msg, 2);    //开始从适配器读取消息到msg
29
30     if(ret == 2){
31         if(copy_to_user(&buf[0], &data, 1));
32         return size;
33     }else{
34         return -EIO;
35     }
36 }
3.i2c读写测试函数
 1 /* i2c测试程序 */
 2
 3 #include <stdio.h>
 4 #include <stdlib.h>
 5 #include <string.h>
 6 #include <sys/types.h>
 7 #include <sys/stat.h>
 8 #include <fcntl.h>
 9
10 /* i2c_test r addr
11  * i2c_test w addr val
12  */
13 int main(int argc, char **argv)
14 {
15     int fd;
16     unsigned char buf[2];
17
18     if((argc != 3) && (argc != 4)){
19         printf("%s r addr \n",argv[0]);
20         printf("%s w addr val \n",argv[0]);
21         return -1;
22     }
23
24     fd = open("/dev/at24cxx", O_RDWR);
25     if(fd < 0){
26         printf("can‘t open /dev/at24cxx \n");
27         return -1;
28     }
29
30     if(strcmp(argv[1], "r") == 0){            //读
31         buf[0] = srtoul(argv[2], NULL, 0);    //将字符串转换成无符号长整型数
32         read(fd, buff, 1);
33         printf("data: %c, %d, 0x%2x\n",buff[0],buf[0],buf[0]);
34
35     }else if((strcmp(argv[1], "w") == 0) && (argc == 4)) {    //写
36         buf[0] = srtoul(argv[2],NULL, 0);    //读取地址,将字符串转换成无符号长整型数
37         buf[1] = srtoul(argv[3],NULL, 0);    //将字符串转换成无符号长整型数
38         if( write(fd, buf, 2) !== 2)
39             printf("write err, addr = 0x%02x, data = 0x%02x\n", buf[0], buf[1]);
40
41     }else{                                    //出错返回
42         printf("%s r addr \n",argv[0]);
43         printf("%s w addr val \n",argv[0]);
44         return -1;
45     }
46
47     return 0;
48 }
49
50 /*
51 测试:
52
53 i2c_test r 0
54 i2c_test w 0 0x61
55 i2c_test r 0
56
57 */
附上驱动程序5:

  1 #include <linux/kernel.h>
  2 #include <linux/init.h>
  3 #include <linux/module.h>
  4 #include <linux/slab.h>
  5 #include <linux/jiffies.h>
  6 #include <linux/mutex.h>
  7 #include <linux/i2c.h>
  8 #include <linux/fs.h>
  9 #include <asm/uaccess.h>
 10
 11
 12 static unsigned short ignore[]         = {I2C_CLIENT_END};
 13 static unsigned short normal_addr[] = {0X50, I2C_CLIENT_END};    //设备地址:01010000(0x50) 七位
 14                                     /* 改为0x60的话,由于不存在设备地址为0x60的设备,at24cxx_detect不被调用 */
 15
 16 /*static unsigned short force_addr[2][3]  = { {ANY_I2C_BUS, 0x60, I2C_CLIENT_END}, // 强制调用at24cxx_detect
 17                                             {ANY_I2C_BUS, 0x60, I2C_CLIENT_END},
 18                                             };*/
 19 static unsigned short force_addr[] = {ANY_I2C_BUS, 0x60, I2C_CLIENT_END};
 20 static unsigned short * forces[] = {force_addr,NULL};
 21
 22
 23 static struct i2c_client_address_data addr_data = {
 24     .normal_i2c    = normal_addr,     //要发出地址信号,并且得到ACK信号,才能确定是否存在这个设备
 25     .probe        = ignore,
 26     .ignore        = ignore,
 27     .forces        = forces,    //在probe函数中查找,强制认为存在这个设备,从会调用at24cxx_detect
 28 };
 29
 30 static struct i2c_driver at24cxx_i2c_driver;
 31 static struct i2c_client *at24cxx_client;
 32
 33 static ssize_t at24cxx_read(struct file *file, char __user *buf, size_t size,loff_t * offset)
 34 {
 35     unsigned char address;            //定义要读取数据的地址
 36     unsigned char data;                //保存数据的内容
 37     struct i2c_msg msg[1];            //定义i2c_msg结构体用于读取数据
 38     int ret;
 39
 40     /* 读 addr = buf[0]   data = buf[1]*/
 41     if(size != 1)                    //如果大小不为1则退出
 42         return -EINVAL;
 43
 44     if(copy_from_user(&address,buf,1));
 45
 46     //构造I2C消息,数据传输三要素:源,目的,长度]
 47     /* 读at24cxx时,要先把要读的存储空间发给它 */
 48     msg[0].addr = at24cxx_client->addr;    //目的:从设备地址
 49     msg[0].buf  = &address;                //源,
 50     msg[0].len    = 1;                    //长度:地址+数据=2byte
 51     msg[0].flags = 0;                    //0:表示写数据
 52
 53     //然后启动读操作
 54     msg[1].addr = at24cxx_client->addr;    //源:从设备地址
 55     msg[1].buf  = &data;                //目的,
 56     msg[1].len    = 1;                    //长度:地址+数据=1byte
 57     msg[1].flags = 0;                    //1:表示读数据
 58
 59     //传输消息
 60     ret = i2c_transfer(at24cxx_client->adapter, msg, 2);    //开始从适配器读取消息到msg
 61
 62     if(ret == 2){
 63         if(copy_to_user(&buf[0], &data, 1));
 64         return size;
 65     }else{
 66         return -EIO;
 67     }
 68 }
 69
 70 static ssize_t at24cxx_write(struct file *file, const char __user *buf, size_t size,loff_t *offset )
 71 {
 72     unsigned char val[2] ;        //定义val用于保存数据
 73     struct i2c_msg msg[1];        //定义一个i2c_msg用于发送msg
 74     int ret;                    //用于保存返回值
 75
 76     /* 写 addr = buf[0]   data = buf[1]*/
 77     if(size != 2)                //如果数据的大小不等于2则退出
 78         return -EINVAL;
 79
 80     if(copy_from_user(val,buf,2));        //读取应用程序要发送的数据
 81
 82     //构造I2C消息,数据传输三要素:源,目的,长度
 83     msg[0].addr = at24cxx_client->addr;    //目的:从设备地址
 84     msg[0].buf  = val;                    //源,目的,长度
 85     msg[0].len    = 2;                    //长度:地址+数据=2byte
 86     msg[0].flags = 0;                    //0:表示写数据
 87
 88     //传输消息
 89     ret = i2c_transfer(at24cxx_client->adapter, msg, 1);    //发送i2c消息
 90
 91     if(ret == 1)
 92         return size;                    //若是发送成功则返回发送数据的大小
 93     else
 94         return -EIO;
 95 }
 96
 97
 98
 99 //定义主设备号
100 static int major;
101 //定义字符设备结构体
102 static struct file_operations at24cxx_fops = {
103     .owner = THIS_MODULE,
104     .read = at24cxx_read,
105     .write = at24cxx_write,
106 };
107 //自动创建设备节点
108 static struct class *cls;
109
110
111
112 static int at24cxx_detect(struct  i2c_adapter *adapter, int address, int kind)
113 {
114     printk("enter at24cxx_detect \n");
115
116     /* ④构造一个i2c_client结构体:以后收发数据靠它,里面有.address .adapter  .driver */
117     at24cxx_client = kzalloc(sizeof(struct i2c_client),GFP_KERNEL);
118     at24cxx_client->addr     = address;
119     at24cxx_client->adapter = adapter;
120     at24cxx_client->driver  = &at24cxx_i2c_driver;
121     strcpy(at24cxx_client->name, "at24cxx");
122     i2c_attach_client(at24cxx_client);  //等要卸载驱动时,会调用at24cxx_detach_adapter函数
123
124     //申请字符设备主设备号
125     major = register_chrdev(0,"at24cxx",&at24cxx_fops);
126     //创建一个类,然后再类下面创建一个设备
127     cls = class_create(THIS_MODULE,"at24cxx");
128     class_device_create(cls, NULL, MKDEV(major, 0), NULL, "at24cxx"); // /dev/at24cxx
129
130     return 0;
131 }
132
133 //探测时调用函数
134 static int at24cxx_attach_adapter(struct  i2c_adapter *adapter)
135 {
136     return i2c_probe(adapter, &addr_data, at24cxx_detect);
137 }
138
139 //卸载函数
140 static int at24cxx_detach_adapter(struct i2c_client *client)
141 {
142     printk("enter at24cxx_detach_adapter \n");
143     if(major){
144         device_destroy(cls, MKDEV(major, 0));        //销毁设备
145         class_destroy(cls);                            //销毁类
146         unregister_chrdev(major, "at24cxx");        //注销字符设备
147     }
148     if(client){
149         i2c_detach_client(client);                    //client结构体
150         kfree(i2c_get_clientdata(client));            //释放client的内存
151     }
152     return 0;
153 }
154
155 //定义i2c_driver结构体
156 static struct i2c_driver at24cxx_i2c_driver = {
157     .driver = {
158         .name = "at24cxx",
159     },
160     .attach_adapter = at24cxx_attach_adapter,
161     .detach_client = at24cxx_detach_adapter,
162 };
163
164 static int at24cxx_init(void)
165 {
166     /* 1.分配一个i2c_driver结构体 */
167     /* 2.设置 */
168     i2c_add_driver(&at24cxx_i2c_driver);    //注册i2c驱动
169
170     return 0;
171 }
172
173 void at24cxx_exit(void)
174 {
175     i2c_del_driver(&at24cxx_i2c_driver);
176 }
177
178 module_init(at24cxx_init);
179 module_exit(at24cxx_exit);
180 MODULE_LICENSE("GPL");
181
182
183 /*
184
185 1.在I2C中总共有两条线,SDA,SCL,分别是负责数据的发送,时钟脉冲线
186 起始信号,SCL变为低电平,SDA由低电平变为高电平
187 ------------------------------------------------------------------------------
188 | 起始位S | 7位设备地址 | R/W | 8B数据 | ACK (注8b数据和ACK可以周而复始) | P |
189 ------------------------------------------------------------------------------
190 设备地址最后一位表示的是读还是写
191
192     刚开始前8个clk里SDA由主机驱动,发送从机设备地址,当从机发现设备地址为自己的时,
193     便会在第9个时钟里SDA由从机驱动,I2C主机释放SDA,由从机驱动SDA
194 写数据:前8个CLK,SDA由主机驱动
195         第9个CLK,SDA由从机驱动
196 写数据:前8个CLK,SDA由从机驱动
197         第9个CLK,SDA由主机驱动
198 停止信号,SCL变为高电平,SDA由低电平变为高电平
199
200 2.i2c驱动框架
201 ----------------------------------------------------------------------
202 APP:  open,read,write
203 ----------------------------------------------------------------------
204 I2c设备驱动程序:drv_open,drv_read,drv_write,     知道数据的含义
205 ----------------------------------------------------------------------
206 I2c总线驱动程序:①识别②提供读写函数,            知道如何收发数据
207 ----------------------------------------------------------------------
208
209 drivers/chip/                            //设备驱动程序
210 drivers/i2c/busses/i2c-s3c2410.c        //总线驱动程序
211 drivers/i2c/algos                        //算法
212 ----------------------------------------------------------------------------------------------
213                             BUS
214             i2c_add    /                    \ i2c_add_diver
215        i2c_adapter /                      \    i2c_driver    .id 表示能支持哪些设备
216                   /    插槽(适配器)          \设备驱动程序    .attach_adapter 接到适配器上去
217 ----------------------------------------------------------------------------------------------
218 i2c总线驱动程序:
219 1.分配一个i2c_adapter    插槽
220 2.设置,algo结构体,核心算法,.master_xfer,
221 3.注册i2c_add_adapter     .master_xfer:发I2C信号的函数
222 ----------------------------------------------------------------------------------------------
223 i2c_add_adapter    ①把结构体放入链表
224                 ②从driver链表取出每一项,得到其ID(设备地址)
225                 ③使用master_xfer函数发start信号,发设备地址
226                 ④如果收到ACK则发现了一个设备client
227 ---------------------------------------------------------------------------------------------
228 i2c设备驱动程序:
229 i2c_add_driver: ①把I2C_driver放入链表
230                 ②使用从adapter链表取出”适配器“,使用它的mater_xfer函数法start信号,发设备地址(.id里面)
231                 如果能收到ACK信号,则表示发现了一个设备client
232 --------------------------------------------------------------------------------------------
233
234 写I2C的driver驱动程序:
235 ①分配一个i2c_driver结构体
236 ②设置
237     attach_adapter  //它直接调用i2c_probe(adap,设备地址,发现这个设备后要调用的函数)
238     detach_client    //卸载驱动后,如果之前有能支持的,则调用它来清理
239 ③注册
240
241
242
243 4.测试1th
244 insmod at24cxx.ko   观察输出信息
245 修改normal_addr为0x60,加载观察输出信息。
246
247
248 */
附上测试程序5:

 1 /* i2c测试程序 */
 2
 3 #include <stdio.h>
 4 #include <stdlib.h>
 5 #include <string.h>
 6 #include <sys/types.h>
 7 #include <sys/stat.h>
 8 #include <fcntl.h>
 9
10 /* i2c_test r addr
11  * i2c_test w addr val
12  */
13 int main(int argc, char **argv)
14 {
15     int fd;
16     unsigned char buf[2];
17
18     if((argc != 3) && (argc != 4)){
19         printf("%s r addr \n",argv[0]);
20         printf("%s w addr val \n",argv[0]);
21         return -1;
22     }
23
24     fd = open("/dev/at24cxx", O_RDWR);
25     if(fd < 0){
26         printf("can‘t open /dev/at24cxx \n");
27         return -1;
28     }
29
30     if(strcmp(argv[1], "r") == 0){            //读
31         buf[0] = srtoul(argv[2], NULL, 0);    //将字符串转换成无符号长整型数
32         read(fd, buff, 1);
33         printf("data: %c, %d, 0x%2x\n",buff[0],buf[0],buf[0]);
34
35     }else if((strcmp(argv[1], "w") == 0) && (argc == 4)) {    //写
36         buf[0] = srtoul(argv[2],NULL, 0);    //读取地址,将字符串转换成无符号长整型数
37         buf[1] = srtoul(argv[3],NULL, 0);    //将字符串转换成无符号长整型数
38         if( write(fd, buf, 2) !== 2)
39             printf("write err, addr = 0x%02x, data = 0x%02x\n", buf[0], buf[1]);
40
41     }else{                                    //出错返回
42         printf("%s r addr \n",argv[0]);
43         printf("%s w addr val \n",argv[0]);
44         return -1;
45     }
46
47     return 0;
48 }
49
50 /*
51 测试:
52
53 i2c_test r 0
54 i2c_test w 0 0x61
55 i2c_test r 0
56
57 */
标签:
原文地址:http://www.cnblogs.com/lihaiyan/p/4452875.html