标签:
1、绘制
不要调用drawRect.调用setNeedsDisplay相当于告知系统视图需要重绘, 它会去调用drawRect,更新屏外缓冲器
2、UIBezierPath绘制图形,
设置图像opaque属性=no,根据透明度一层层合成视图,比直接修改比特值的开销会大很大多,消耗性能
如果只是显示的问题可以通过设置hidden
3、UIGestureRecognizer
setNeedDisplay是为了让有人修改时重绘 ,据目标大小,选择合适尺寸
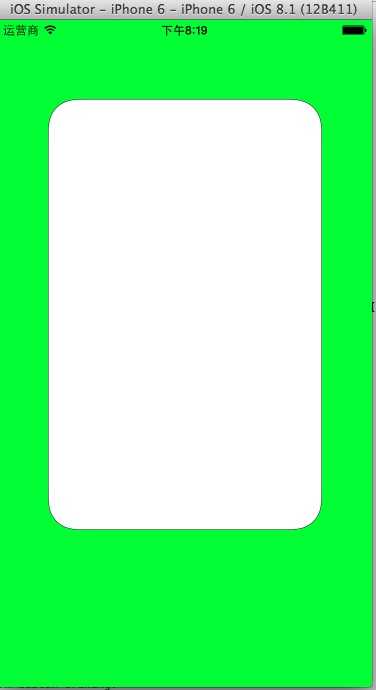
现在利用绘制做一个小demo,效果如下图,有一个黑色边缘的圆角:

代码如下:
ModelView.m
 1 //
 2 //  ModelView.m
 3 //  testForRouteAngle
 4 //
 5 //  Created by bos on 15-4-16.
 6 //  Copyright (c) 2015年 axiba. All rights reserved.
 7 //
 8
 9 #import "ModelView.h"
10
11 @implementation ModelView
12
13 #define HEIGHT 180.0  //高度的标准值
14 #define RADIOS 12.0  //半径
15
16 -(CGFloat)cornerScaleFactor {return  self.bounds.size.height/HEIGHT;}
17 -(CGFloat)cornerRadius{ return RADIOS *[self cornerScaleFactor];}
18 -(CGFloat)cornerOffset{ return  [self cornerRadius] / 3.0;}
19
20 -(void)drawRect:(CGRect)rect
21 {
22     //所绘制范围的坐标系
23     //cornerRadius :圆角矩形的圆角的半径有多少个点
24     UIBezierPath *roundrect = [UIBezierPath bezierPathWithRoundedRect:self.bounds cornerRadius:[self cornerRadius]];
25
26     //裁剪
27     [roundrect addClip];
28
29     //填充色
30     [[UIColor whiteColor] setFill];
31     UIRectFill(self.bounds);
32
33     //**边缘添加一圈黑色边框**//
34
35     //设置描边颜色
36     [[UIColor blackColor]setStroke];
37     //让roundrect也就是被塞尔路径描边
38     [roundrect stroke];
39 }
40
41 #pragma  storyBoard 中需要用 awake来唤醒加载,不用alloc/init
42 -(void)awakeFromNib
43 {
44     self.backgroundColor = nil;
45     self.opaque = NO;
46
47     //如果bounds变化来,就调用drawrect
48     self.contentMode = UIViewContentModeRedraw;
49 }
50
51
52 /*
53 // Only override drawRect: if you perform custom drawing.
54 // An empty implementation adversely affects performance during animation.
55 - (void)drawRect:(CGRect)rect {
56     // Drawing code
57 }
58 */
59
60 @end
demo需要注意的地方:
1、我们往storyBoard是拉进去一个UIView,然后新建一个继承自UIVIEW的文件,所以文件和控件的之间的连接,还需要通过设置class
2、设置圆角需要一个高度标准、半径,具体看代码设置,可以复用
标签:
原文地址:http://www.cnblogs.com/daomul/p/4433177.html