标签:style class blog code java http
TestNG的英文为Test Next Generation, 听上去好像下一代测试框架已经无法正常命名了的样子,哈哈,言归正传,啥是TestNG呢,它是一套测试框架,在原来的Junit框架的思想基础上开发的新一代测试框架,既然这么牛b,那果断弄来试试。本文主要从安装步骤-->第一个测试例子-->再多一点例子-->框架分析-->suite文件的书写-->总结结束。
安装步骤:
1. 第一步,当然首先是在你的java sdk, eclipse ide, system environment,都已经配置好了的情况下进行, 这些本人早就搭建好了,为了体现手把手教学,这里附加上本人的开发环境参数:os: win 8, java_version: 1.7, path: (added), eclipse_version: 4.3.1, 好了,其实只要装好这些就行了,版本么,再说,哈哈,开工
2. 第二步,去官网download一个TestNG插件,这个工作在eclipse内完成,点击help->install new software,紧接着填上http://beust.com/eclipse

然后一路next到finish。好了TestNG插件装上了,为了check一下是否正常工作,新建一个空的工程,然后再新建一个一个TestNG类试一下,如果能够正常建立,那么就成功了,步骤:file->new->Other,会看到
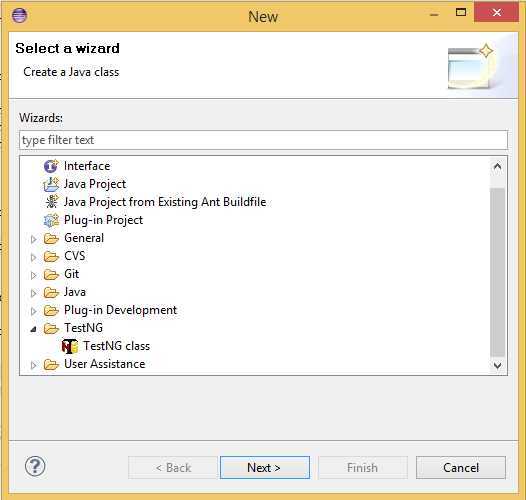
如果这个看到了,那么okay,恭喜你,可以开工写测试的case了,至此,环境搭建完成。
第一个测试例子:
点击src包上右击,新建一个类,->new->class,包名就叫cases吧,类名就叫CaseOne吧不要main方法,然后finish
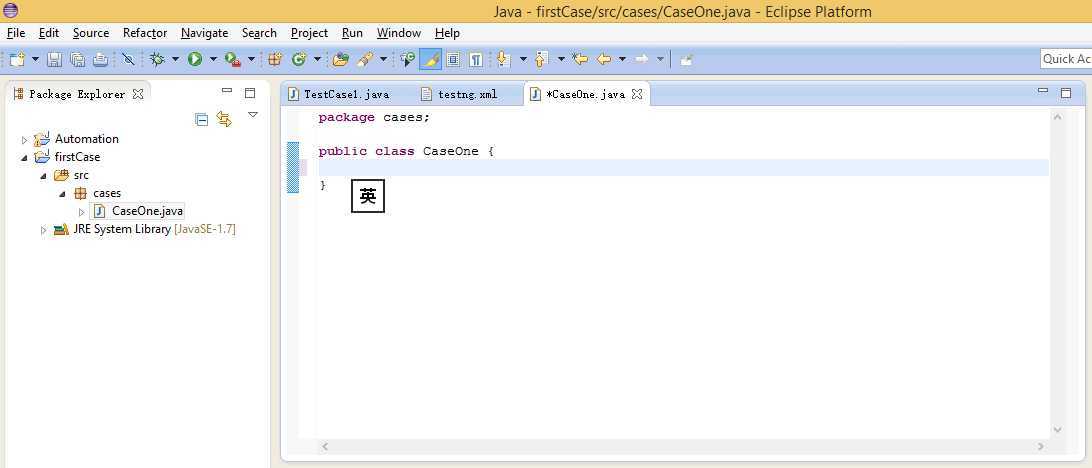
写第一个TestNG的带有@Test的方法如图
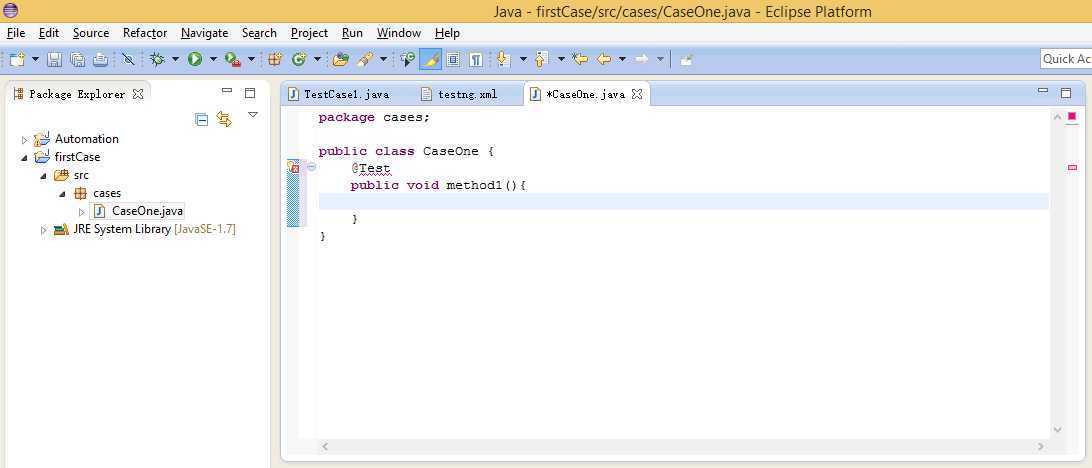
会有小error,这是因为我们还没有将TestNG加入到我们的LIB中来,点击错误,会有import Library的选项,点击便有了,如图
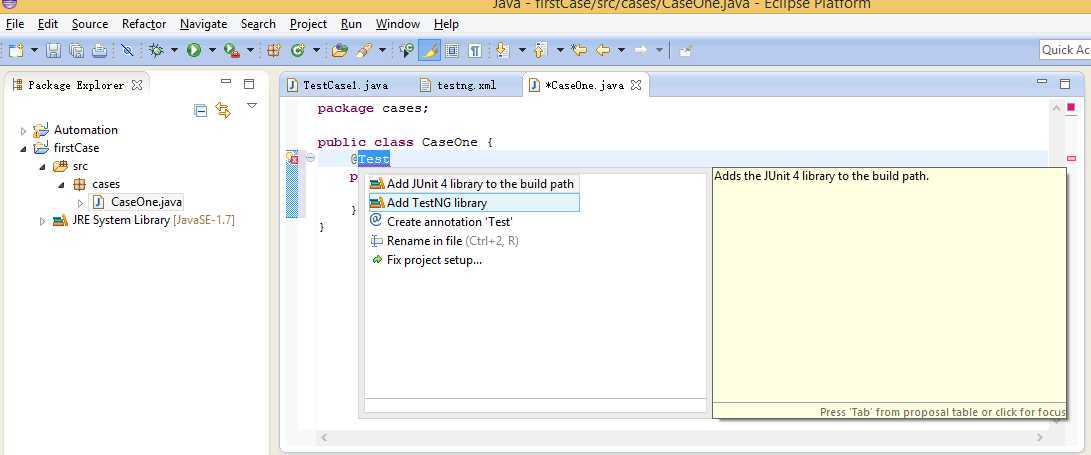
最后
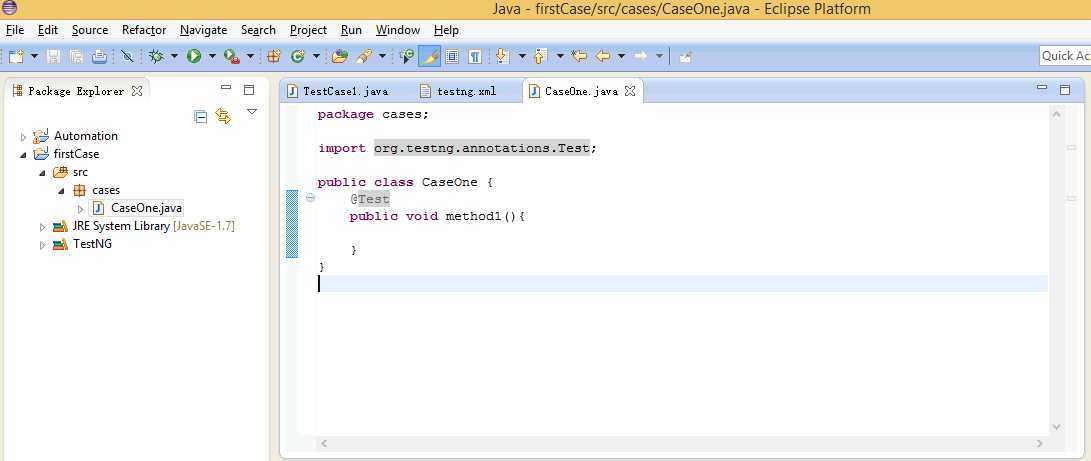
可见方法method1写好了,在method里加一句
System.out.println("**********method1*********");
执行程序可以看到Console里打印了**********method1*********,接下来加入更多的方法
package cases;

import org.testng.annotations.Test;

public class CaseOne {
	@Test
	public void method1(){
		//selenium code
		System.out.println("**********method1*********");
//		Assert.assertEquals("A", "B");
	}

	@Test
	public void method2(){
		System.out.println("**********method2*********");
	}

	@Test
	public void method3(){
		System.out.println("**********method3*********");
	}
}
执行以上代码,程序将从上到下执行三个带有@Test的方法。结果
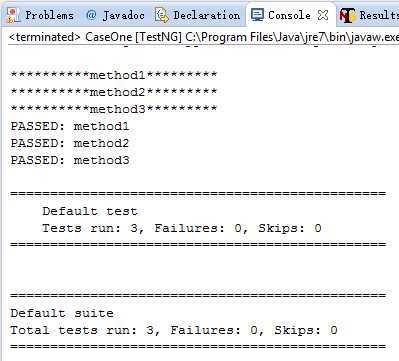
我们可以对这三个方法建立倚赖,所有后面的都建立在之前的case通过的情况下,标注是这样写的
package cases;

import org.testng.annotations.Test;

public class CaseOne {
	@Test
	public void method1(){
		System.out.println("*********method1*********");
//		Assert.assertEquals("A", "B");
	}

	@Test(dependsOnMethods={"method1"})
	public void method2(){
		System.out.println("*********method1*********");
	}

	@Test(dependsOnMethods={"method1","method1"})
	public void method3(){
		System.out.println("*********method1*********");
	}
}
这样前面的case没通过,后面的当然也不会过,比如将注释掉的那句代码去掉就不会通过执行后面两case了。
我们还可以对method进行分组,如
@Test(groups={"group1"})
这样就不用像方法3那样倚赖写一大串了,只需要一个group的名字便可以了。
框架分析
再来看看别的annotation吧!上代码
package cases;

import org.testng.annotations.AfterClass;
import org.testng.annotations.AfterMethod;
import org.testng.annotations.AfterTest;
import org.testng.annotations.BeforeClass;
import org.testng.annotations.BeforeMethod;
import org.testng.annotations.BeforeTest;
import org.testng.annotations.Test;

public class TestCase2 {
	@BeforeTest
	public void setUp(){
		System.out.println("*******before********");
	}

	@BeforeMethod
	public void beforeMethod(){
		System.out.println("*******beforeMethod********");
	}

	@AfterMethod
	public void afterMethod(){
		System.out.println("*******aftermethod********");
	}

	@Test
	public void t1(){
		System.out.println("*********t1**********");
	}

	@Test
	public void t2(){
		System.out.println("*********t2**********");
	}

	@BeforeClass
	public void beforeClass(){
		System.out.println("*****beforeClass*****");
	}

	@AfterClass
	public void afterClass(){
		System.out.println("*****afterClass*****");
	}

	@AfterTest
	public void finish(){
		System.out.println("*******finish********");
	}
}
运行得到结果如下
*******before********
*****beforeClass*****
*******beforeMethod********
*********t1**********
*******aftermethod********
*******beforeMethod********
*********t2**********
*******aftermethod********
*****afterClass*****
*******finish********
PASSED: t1
PASSED: t2

===============================================
    Default test
    Tests run: 2, Failures: 0, Skips: 0
===============================================
这样一来咱们就大概的知道了不同的annotation下的方法的执行顺序了。基本上是@BeforeTest->@BeforeClass->(@BeforeMethod->@Test->@AfterTest)->...重复()内内容...->@AfterClass->@AfterTest.好了,框架基本如下,
再多一点例子:
同时建立多个Class,如
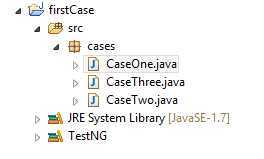
如果全部选中,当然会从上当下的执行,但是万一有些文件我们不想执行呢,比如CaseOne中的method1我们想跳过去,那就得写一个控制文件了,在TestNG中使用xml来控制,在顶级目录下建一个build.xml文件,内容如下
<?xml version="1.0" encoding="UTF-8"?>
<!DOCTYPE suite SYSTEM "http://testng.org/testng-1.0.dtd">
<suite name="My Sample Suite">
  <test name="First test">
    <classes>
      <class name="cases.CaseOne"></class>
    </classes>
  </test>
    <test name="Second test">
    <classes>
      <class name="cases.CaseTwo"></class>
    </classes>
  </test>
    <test name="Third test">
    <classes>
      <class name="cases.CaseThree"></class>
    </classes>
  </test>
</suite>
这是按类写的,当然你可以写的更详细,指定方法
<?xml version="1.0" encoding="UTF-8"?>
<!DOCTYPE suite SYSTEM "http://testng.org/testng-1.0.dtd">
<suite name="My Sample Suite">
  <test name="First test">
    <classes>
      <class name="cases.CaseOne"></class>
      <methods>
          <include name="method1"/>
          <include name="method2"/>
        </methods>
    </classes>
  </test>
    <test name="Second test">
    <classes>
      <class name="cases.CaseTwo"></class>
    </classes>
  </test>
    <test name="Third test">
    <classes>
      <class name="cases.CaseThree"></class>
    </classes>
  </test>
</suite>
这样类CaseOne中的第三个方法会掠过去不执行。
总结:
在我看来,TestNG是一个非常好用的测试框架,其测试步骤顺序很规范,很强大,当然还有很多东西要去探索。笔者水平较浅,不足之处,大家海涵!
TestNG环境搭建以及框架初识,布布扣,bubuko.com
标签:style class blog code java http
原文地址:http://www.cnblogs.com/luomingchuan/p/3786128.html