标签:

#include <SoftwareSerial.h>
SoftwareSerial mySerial(4,5);
byte ZERO=0x00;
byte Addr=0x03;
byte Status=0x00;
int buffLen=32;
char HexTable[] = "0123456789ABCDEF";
int pinTrigger=7;
int pinDirection=8;
void setup() {
  // put your setup code here, to run once:
  pinMode(pinDirection,OUTPUT);
  digitalWrite(pinDirection,LOW);
  pinMode(pinTrigger,OUTPUT);
  Off();

  mySerial.begin(9600);
  Serial.begin(9600);
  Serial.println("ok");
}


void On(){
  digitalWrite(pinTrigger,HIGH);
  Status=0x01;
}
void Off(){
   digitalWrite(pinTrigger,LOW);
  Status=0x00;
}

void loop() {

  byte crc[2];
  int count=0;
  byte rBytes[buffLen];
   while(mySerial.available()>0){
      byte b=mySerial.read();
      if(count<buffLen){
        rBytes[count]=b;
      }
      count++;
      delayMicroseconds(100);
   }
   if(count>0){
     String v= toHex(rBytes,count > buffLen? buffLen : count);
     Serial.println("r:" + v);
   }

   if(count<4)return;
   if(rBytes[0] !=Addr)return;
   if(count>buffLen)return;
   //Send To Me


     //check crc
     calculateCRC(rBytes,count-2,crc);
     if(crc[0]!=rBytes[count-2] || crc[1] !=rBytes[count-1]){
        Serial.println("crc error!");
        return;
     }

     digitalWrite(pinDirection,HIGH);
     byte resp[32];
     byte respLen=0;
     //Read status
     if(rBytes[1]==0x03){
             resp[0]=Addr;
             resp[1]=0x03;
             resp[2]=Status;
             respLen=3;
     }else if(rBytes[1]==0x06){ //Write Status
       //power on : 03 06 01
       //power off: 03 06 00
       if(rBytes[2]==0x01){
         On();
       }else{
         Off();
       }
       resp[0]=Addr;
       resp[1]=0x06;
       resp[2]=Status;
       respLen=3;
     }else{
       resp[0]=Addr;
       resp[1]=0x83;
       respLen=2;
     }

     sendData(resp,respLen);
     digitalWrite(pinDirection,LOW);


}

//================CRC 16==========================
//CRC校验函数
//参数1:待校验数组的起始地址
//参数2:待校验数组的长度
//返回值CRC校验结果,16位,低字节在前
unsigned int calculateCRC(unsigned char* _regs,unsigned char arraySize,byte* crc)
{
  unsigned int temp, temp2, flag;
  temp = 0xFFFF;
  for (unsigned char i = 0; i < arraySize; i++)
  {
    temp = temp ^ *(_regs+i);
    for (unsigned char j = 1; j <= 8; j++)
    {
      flag = temp & 0x0001;
      temp >>= 1;
      if (flag)
        temp ^= 0xA001;
    }
  }
  temp2 = temp >> 8;

//  Serial.print("b:");
//  Serial.println(temp,HEX);
//  Serial.println((byte)(temp & 0x00FF),HEX);
//  Serial.println( (byte)(temp >> 8)  ,HEX);

  temp = (temp << 8) | temp2;
  temp &= 0xFFFF;

  crc[0]=(byte)(temp >> 8) ;
  crc[1]=(byte)(temp & 0x00FF);


  return temp;
}
void sendData(byte data[],int count)
{
   byte crc[2];
   calculateCRC(data,count,crc);
   for(int i=0;i<count;i++){
     mySerial.write(data[i]);
   }
   mySerial.write(crc[0]);
   mySerial.write(crc[1]);
}
//=================================================
//==============byte to hex string===============
 String toHex(byte bs[],int count){
  String bundle="";
   for(int i=0;i<count;i++){
     bundle += (String)( HexTable[ bs[i] / 16]) + (String)( HexTable[bs[i] % 16]);

   }
   return bundle;
}
//==============End byte to hex string=============

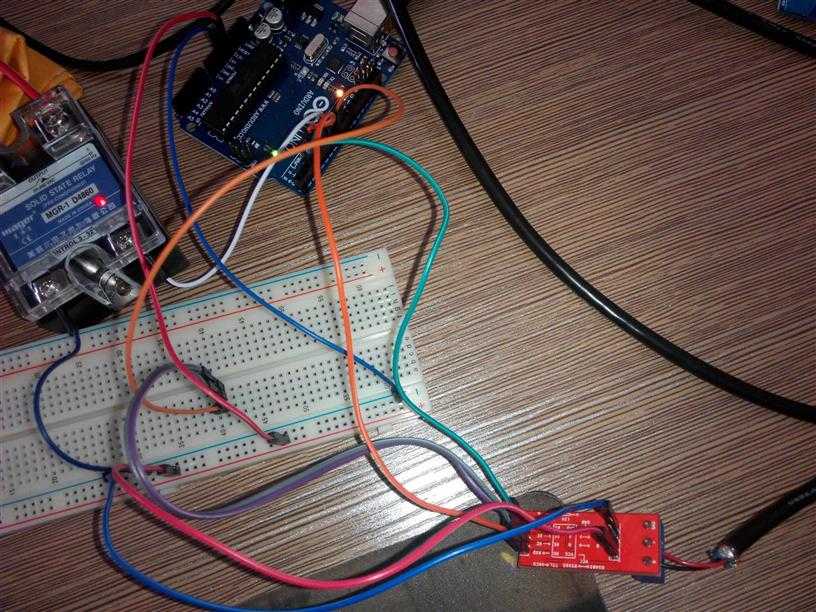
中间2脚短后连到单片机数字口上,低电位收,高电位发数据
注意左边4脚 是指MUC的,所以串口收发线不需要互换,直接按标识连好。
服务端代码参考:华为网盘中的ZNJM2-20150612.rar
标签:
原文地址:http://www.cnblogs.com/wdfrog/p/4571146.html