标签:
课程:Java程序与设计 班级:1353 姓名:王剑桥 小组成员: 20135316王剑桥 20135309李雪琦
学号:20135316
成绩: 指导教师:娄嘉鹏 实验日期:2015.6.9
实验密级: 预习程度: 实验时间:15:30-18:00
仪器组次: 必修/选修:选修 实验序号:4
实验名称:Java网络编程及安全
实验目的与要求:结对编程,实现客户端和服务器之间数据的发送与接收,实现加解密和验证Hash函数值。
实验仪器:
|
名称 |
型号 |
数量 |
|
PC |
Lenovo Y510P |
1 |
|
Eclipse |
|
1 |
一、实验内容
1.用TCP代码,实现服务器与客户端。
2.客户端与服务器连接
3.客户端中输入明文,利用DES算法加密,DES的秘钥用RSA公钥密码中服务器的公钥加密.
4.客户端用RSA公钥密码中服务器的私钥解密DES的,秘钥,用秘钥对密文进行解密,得出明文。
二.实验过程
1.客户端 与服务器的连接。
服务器代码:
import java.io.BufferedInputStream;
import java.io.DataInputStream;
import java.io.DataOutputStream;
import java.io.File;
import java.io.FileInputStream;
import java.net.ServerSocket;
import java.net.Socket;
import java.security.SecureRandom;
import javax.crypto.Cipher;
import javax.crypto.SecretKey;
import javax.crypto.SecretKeyFactory;
import javax.crypto.spec.DESKeySpec;
public class ServerTest {
int port = 8821;
void start() {
Socket s = null;
try {
ServerSocket ss = new ServerSocket(port); //创建一个ServerSocket套接字对象,并绑定在8821端口上
while (true) {
// 选择进行传输的文件
String filePath = "E:\\服务器\\jiami.txt";
File fi = new File(filePath); //通过将给定路径名字符串转换为抽象路径名来创建一个新 File 实例
System.out.println("文件长度:" + (int) fi.length());
s = ss.accept();
System.out.println("建立socket链接");
DataInputStream dis = new DataInputStream(new BufferedInputStream(s.getInputStream())); //DataInputStream:使用指定的底层 InputStream 创建一个 DataInputStream;
dis.readByte(); //返回此输入流的下一个字节,以有符号 8 位 byte 的形式表示。
DataInputStream fis = new DataInputStream(new BufferedInputStream(new FileInputStream(filePath)));
DataOutputStream ps = new DataOutputStream(s.getOutputStream());//创建一个新的数据输出流,将数据写入指定基础输出流
ps.writeUTF(fi.getName());
ps.flush();
ps.writeLong((long) fi.length());
ps.flush();
int bufferSize = 8192; //缓冲区,1k
byte[] buf = new byte[bufferSize];
while (true) {
int read = 0;
if (fis != null) {
read = fis.read(buf);
}
if (read == -1) {
break;
}
ps.write(buf, 0, read);
}
ps.flush();// 直到socket超时,导致数据不完整。
fis.close();
s.close();
System.out.println("文件传输完成");
}
} catch (Exception e) {
e.printStackTrace();
}
}
public static void main(String arg[]) {
new ServerTest().start();
}
}
客户端Socket代码:
import java.net.*;
import java.io.*;
public class ClientSocket {
private String ip;
private int port;
private Socket socket = null;
DataOutputStream out = null;
DataInputStream getMessageStream = null;
public ClientSocket(String ip, int port) {
this.ip = ip;
this.port = port;
}
/** *//**
* 创建socket连接
*
* @throws Exception
* exception
*/
public void CreateConnection() throws Exception {
try {
socket = new Socket(ip, port);
} catch (Exception e) {
e.printStackTrace();
if (socket != null)
socket.close();
throw e;
} finally {
}
}
public void sendMessage(String sendMessage) throws Exception {
try {
out = new DataOutputStream(socket.getOutputStream());
if (sendMessage.equals("Windows")) {
out.writeByte(0x1);
out.flush();
return;
}
if (sendMessage.equals("Unix")) {
out.writeByte(0x2);
out.flush();
return;
}
if (sendMessage.equals("Linux")) {
out.writeByte(0x3);
out.flush();
} else {
out.writeUTF(sendMessage);
out.flush();
}
} catch (Exception e) {
e.printStackTrace();
if (out != null)
out.close();
throw e;
} finally {
}
}
public DataInputStream getMessageStream() throws Exception {
try {
getMessageStream = new DataInputStream(new BufferedInputStream(socket.getInputStream()));
return getMessageStream;
} catch (Exception e) {
e.printStackTrace();
if (getMessageStream != null)
getMessageStream.close();
throw e;
} finally {
}
}
public void shutDownConnection() {
try {
if (out != null)
out.close();
if (getMessageStream != null)
getMessageStream.close();
if (socket != null)
socket.close();
} catch (Exception e) {
}
}
}
客户端Test代码:
import java.io.BufferedOutputStream;
import java.io.DataInputStream;
import java.io.DataOutputStream;
import java.io.FileOutputStream;
public class ClientTest {
private ClientSocket cs = null;
private String ip = "192.168.56.1";// 设置成服务器IP
private int port = 8821;
private String sendMessage = "Windwos";
public ClientTest() {
try {
if (createConnection()) {
sendMessage();
getMessage();
}
} catch (Exception ex) {
ex.printStackTrace();
}
}
private boolean createConnection() {
cs = new ClientSocket(ip, port);
try {
cs.CreateConnection();
System.out.print("连接服务器成功!" + "\n");
return true;
} catch (Exception e) {
System.out.print("连接服务器失败!" + "\n");
return false;
}
}
private void sendMessage() {
if (cs == null)
return;
try {
cs.sendMessage(sendMessage);
} catch (Exception e) {
System.out.print("发送消息失败!" + "\n");
}
}
private void getMessage() {
if (cs == null)
return;
DataInputStream inputStream = null;
try {
inputStream = cs.getMessageStream();
} catch (Exception e) {
System.out.print("接收消息缓存错误\n");
return;
}
try {
//本地保存路径,文件名会自动从服务器端继承而来。
String savePath = "E:\\客户端\\";
int bufferSize = 8192;
byte[] buf = new byte[bufferSize];
int passedlen = 0;
long len=0;
savePath += inputStream.readUTF();
DataOutputStream fileOut = new DataOutputStream(new BufferedOutputStream(new BufferedOutputStream(new FileOutputStream(savePath))));
len = inputStream.readLong();
System.out.println("文件的长度为:" + len + "\n");
System.out.println("开始接收文件!" + "\n");
while (true) {
int read = 0;
if (inputStream != null) {
read = inputStream.read(buf);
}
passedlen += read;
if (read == -1) {
break;
}
//下面进度条本为图形界面的prograssBar做的,这里如果是打文件,可能会重复打印出一些相同的百分比
System.out.println("文件接收了" + (passedlen * 100/ len) + "%\n");
fileOut.write(buf, 0, read);
}
System.out.println("接收完成,文件存为" + savePath + "\n");
fileOut.close();
} catch (Exception e) {
System.out.println("接收消息错误" + "\n");
return;
}
}
public static void main(String arg[]) {
new ClientTest();
}
}
在这只做简单代码展示,具体传输文件见下述步骤。
2.用DES加密明文,并传输给服务器密文。
DES加密代码:
import java.io.File;
import java.io.FileInputStream;
import java.io.FileOutputStream;
import java.security.SecureRandom;
import javax.crypto.Cipher;
import javax.crypto.SecretKey;
import javax.crypto.SecretKeyFactory;
import javax.crypto.spec.DESKeySpec;
public class JiaMi {
public static void main(String[] args) throws Exception {
// DES算法要求有一个可信任的随机数源
SecureRandom sr = new SecureRandom();
// 获得密匙数据
FileInputStream fi = new FileInputStream(new File("key.txt"));
byte rawKeyData[] = new byte[fi.available()];
fi.read(rawKeyData);
fi.close();
// 从原始密匙数据创建DESKeySpec对象
DESKeySpec dks = new DESKeySpec(rawKeyData);
// 创建一个密匙工厂,然后用它把DESKeySpec转换成一个SecretKey对象
SecretKey key = SecretKeyFactory.getInstance("DES").generateSecret(dks);
// Cipher对象实际完成加密操作
Cipher cipher = Cipher.getInstance("DES");
// 用密匙初始化Cipher对象
cipher.init(Cipher.ENCRYPT_MODE, key, sr);
// 现在,获取要加密的文件数据
FileInputStream fi2 = new FileInputStream(new File("lib.txt"));
byte data[] = new byte[fi2.available()];
fi2.read(data);
fi2.close();
// 正式执行加密操作
byte encryptedData[] = cipher.doFinal(data);
// 用加密后的数据文件
FileOutputStream fo = new FileOutputStream(new File("jiami.txt"));
fo.write(encryptedData);
fo.close();
new ServerTest().start();
}
}
DES解密代码:
import java.io.File;
import java.io.FileInputStream;
import java.io.FileOutputStream;
import java.security.SecureRandom;
import javax.crypto.Cipher;
import javax.crypto.SecretKey;
import javax.crypto.SecretKeyFactory;
import javax.crypto.spec.DESKeySpec;
public class JieMi {
public static void main(String[] args) throws Exception {
new ClientTest();
// DES算法要求有一个可信任的随机数源
SecureRandom sr = new SecureRandom();
// 获得密匙数据
FileInputStream fi = new FileInputStream(new File("key.txt"));
byte rawKeyData[] = new byte[fi.available()];// = new byte[5];
fi.read(rawKeyData);
fi.close();
// 从原始密匙数据创建一个DESKeySpec对象
DESKeySpec dks = new DESKeySpec(rawKeyData);
// 创建一个密匙工厂,然后用它把DESKeySpec对象转换成一个 SecretKey对象
SecretKey key = SecretKeyFactory.getInstance("DES").generateSecret(dks);
// Cipher对象实际完成解密操作
Cipher cipher = Cipher.getInstance("DES");
// 用密匙初始化Cipher对象
cipher.init(Cipher.DECRYPT_MODE, key, sr);
// 现在,获取数据并解密
FileInputStream fi2 = new FileInputStream(new File("jiami.txt"));
byte encryptedData[] = new byte[fi2.available()];
fi2.read(encryptedData);
fi2.close();
// 正式执行解密操作
byte decryptedData[] = cipher.doFinal(encryptedData);
// 这时把数据还原成原有的类文件
FileOutputStream fo = new FileOutputStream(new File("jiemi.txt"));
fo.write(decryptedData);
}
}
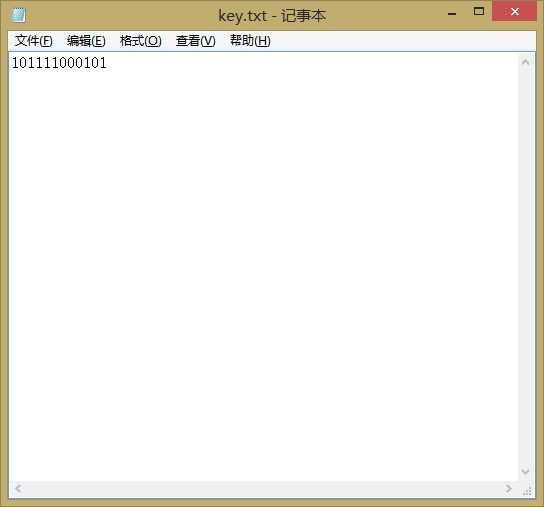
我们所采用的密钥 key.txt 此时客户端并没有此文件。
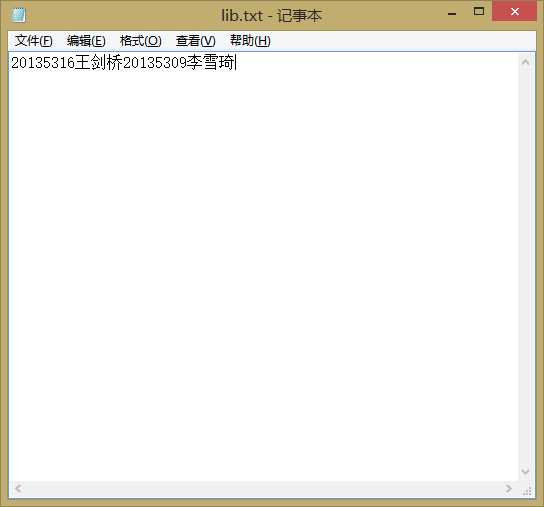
lib.txt表示明文
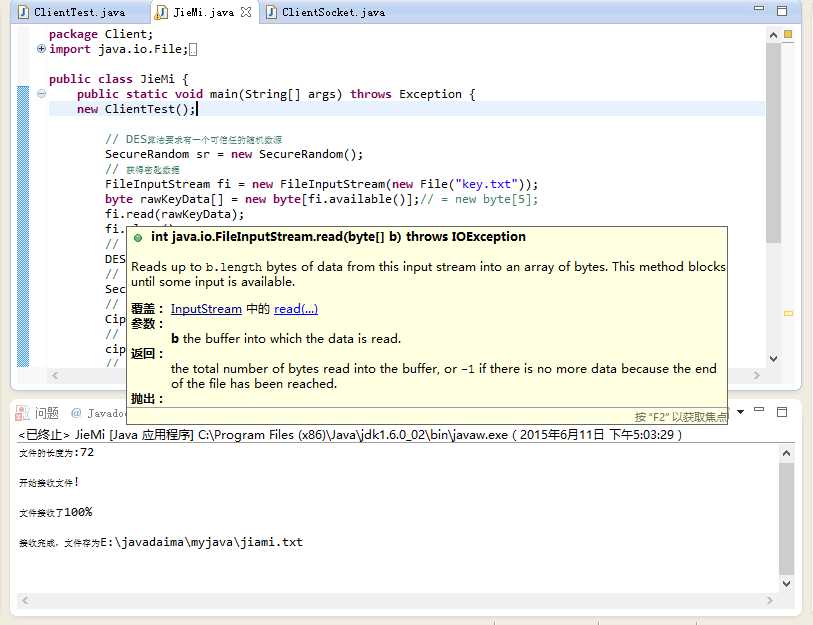
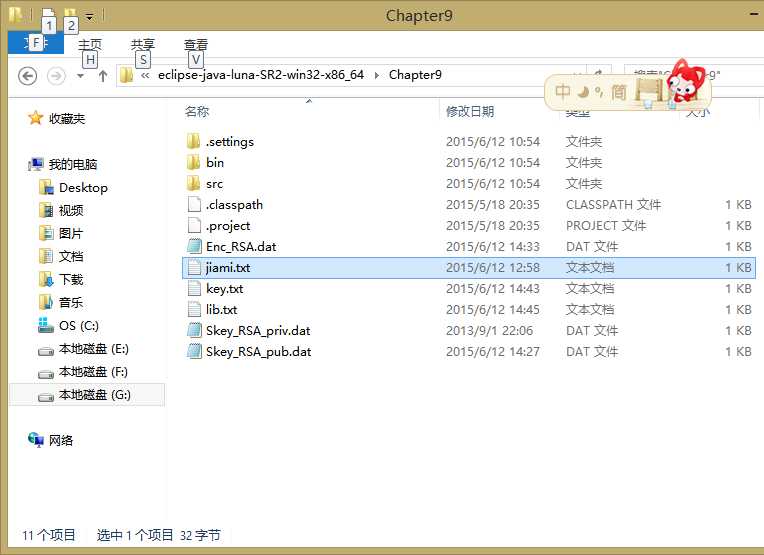
通过服务器与客户端相连,服务器将加密后的文件jiami.txt传输给客户端待用。
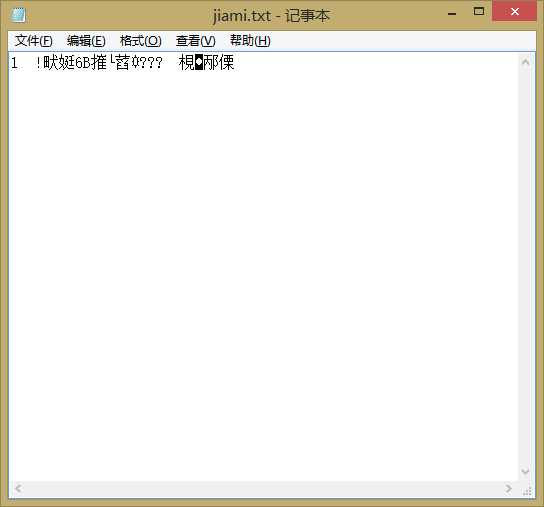
王剑桥收到加密后的密文 jiami.txt
3.RSA加密密钥,传输,RSA解密获得密钥。
服务器使用已给出的代码加密密钥。传输过程与上述相同。
将所加密内容发给客户端。并进行解密。
客户端解密后得到的密钥。
4.应用密钥解密密文。
解密代码所生成的jiemi.txt。
【实验体会】
1.实验过程的理解,实验指导书中知识点的理解。
这次实验主要是练习在已有的代码之上如何把功能在同一个程序中实现,这给我们的编程带来了极大的方便,所以我们要做的就是熟悉这些代码所代表的含义,将代码所包含的知识彻底吸收,为自己以后的学习打下良好的基础
2. 实验过程中遇到的问题以及解决方案。
在服务器和客户端连接时,客户端的ip地址要设置为服务器的ip地址;
在进行加密的时候要将lib.txt和key.txt放在包目录下进行;
进行解密的时候,传输文件要传输正确,不然会导致解密出现乱码,得不到对应明文的问题。
|
步骤 |
耗时 |
百分比 |
|
需求分析 |
40 |
30% |
|
设计 |
20 |
15% |
|
代码实现 |
30 |
20% |
|
测试 |
30 |
20% |
|
分析总结 |
20 |
15% |
结对伙伴:20135316 王剑桥
博客地址:http://www.cnblogs.com/20135316wjq/
标签:
原文地址:http://www.cnblogs.com/lxq20135309/p/4571858.html