标签:
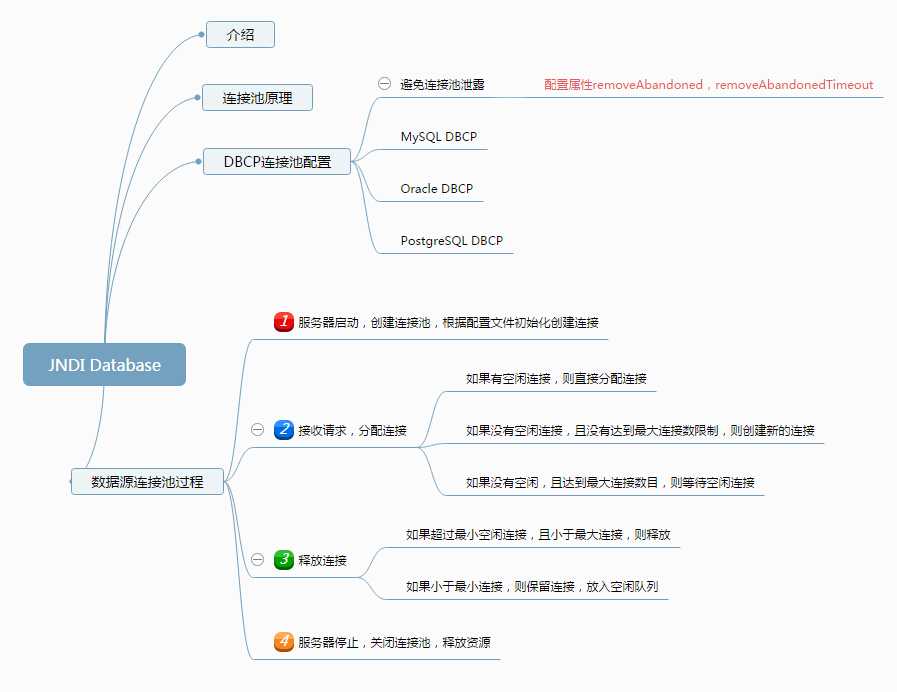
数据库连接池这个概念应该都不陌生,在Java中连接池也就是数据库的连接池,它是一种采用连接复用的思想避免多次连接造成资源的浪费机制。
最常见的连接池就是DBCP和C30P了,在tomcat中默认使用的DBCP的连接池,在Hibernate中则默认使用的是C30P。他们的区别对于使用者来说最明显的就是,默认情况下DBCP不提供空闲连接的释放,需要手动开启。
下面介绍下Tomcat中数据连接池的配置及使用。

本篇依赖一个概念——JNDI,可以参考前面的博客:JNDI资源详解。
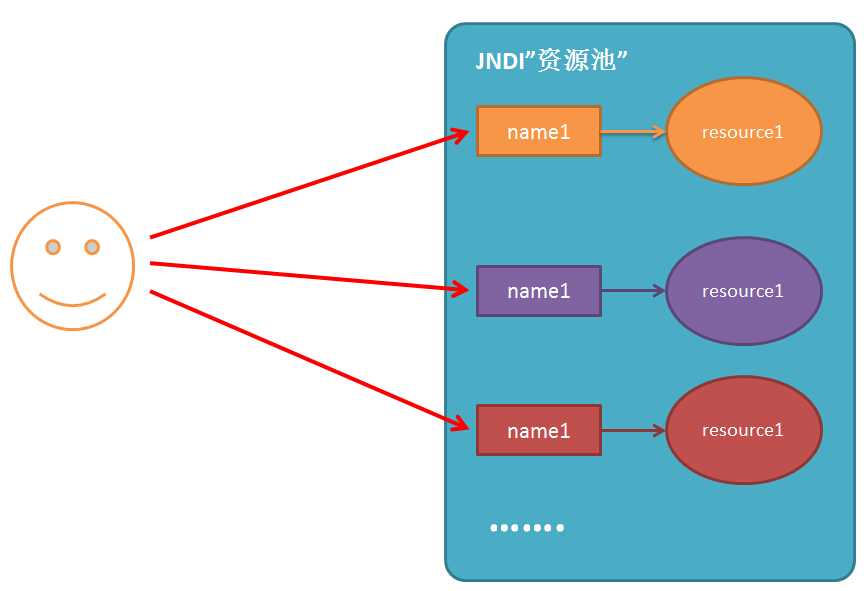
对于JNDI,可以简单理解成Tomcat中的资源池,通过一些特有的名字与特定的资源相对应,类似一个map,可以简单的通过名字获取到该资源。

那么本篇中JNDI数据源就是通过配置一个数据源的资源,在应用中通过该名称获取到数据库连接,进行操作。这样就省去了每次连接数据库的步骤。
连接池的概念,应该都不陌生了。部分内容可以参考:几个主流的连接池
这里简单说明下,如果单独在应用使用连接池,可能只是在应用运行时创建连接池。而tomcat配置数据源可以在tomcat容器启动时就初始化连接池,停止tomcat时才释放资源,其部署的应用可以根据JNDI的声明,在应用中共享使用该资源。
因此一个是应用中的连接池(即一个应用中不同的业务使用该连接池,比如注册新用户与购买商品),一个可以扩大到多应用的连接池,具体使用的还要看业务需求。
另外,tomcat中默认使用的DBCP连接池,其jar包位于CATALINA_HOME/lib下,tomcat-dbcp.jar。
需要注意的是,默认情况下dbcp不会去释放空闲的连接。比如,我们在编码时,拿到一个连接执行业务操作,但是没有进行释放。此时,DBCP连接池不会放回到空闲队列中。如果再有新的连接,会分配其他的连接。当连接数目过大时,就会造成连接的阻塞。
可以通过配置某些属性来自动回收连接,首先设置removeAbandoned="true"开启回收,然后设置removeAbandonedTimeout="300"设置连接的时间,超过该时间就会自动收回。
具体内容可以参考:DBCP文档
按照下面几个步骤:
1 放置mysql驱动:可以到这里下载
2 创建数据库插入数据
3 配置JNDI资源(context.xml以及web.xml)
4 创建JSP验证结果
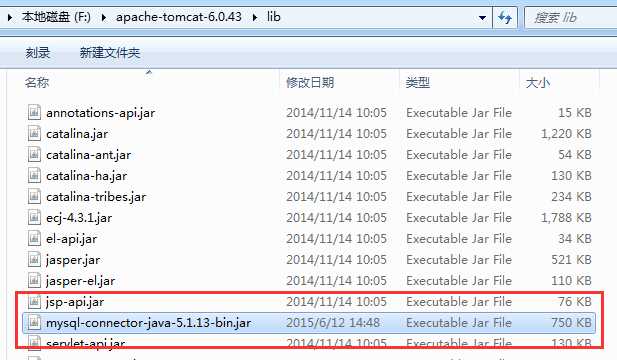
1 放置驱动
在tomcat根目录下的Lib中放置mysql驱动。

2 创建数据库表并添加数据
可以参考下面的SQL脚本:
/*
SQLyog v4.05
Host - 4.1.11-nt : Database - test
*********************************************************************
Server version : 4.1.11-nt
*/


create database if not exists `test`;

USE `test`;

/*Table structure for table `test`.`stu` */

drop table if exists `test`.`stu`;

CREATE TABLE `stu` (
  `id` int(11) NOT NULL default ‘0‘,
  `name` char(1) default NULL,
  `age` int(11) default NULL,
  PRIMARY KEY  (`id`)
) ENGINE=InnoDB DEFAULT CHARSET=latin1;

/*Data for the table `test`.`stu` */

insert into `test`.`stu` values (0,‘x‘,26),(1,‘z‘,27),(2,‘w‘,25);
3 配置JNDI资源
首先在context.xml中添加<resource>
<Resource name="jdbc/TestDB" auth="Container" type="javax.sql.DataSource"
               maxActive="100" maxIdle="30" maxWait="10000"
               username="root" password="123456" driverClassName="com.mysql.jdbc.Driver"
               url="jdbc:mysql://localhost:3306/test"/>
其中username为你的用户名,password是密码。
maxActive指定最大的连接数,maxIdle指定最大的空闲连接数(即没有连接时,保存多少连接),maxWait指定最大的等待连接数。
然后在web.xml中配置指定的资源名称(不是必须的)
  <resource-ref>
      <description>DB Connection</description>
      <res-ref-name>jdbc/TestDB</res-ref-name>
      <res-type>javax.sql.DataSource</res-type>
      <res-auth>Container</res-auth>
  </resource-ref>
4 创建JSP页面,输出信息
按照下面的代码创建,并释放连接:
<%@ page language="java" contentType="text/html; charset=UTF-8"
    import="javax.naming.*,java.sql.*,javax.sql.*"
    pageEncoding="UTF-8"%>
<!DOCTYPE html PUBLIC "-//W3C//DTD HTML 4.01 Transitional//EN" "http://www.w3.org/TR/html4/loose.dtd">
<html>
<head>
<meta http-equiv="Content-Type" content="text/html; charset=UTF-8">
<title>Insert title here</title>
</head>
<body>
    <h2>Results</h2>
    <%
    Context initContext = new InitialContext();
    Context envContext  = (Context)initContext.lookup("java:/comp/env");
    DataSource ds = (DataSource)envContext.lookup("jdbc/TestDB");
    Connection conn = ds.getConnection();
    String sql = "select * from stu";
    PreparedStatement st = conn.prepareStatement(sql);
    ResultSet rs = st.executeQuery();
    while(rs.next()){
        out.println("name:"+rs.getString(2)+" age:"+rs.getInt(3)+"<br>");
    }
    if(rs!=null){
        try{
            rs.close();
        }catch (Exception e) {
            e.printStackTrace();
        }
        rs = null;
    }
    if(st!=null){
        try{
            st.close();
        }catch (Exception e) {
            e.printStackTrace();
        }
    }

    if(conn!=null){
        try{
            conn.close();
        }catch (Exception e) {
            e.printStackTrace();
        }
    }
    %>
</body>
</html>
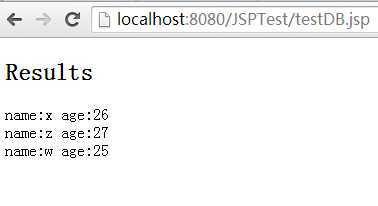
最后的执行结果:

其他的配置如Oracle和PostgreSQL仅仅是需要的数据库驱动和创建的JNDI名称不同:
例如,在oracle中,context.xml中配置如下:
<Resource name="jdbc/myoracle" auth="Container"
              type="javax.sql.DataSource" driverClassName="oracle.jdbc.OracleDriver"
              url="jdbc:oracle:thin:@127.0.0.1:1521:mysid"
              username="scott" password="tiger" maxActive="20" maxIdle="10"
              maxWait="-1"/>
在PostgreSQL中配置如下:
<Resource name="jdbc/postgres" auth="Container"
          type="javax.sql.DataSource" driverClassName="org.postgresql.Driver"
          url="jdbc:postgresql://127.0.0.1:5432/mydb"
          username="myuser" password="mypasswd" maxActive="20" maxIdle="10"
maxWait="-1"/>
使用方式都是差不多的。
【1】几种主流的连接池:http://developer.51cto.com/art/201006/207768.htm
【2】DBCP官方文档:http://commons.apache.org/proper/commons-dbcp/configuration.html
【3】Tomcat JNDI Database:http://tomcat.apache.org/tomcat-6.0-doc/jndi-datasource-examples-howto.html
标签:
原文地址:http://www.cnblogs.com/xing901022/p/4571855.html