标签:
Code-First数据迁移
首先要通过NuGet将EF升级至最新版本。
新建MVC 4项目MvcMigrationDemo
添加数据模型 Person 和 Department,定义如下:

 1 using System;
 2 using System.Collections.Generic;
 3 using System.Linq;
 4 using System.Web;
 5 using System.ComponentModel.DataAnnotations;
 6 using System.ComponentModel.DataAnnotations.Schema;
 7
 8 namespace MvcMigrationDemo.Models
 9 {
10     public class Person
11     {
12         [Key]
13         public int PersonID { get; set; }
14
15         [Required]
16         [MaxLength(20)]
17         public string PersonName { get; set; }
18
19         public virtual Department Departmant { get; set; }
20
21     }
22 }

 1 using System;
 2 using System.Collections.Generic;
 3 using System.Linq;
 4 using System.Web;
 5 using System.ComponentModel.DataAnnotations;
 6 using System.ComponentModel.DataAnnotations.Schema;
 7
 8 namespace MvcMigrationDemo.Models
 9 {
10     public class Department
11     {
12         [Key]
13         public int DeptID { get; set; }
14
15         [Required]
16         [MaxLength(200)]
17         public string DeptName { get; set; }
18
19         public ICollection<Person> Persons { get; set; }
20     }
21 }
添加控制器 PersonController

using System.Data.Entity;

namespace MvcMigrationDemo.Models
{
    public class MvcMigrationDemoContext : DbContext
    {
        // 您可以向此文件中添加自定义代码。更改不会被覆盖。
        //
        // 如果您希望只要更改模型架构,Entity Framework
        // 就会自动删除并重新生成数据库,则将以下
        // 代码添加到 Global.asax 文件中的 Application_Start 方法。
        // 注意: 这将在每次更改模型时销毁并重新创建数据库。
        //
        // System.Data.Entity.Database.SetInitializer(new System.Data.Entity.DropCreateDatabaseIfModelChanges<MvcMigrationDemo.Models.MvcMigrationDemoContext>());

        public MvcMigrationDemoContext() : base("name=MvcMigrationDemoContext")
        {
        }

        public DbSet<Person> People { get; set; }
        public DbSet<Department> Departments { get; set; }
    }
}
调试,网址输入http://localhost:7139/Person
登陆(localdb)\v11.0,数据库如下图:
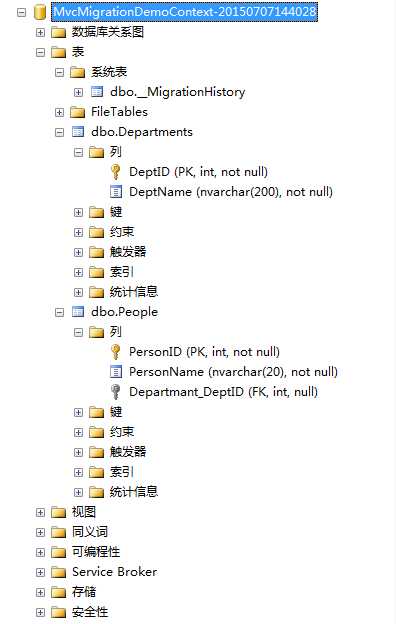
出现新建表[dbo].[Departments]和[dbo].[People],以及系统表[dbo].[__MigrationHistory]。
其中[dbo].[__MigrationHistory]用来追踪每次数据模型异动信息,如下图

MigrationId记录版本,Model记录这次创建时的数据模型,ProductVersion代表当前EF版本。
启动数据迁移
打开程序包管理器控制台,输入Enable-Migrations指令,以MvcMigrationDemoContext为例,输入如下:
Enable-Migrations -ContextTypeName MvcMigrationDemo.Models.MvcMigrationDemoContext
运行结果如下:

查看解决方案资源管理器,如图
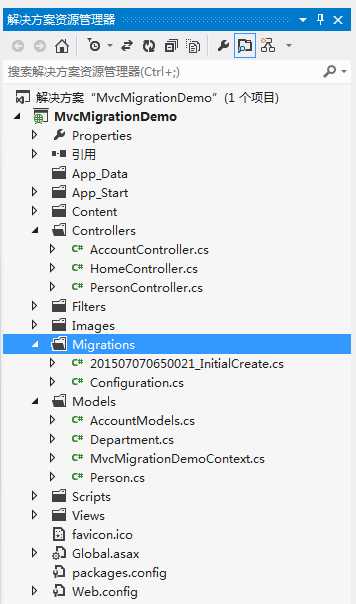
VS 会创建一个Migrations目录,包含两个文档201507070650021_InitialCreate和Configuration。
会发现201507070650021_InitialCreate刚好和[dbo].[__MigrationHistory].MigrationId一致,文档记录了创建本次数据模型的完整描述。
Configuration定义了数据库迁移该有的行为。
运行数据库迁移
修改Department数据模型如下:添加About字段

 1 using System;
 2 using System.Collections.Generic;
 3 using System.Linq;
 4 using System.Web;
 5 using System.ComponentModel.DataAnnotations;
 6 using System.ComponentModel.DataAnnotations.Schema;
 7
 8 namespace MvcMigrationDemo.Models
 9 {
10     public class Department
11     {
12         [Key]
13         public int DeptID { get; set; }
14
15         [Required]
16         [MaxLength(200)]
17         public string DeptName { get; set; }
18
19         [MaxLength(4000)]
20         public string About { get; set; }
21
22         public ICollection<Person> Persons { get; set; }
23     }
24 }
在PM中,输入Add-Migration指令,必须带上一个版本名称,本次操作如下:

查看项目Migration目录,会发现新增文档:201507070718108_AddAbout
此时还没有对数据库做任何迁移动作,可查看数据表Department,无任何修改如图
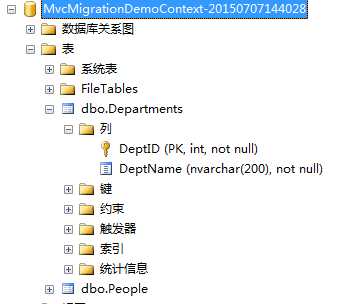
手动添加测试数据如下图
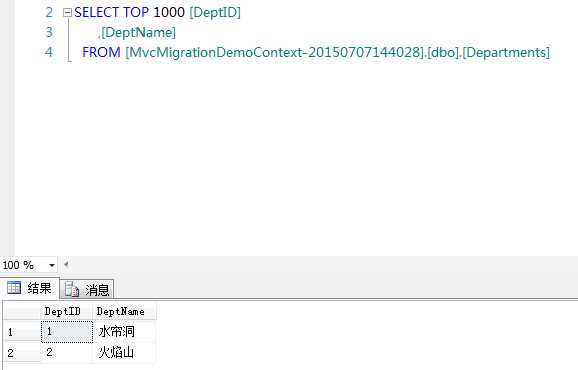
进行迁移动作 在PM中输入Update-Database指令,本次操作如下:

更新数据库成功后,查看数据库。如下图。
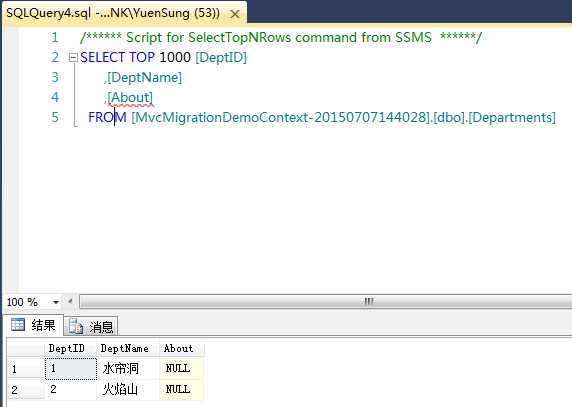
到此,数据迁移完成。
附1:可通过Update-Database指令自动生成数据库迁移的T-SQL脚本,本次操作如下:Update-Database -SourceMigration 201507070650021_InitialCreate -TargetMigration 201507070718108_AddAbout -Script

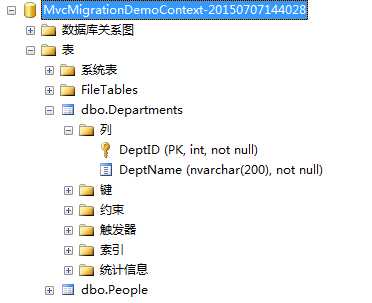
附2:还原数据库 本次操作如下:Update-Database -TargetMigration 201507070650021_InitialCreate

查看此时的数据库,发现数据库已还原:
附3:本文参考自Will保哥作品
标签:
原文地址:http://www.cnblogs.com/YuanSong/p/4627200.html