标签:
Hosting a WCF service in IIS (Internet Information Services) is a step-by-step process. IIS Hosting is illustrated below in detail with the desired coding as well as screenshots to understand the process.
按照如下步骤可以在IIS中托管wcf服务。IIS托管的细节如下所示,并且包含了所需的编码以及截图来明白iIS托管的流程
Step 1 : Start Visual Studio 2012 and click File -> New -> Web site. Select “WCF Service” and Location as http. This will host the service in IIS. Click OK.
步骤1:启动VS2012,文件-->新建-->网站-->WCF服务 位置选择Http。这种方式将会把服务托管在IIS中
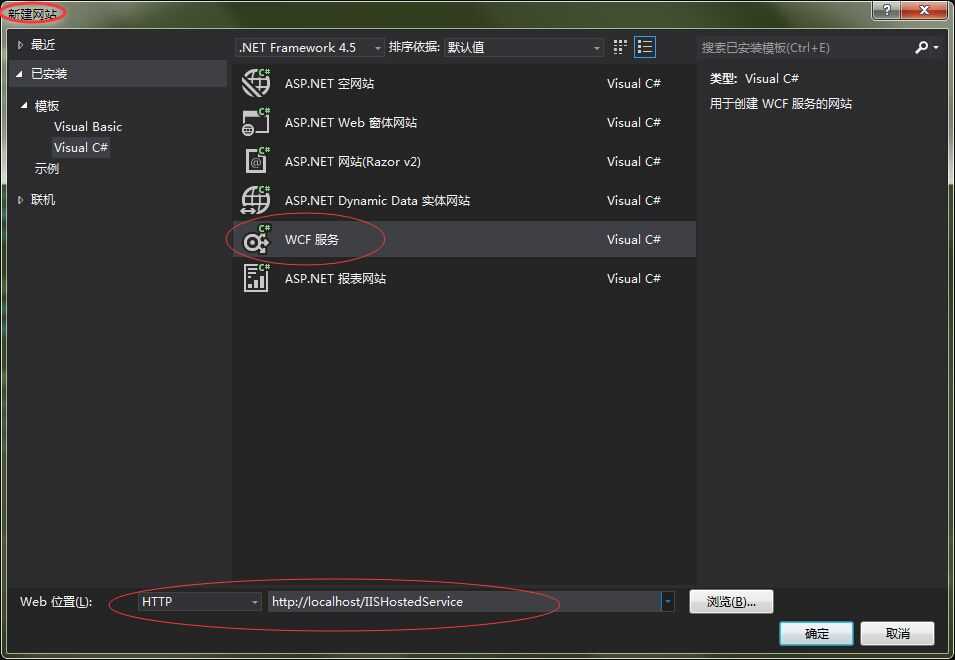
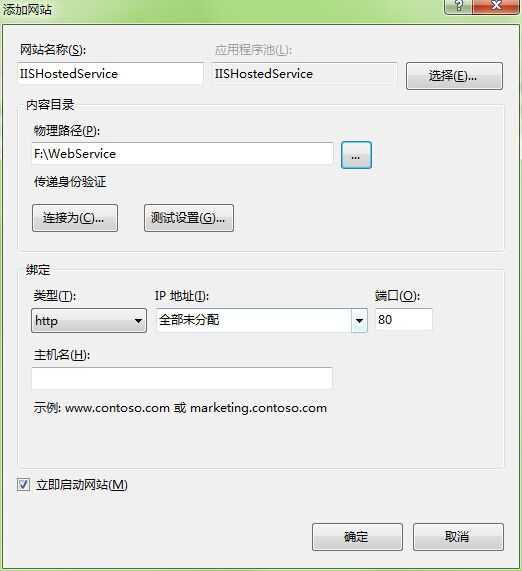
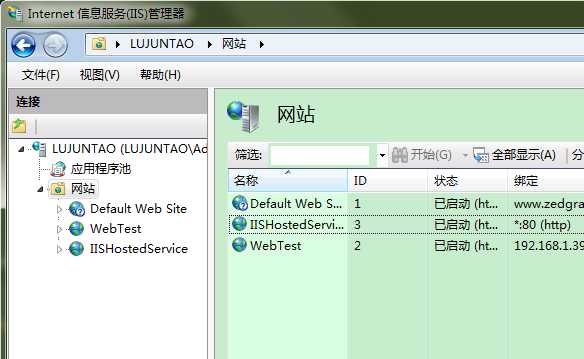
ps:位置这一块需要首先在本地添加一个网站,并且启动。 IIS管理器,可以在开始--运行--输入iis,选择对应的程序
5){_OL1VVG2BW.png)
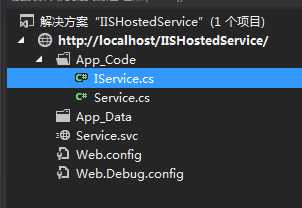
新建后的项目的架构图如下所示
Step 2 : The code behind the interface is given below. 接口的代码如下
using System;
using System.Collections.Generic;
using System.Linq;
using System.Runtime.Serialization;
using System.ServiceModel;
using System.ServiceModel.Web;
using System.Text;

// 注意: 使用“重构”菜单上的“重命名”命令,可以同时更改代码和配置文件中的接口名“IService”。
[ServiceContract]
public interface IService
{

    [OperationContract]
    string GetData(int value);

    [OperationContract]
    CompositeType GetDataUsingDataContract(CompositeType composite);

    // TODO: 在此添加您的服务操作
}

// 使用下面示例中说明的数据约定将复合类型添加到服务操作。
[DataContract]
public class CompositeType
{
    bool boolValue = true;
    string stringValue = "Hello ";

    [DataMember]
    public bool BoolValue
    {
        get { return boolValue; }
        set { boolValue = value; }
    }

    [DataMember]
    public string StringValue
    {
        get { return stringValue; }
        set { stringValue = value; }
    }
}
Step 3 : The code behind the class file is given below. 实现接口的类的代码
using System;
using System.Collections.Generic;
using System.Linq;
using System.Runtime.Serialization;
using System.ServiceModel;
using System.ServiceModel.Web;
using System.Text;

// 注意: 使用“重构”菜单上的“重命名”命令,可以同时更改代码、服务和配置文件中的类名“Service”。
public class Service : IService
{
    public string GetData(int value)
    {
        return string.Format("You entered: {0}", value);
    }

    public CompositeType GetDataUsingDataContract(CompositeType composite)
    {
        if (composite == null)
        {
            throw new ArgumentNullException("composite");
        }
        if (composite.BoolValue)
        {
            composite.StringValue += "Suffix";
        }
        return composite;
    }
}
Step 4 : Service file (.svc) contains the name of the service and the code behind the file name. This file is used to know about the service.
服务文件包含服务名称以及代码文件的名称,

<%@ ServiceHost Language="C#" Debug="true" Service="Service" CodeBehind="~/App_Code/Service.cs" %>
Step 5 : Server-side configurations are mentioned in the config file. Here, there is a mention of only one end-point which is configured to ‘wsHttpBinding‘; we can also have multiple endpoints with different bindings. Since we are going to host in IIS, we have to use only http binding.
服务端配置在配置文件中有提到。这里仅仅提到了一个终结点,配置为wsHttpBinding。我们也可以有多个终结点,每个终结点有不同的binding。因为我们只是在IIS中托管,所以我们只需使用http绑定
Step 6:
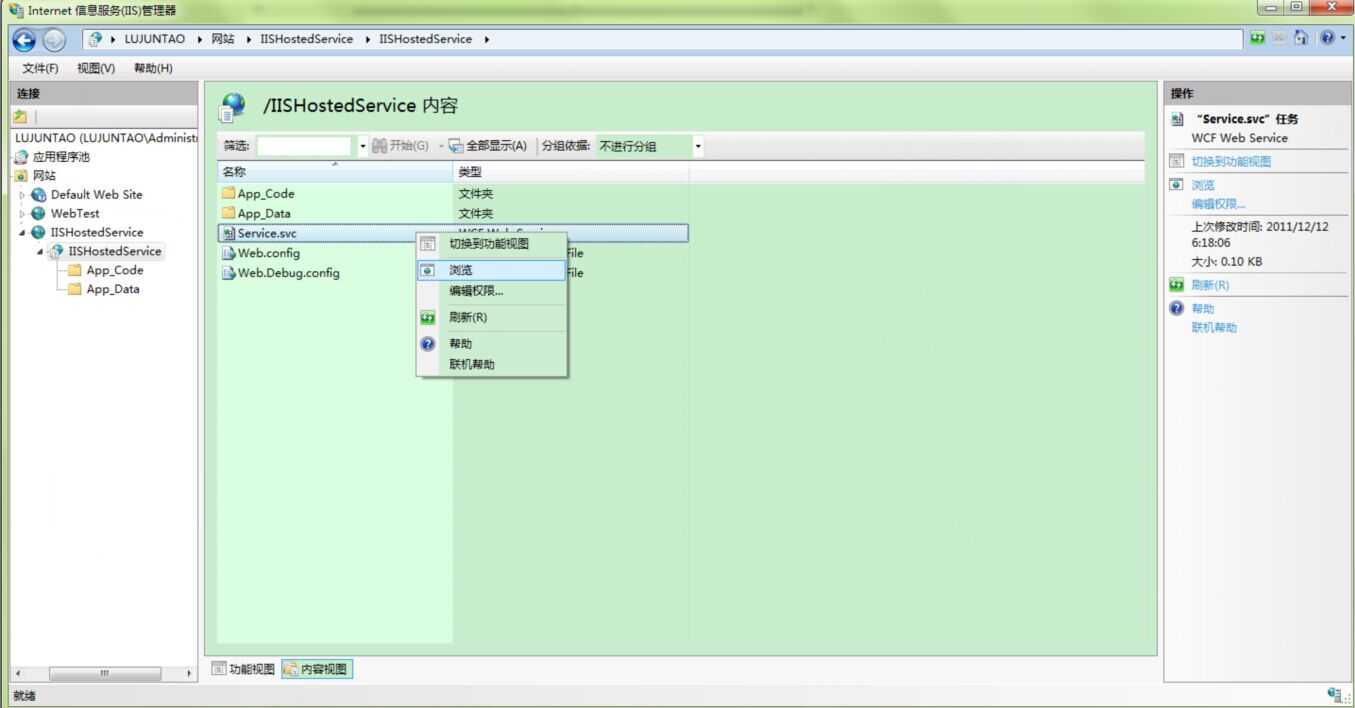
You need to mention the service file name, along with the Address mentioned in the config file. The screenshot of IIS is given here.
Click Start -> run -> inetmgr which will open the following window.
首先在功能视图和内容视图中选择内容视图,然后选中.svc文件,右键,然后选择浏览
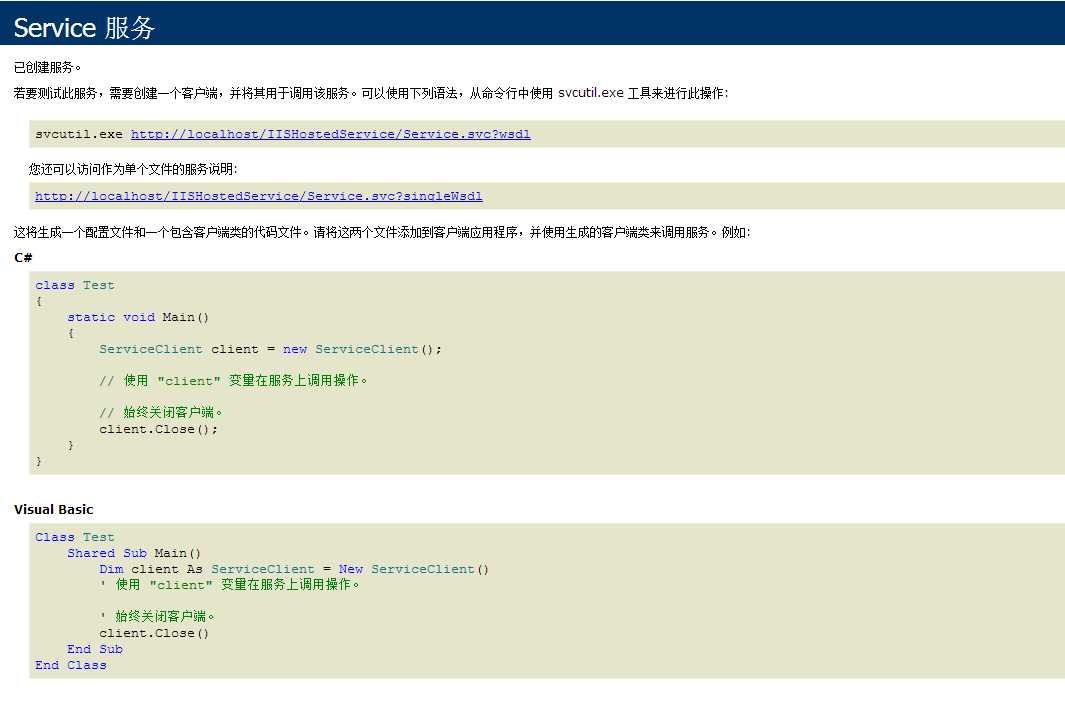
Step 7 : Run the application which will produce the following screen.
标签:
原文地址:http://www.cnblogs.com/chucklu/p/4629915.html