标签:
LEMP是一组软件,可以用来服务动态网页和网络应用.
其中, L代表’Linux’,操作系统;E代表’Nginx’,web服务器;M代表’MySql’,数据库;P代表’PHP’,动态语言处理器.
下面的手顺中,会以Ubuntu 14.04作为操作系统进行安装
Ubuntu系统中有一个普通用户,并且拥有sudo权限.
先更新本地软件包索引,然后安装Nginx web服务器.
sudo apt-get update
sudo apt-get install nginx
在Ubuntu 14.04,Nginx安装完成后,就会运行,所以可以直接验证Nginx是否安装成功.
在Terminal中输入ifconfig,找到本地ip,
如果连接的是无线网络,wlan0所对应的inet地址.
然后在浏览器中输入该ip,如果出现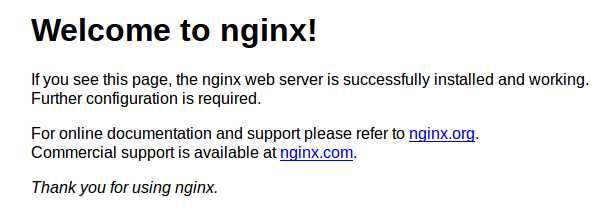
即表示Nginx成功安装.
现在我们已经有了web服务器了,所以需要安装MySql去存储网站数据.
安装MySql很简单,输入命令:
sudo apt-get install mysql-server
安装过程中,你会被要求输入MySql的超级用户root的密码,记得输入.
MySql安装之后,需要进行配置.
首先,我们需要告诉MySql如何产生存储数据和信息的目录结构.输入命令:
sudo mysql_intall_db
然后,需要运行脚本进行安全性配置:
sudo mysql_secure_installation
在这一步中,需要输入刚刚设定的MySql的root密码.这之后,会有一些安全性设置,按照需求输入N或者Y即可.
我们现在安装了Nginx去服务我们的网页,安装了MySql去存储我们的数据,现在我们需要PHP去产生动态内容连接这两个组件.
由于Nginx不包含原生的PHP解析器,我们需要安装php5-fpm(fastCGI processing manager)去告诉Nginx将php的请求交给这个软件处理.
同时,我们也可以安装额外的工具包让PHP和MySql交互.
所以,输入命令:
sudo apt-get install php5-fpm php5-mysql
我们需要做一点点改变让PHP模块更加安全.
以系统root权限打开php5-fpm配置文件:
sudo nano /etc/php5/fpm/php.ini
找到cgi.fix_pathinfo选项,取消注释,也就是前面的分号(;)并将其设置为0,最后的结果如下:
cgi.fix_pathinfo=0
保存并关闭.
cgi.fix_pathinfo为1代表如果PHP处理器不能正确匹配一个php文件,那么它可以找到它能找到的最近的php文件执行,这可能不是你想要的.
然后重启php5-fpm服务
sudo service php5-fpm restart
现在我们需要告诉Nginx去使用PHP处理器来处理动态内容.
我们配置Nginx服务器块(类似Apach的虚拟主机)配置文件
sudo nano /etc/nginx/sites-available/default
找到类似下面的这样一段代码:
server {
    listen 80 default_server;
    listen [::]:80 default_server ipv6only=on;

    root /usr/share/nginx/html;
    index index.html index.htm;

    server_name localhost;

    location / {
        try_files $uri $uri/ =404;
    }
}
然后,我们需要作出以下改变:
- 在index加入index.php以使php文件可以作为主页.
- 在server_name中修改为自己的IP
- 加入错误处理规则
- 添加try_file项,确保Nginx不会把不合适的请求传送给php处理器.
最后修改完的文件如下:
server {
listen 80 default_server;
listen [::]:80 default_server ipv6only=on;

root /usr/share/nginx/html;
index index.php index.html index.htm;

# Make site accessible from http://localhost/
server_name server_domain_name_or_IP;

location / {
    # First attempt to serve request as file, then
    # as directory, then fall back to displaying a 404.
    try_files $uri $uri/ =404;
    # Uncomment to enable naxsi on this location
    # include /etc/nginx/naxsi.rules
}

# Only for nginx-naxsi used with nginx-naxsi-ui : process denied requests
#location /RequestDenied {
#   proxy_pass http://127.0.0.1:8080;
#}

error_page 404 /404.html;

# redirect server error pages to the static page /50x.html
#
error_page 500 502 503 504 /50x.html;
location = /50x.html {
    root /usr/share/nginx/html;
}

# pass the PHP scripts to FastCGI server listening on 127.0.0.1:9000
#
location ~ \.php$ {
    fastcgi_split_path_info ^(.+\.php)(/.+)$;
    # NOTE: You should have "cgi.fix_pathinfo = 0;" in php.ini

    # With php5-cgi alone:
**# fastcgi_pass 127.0.0.1:9000; **
    # With php5-fpm:
    fastcgi_pass unix:/var/run/php5-fpm.sock;
    fastcgi_index index.php;
    include fastcgi_params;
}

# deny access to .htaccess files, if Apache‘s document root
# concurs with nginx‘s one
#
#location ~ /\.ht {
#   deny all;
#}
}
需要提醒的是,可能Nginx配置文件中大部分都是注释掉了,所以直接把需要生效的部分取消注释即可.但是,一定要注意加粗的代码fastcgi_pass 127.0.0.1:9000,一定还要注释掉,因为我们安装的是php5-fpm.否则,Nginx不知道把PHP请求传送给哪一个PHP处理器,会有"fastcgi_pass" directive is duplicate的错误.
编辑一个PHP文件:
sudo nano /usr/share/nginx/html/info.php
添加几行简单的代码:
<?php
phpinfo();
?>
保存并退出.
在浏览器中,输入:
http://server_domain_name_or_IP/info.php
如果可以看到下面的图片,bingo,配置完成.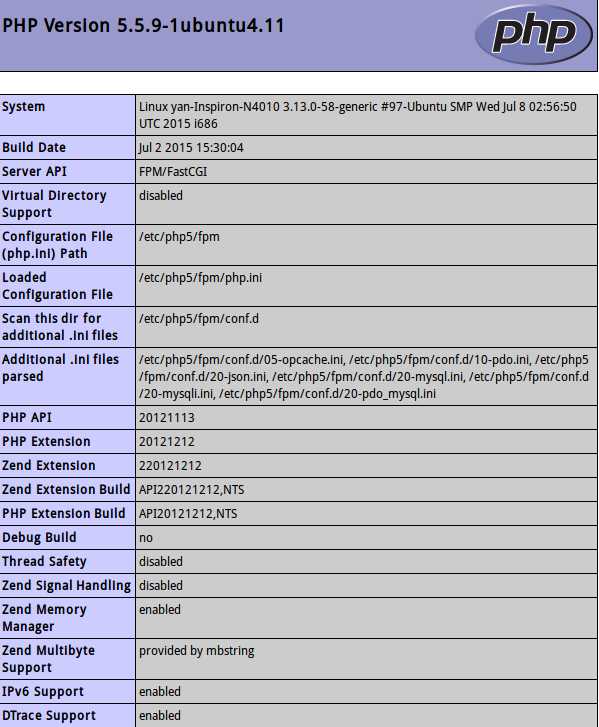
然后,你需要删除这个文件,因为它给未授权用户提供了很多关于你配置信息.
sudo rm /usr/share/nginx/html/info.php
现在你已经将LEMP环境配置在你的机器上了.
标签:
原文地址:http://www.cnblogs.com/shitoujizu/p/4709470.html