标签:
矩形:描边与填充
Canvas的API提供了三个方法,分别用于矩形的清除、描边及填充
clearRect(double x, double y, double w, double h)
strokeRect(double x, double y, double w, double h)
fillRect(double x, double y, double w, double h)
看一下这三个方法的使用
<!DOCTYPE html>
<html lang="zh-CN">
<head>
  <meta name="viewport" content="width=device-width,initial-scale=1,maximum-scale=1,user-scalable=no">
  <meta charset="utf-8">
  <title>TESTAPP</title>
  <style>
    * {
      padding: 0;
      margin: 0;
    }
    #canvas {
      background: #ccc;
      border: 1px solid #aaa;
      border-radius: 8px;
      display: block;
      margin: 20px auto;
    }
  </style>
</head>
<body>
<canvas id="canvas" width="600" height="400">
  Canvas is not supported.
</canvas>
<script>
 var cvs = document.getElementById(‘canvas‘);
  ctx = cvs.getContext(‘2d‘);
  ctx.lineJoin = ‘round‘;
  ctx.lineWidth = 30;
  ctx.font = "24px Helvetica";
  ctx.fillText("Click anywhere to erase", 175, 40);
  ctx.strokeRect(75, 100, 200, 200);
  ctx.fillRect(325, 100, 200, 200);
  ctx.canvas.onmousedown = function(e) {
    ctx.clearRect(0, 0, cvs.width, cvs.height);
  };
</script>
</body>
</html>
clearRect(double x, double y, double w, double h)
该方法将指定矩形与当前剪辑区域相交范围内的所有像素清除。
在默认情况下,剪辑区域的大小就是整个canvas,所以,如果你没有改动剪辑区域的话,那么在参数所指范围内的所有像素都会被清除。所谓“清除像素”,指的是将其颜色设置为全透明的黑色。这在实际效果上就等同域“擦除”erase或者“清除”clear了某个像素,从而使得canvas的背景可以透过像素显示出来。
strokeRect(double x, double y, double w, double h)
使用如下属性,为指定的矩形描边
strokeStyle lineWidth lineJoin miterLimit
fillRect(double x, double y, double w, double h)
使用fillStyle属性填充指定的矩形。
线段
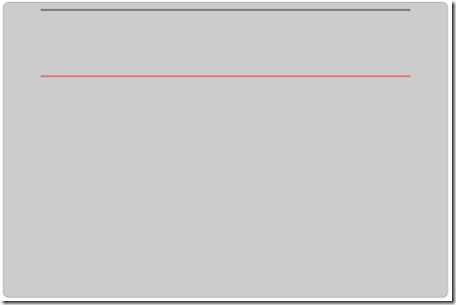
Canvas绘图环境提供了两个可以用来创建线性路径的方法:moveTo() lineTo(),要使用线性路径(也就是线段)出现在canvas中,在创建路径之后还要调用stroke()方法。
<!DOCTYPE html>
<html lang="zh-CN">
<head>
  <meta name="viewport" content="width=device-width,initial-scale=1,maximum-scale=1,user-scalable=no">
  <meta charset="utf-8">
  <title>TEST APP</title>
  <style>
    * {
      padding: 0;
      margin: 0;
    }
    #canvas {
      background: #ccc;
      border: 1px solid #aaa;
      border-radius: 8px;
      display: block;
      margin: 20px auto;
    }
  </style>
</head>
<body>
<canvas id="canvas" width="600" height="400">
  Canvas is not supported.
</canvas>
<script>
 var cvs = document.getElementById(‘canvas‘);
  ctx = cvs.getContext(‘2d‘);
  ctx.lineWidth = 1;
  ctx.beginPath();
  ctx.moveTo(50, 10);
  ctx.lineTo(550, 10);
  ctx.stroke();
  ctx.beginPath();
  ctx.strokeStyle = "#f00";
  ctx.moveTo(50, 100);
  ctx.lineTo(550, 100);
  ctx.stroke();
</script>
</body>
</html>

圆弧与圆形
Canvas绘图环境提供了两个用于绘制圆弧与圆形的方法: arc() arcTo()
arc(x, y, radius, startAngle, endAngle, counterClockwise)
前面两个参数表示圆心坐标,radius表示圆半径,startAngle和endAngle表示浏览器在圆周上绘制圆弧的起始角度和终结角度,最后一个参数,counterClockwise是可选的,true,是逆时针画圆,false,顺时针画圆。
arcTo(x1, y1, x2, y2, radius)
参数意为两个点与半径
该方法以指定的半径来绘制一条圆弧,绘制的圆弧与当前点到第一个点(x1, y1)的连线相切,而且与第一个点到第二个点(x2, y2)的连线也相切,由于这些特性,该方法非常适合绘制矩形的圆角。
坐标变换:平移、缩放与旋转
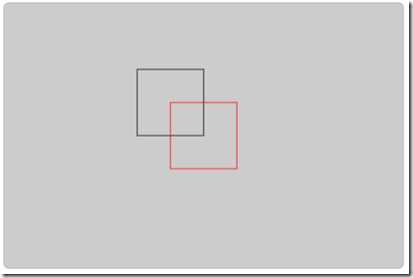
这里看一个小例子,也许这里坐标原点的移动并没有带来多大的好处,但想像一下,如果你需要绘制的是很多图形的情景
<!DOCTYPE html>
<html lang="zh-CN">
<head>
  <meta name="viewport" content="width=device-width,initial-scale=1,maximum-scale=1,user-scalable=no">
  <meta charset="utf-8">
  <title>TEST APP</title>
  <style>
    * {
      padding: 0;
      margin: 0;
    }
    #canvas {
      background: #ccc;
      border: 1px solid #aaa;
      border-radius: 8px;
      display: block;
      margin: 20px auto;
    }
  </style>
</head>
<body>
<canvas id="canvas" width="600" height="400">
  Canvas is not supported.
</canvas>
<script>
  var cvs = document.getElementById("canvas"),
  ctx = cvs.getContext(‘2d‘),
  RECTANGLE_WIDTH = 100,
  RECTANGLE_HEIGHT = 100;
  //没有移动坐标原点的情况
  ctx.strokeRect(cvs.width / 2 - RECTANGLE_WIDTH ,
    cvs.height / 2 - RECTANGLE_HEIGHT,
    RECTANGLE_WIDTH, RECTANGLE_HEIGHT);
  //移动坐标原点
  ctx.translate(cvs.width / 2 - RECTANGLE_WIDTH / 2, cvs.height / 2 - RECTANGLE_HEIGHT / 2);
  ctx.beginPath();
  ctx.strokeStyle = "#f00";
  ctx.strokeRect(0, 0, RECTANGLE_WIDTH, RECTANGLE_HEIGHT);
</script>
</body>
</html>

本文所有前端代码均在谷歌浏览器测试,其他浏览器没有测试过
标签:
原文地址:http://www.cnblogs.com/1000px/p/4729770.html