标签:
// Created by 妖精的尾巴 on 15-8-14.
// Copyright (c) 2015年 妖精的尾巴. All rights reserved.
//
#import "ViewController.h"
@interface ViewController ()<UIAlertViewDelegate>
@property(nonatomic,strong)UITextField* textField;
@implementation ViewController
- (void)viewDidLoad
{
[super viewDidLoad];
self.view.backgroundColor=[UIColor whiteColor];
[self createLabel];
[self createTextField];
[self createButton];
}
-(void)createLabel
{
UILabel* label=[[UILabel alloc]initWithFrame:CGRectMake(110, 80, 100, 50)];
label.text=@"妖精的尾巴";
label.textAlignment=NSTextAlignmentCenter;
label.textColor=[UIColor blueColor];
label.font=[UIFont systemFontOfSize:17];
[self.view addSubview:label];
UILabel* label2=[[UILabel alloc]initWithFrame:CGRectMake(30, 120, 80, 50)];
label2.text=@"用户名:";
label2.textAlignment=NSTextAlignmentCenter;
label2.textColor=[UIColor greenColor];
label2.font=[UIFont systemFontOfSize:16];
[self.view addSubview:label2];
}
-(void)createTextField
{
self.textField=[[UITextField alloc]initWithFrame:CGRectMake(110, 120, 150, 35)];
self.textField.borderStyle= UITextBorderStyleRoundedRect;
self.textField.placeholder=@"请输入用户名";
self.textField.font=[UIFont systemFontOfSize:16];
[self.view addSubview:self.textField];
}
-(void)createButton
{
UIButton* btn=[UIButton buttonWithType:UIButtonTypeRoundedRect];
btn.layer.cornerRadius=10;
btn.showsTouchWhenHighlighted=YES;
btn.backgroundColor=[UIColor yellowColor];
btn.frame=CGRectMake(110,180,120,50);
[btn setTitle:@"认真你就赢了" forState:UIControlStateNormal];
[btn setTitleColor:[UIColor redColor] forState:UIControlStateNormal];
[btn addTarget:self action:@selector(btnClick) forControlEvents:UIControlEventTouchUpInside];
[self.view addSubview:btn];
}
-(void)btnClick
{
/**
*对UITextField调出键盘的退出处理方式有两种
*
*第一种 在按钮点击方法中执行[self.textField resignFirstResponder];
*
*第二种 在-(void)touchesBegan:(NSSet *)touches withEvent:(UIEvent *)event执行[self.view endEditing:YES];
*
*/
[self.textField resignFirstResponder];
if (self.textField.text.length==0) {
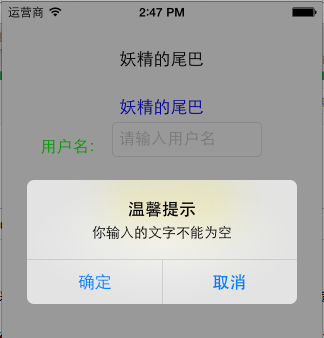
UIAlertView* alter=[[UIAlertView alloc]initWithTitle:@"温馨提示" message:@"你输入的文字不能为空" delegate:self cancelButtonTitle: @"确定" otherButtonTitles:@"取消",nil];
[alter show];
}
else{
NSLog(@"用户输入了文字,文字内容是:%@",self.textField.text);
}
}
-(void)touchesBegan:(NSSet *)touches withEvent:(UIEvent *)event
{
[self.view endEditing:YES];
}
#pragma mark-UIAlertViewDelegate方法
- (void)alertView:(UIAlertView *)alertView clickedButtonAtIndex:(NSInteger)buttonIndex
{
if (buttonIndex==0) {
NSLog(@"用户开始输入文字");
}
}
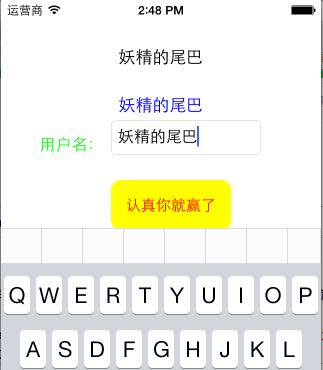
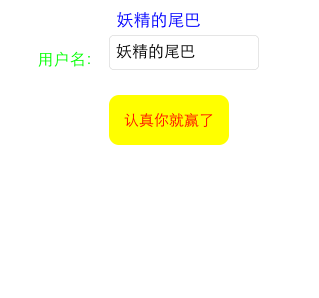
运行结果如下:


UITextField,UILabel, UIButton,UIAlertview的简单使用
标签:
原文地址:http://my.oschina.net/iOSliuhui/blog/492363