标签:
现版本 SDK 8.4 Xcode
运行Xcode 选择 Create a new Xcode project ->Single View Application 命名 NavigationControllerDemo
一、创建 Empty Application
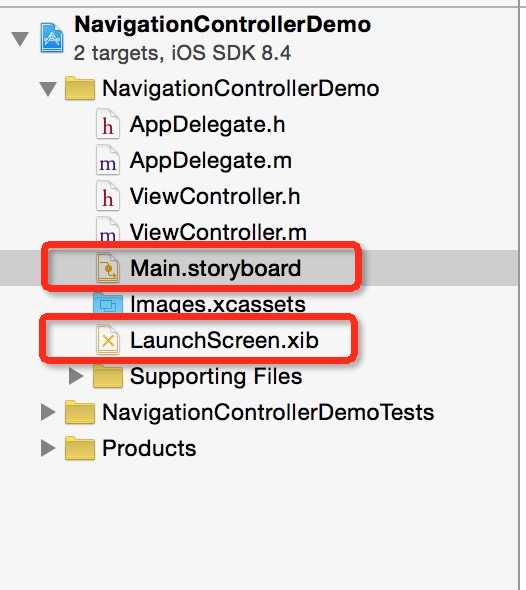
把工程目录下的Main.storyboard和LaunchScreen.xib删除,扔进废纸篓。(ViewController.h ViewController.m也可删除)
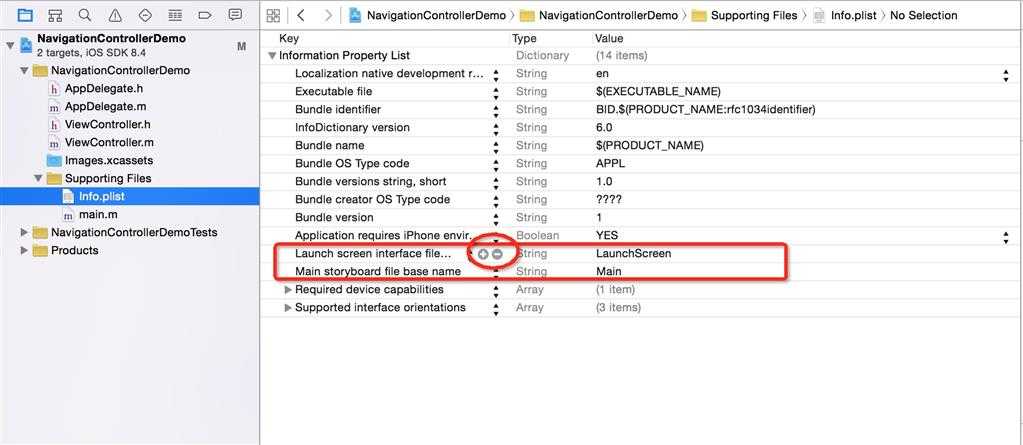
打开Info.plist,把Launch screen interface file base name,以及Main storyboard file base name两项,(点击旁边的减号即可)删除。
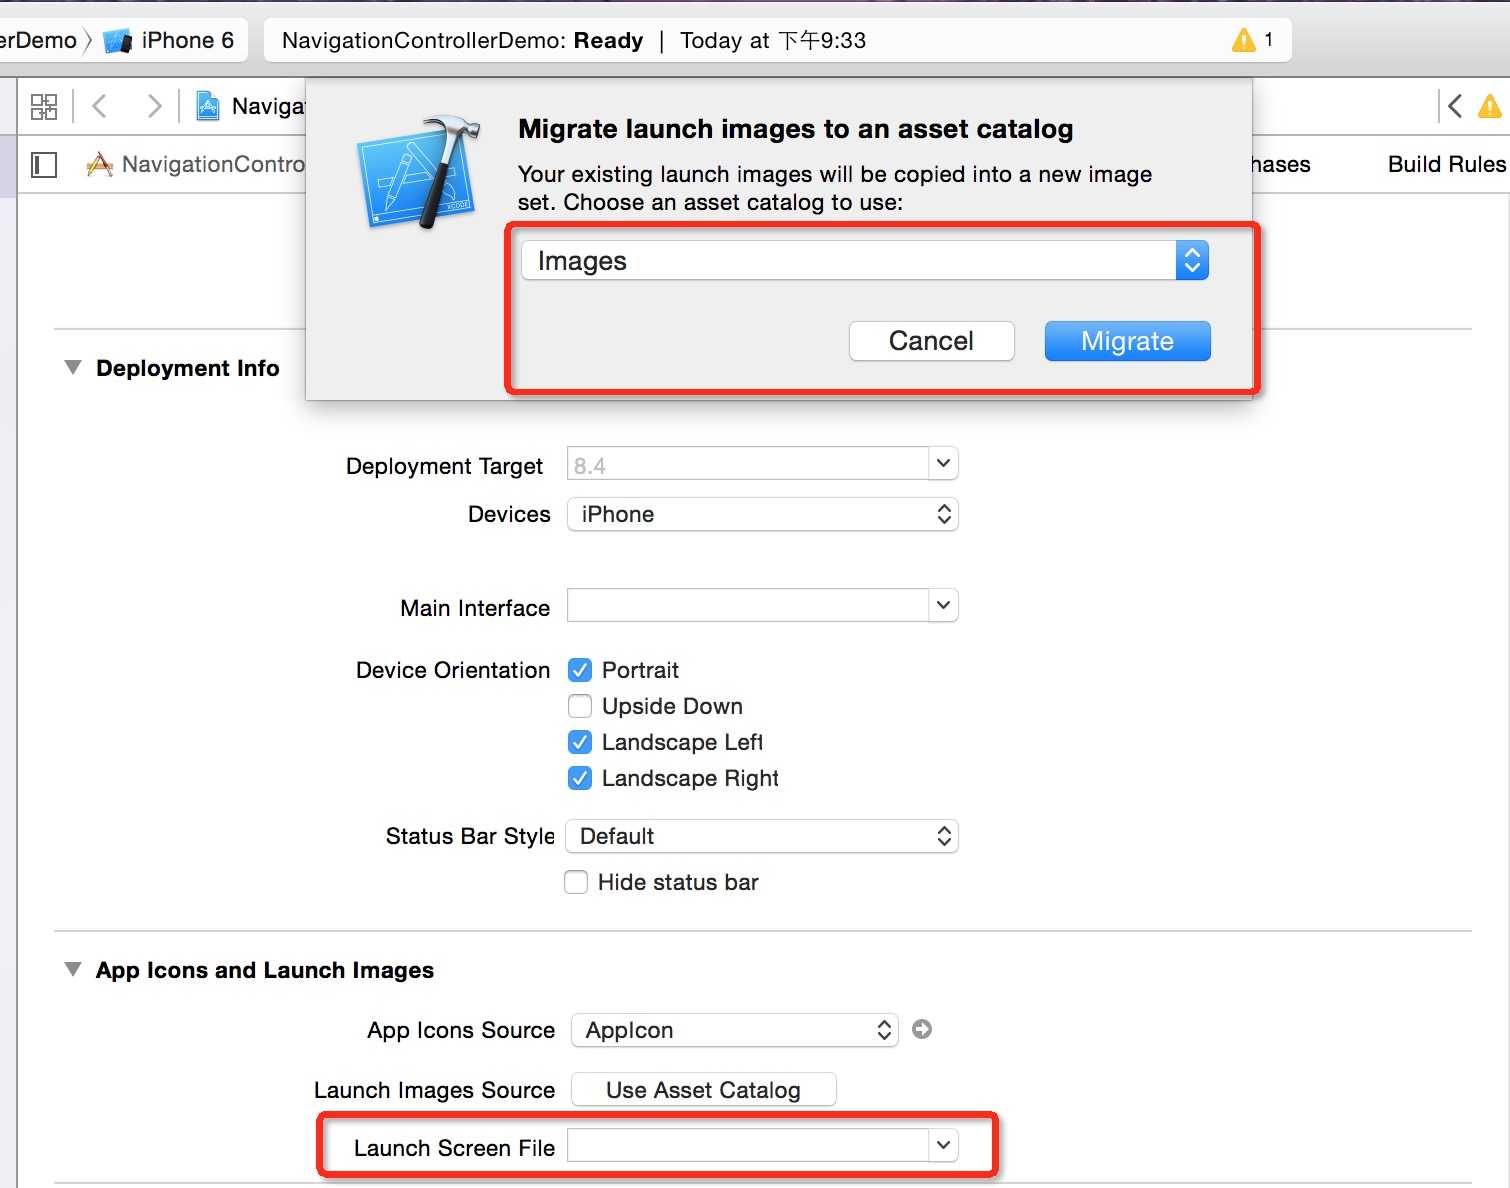
打开工程项目属性文件,点击Target下面的第一项,再选择General选项卡,向下找到Use Asset Catalog按钮。点击它。
弹出对话框,点击Migrate即可。这样,应用尺寸就能根据屏幕大小进行调整了。
在AppDelegate的第一个方法里面即
- (BOOL)application:(UIApplication *)application didFinishLaunchingWithOptions:(NSDictionary *)launchOptions
,“return”语句之前,添加必要代码。
//创建window
self.window = [[UIWindow alloc] initWithFrame:[[UIScreen mainScreen] bounds]];
//设置window背景
self.window.backgroundColor = [UIColor whiteColor];
//使window可见
[self.window makeKeyAndVisible];
编译运行通过,出现空白页面。
二、创建一个View Controller,作为Root View Controller:依次选择File——New——New File,在弹出的窗口,左边选择iOS下的Source,右边选择Cocoa Touch Class
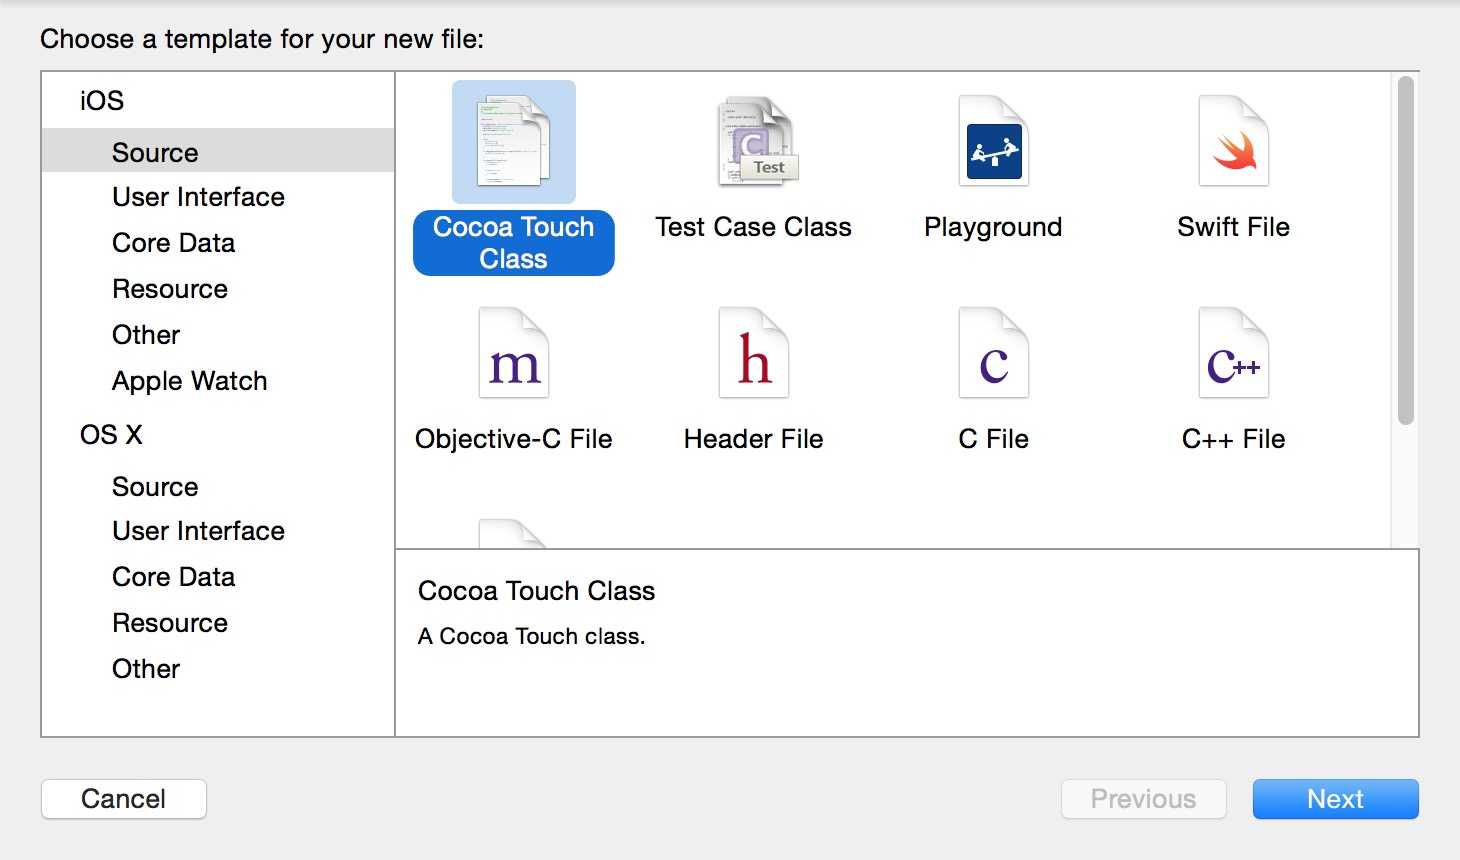
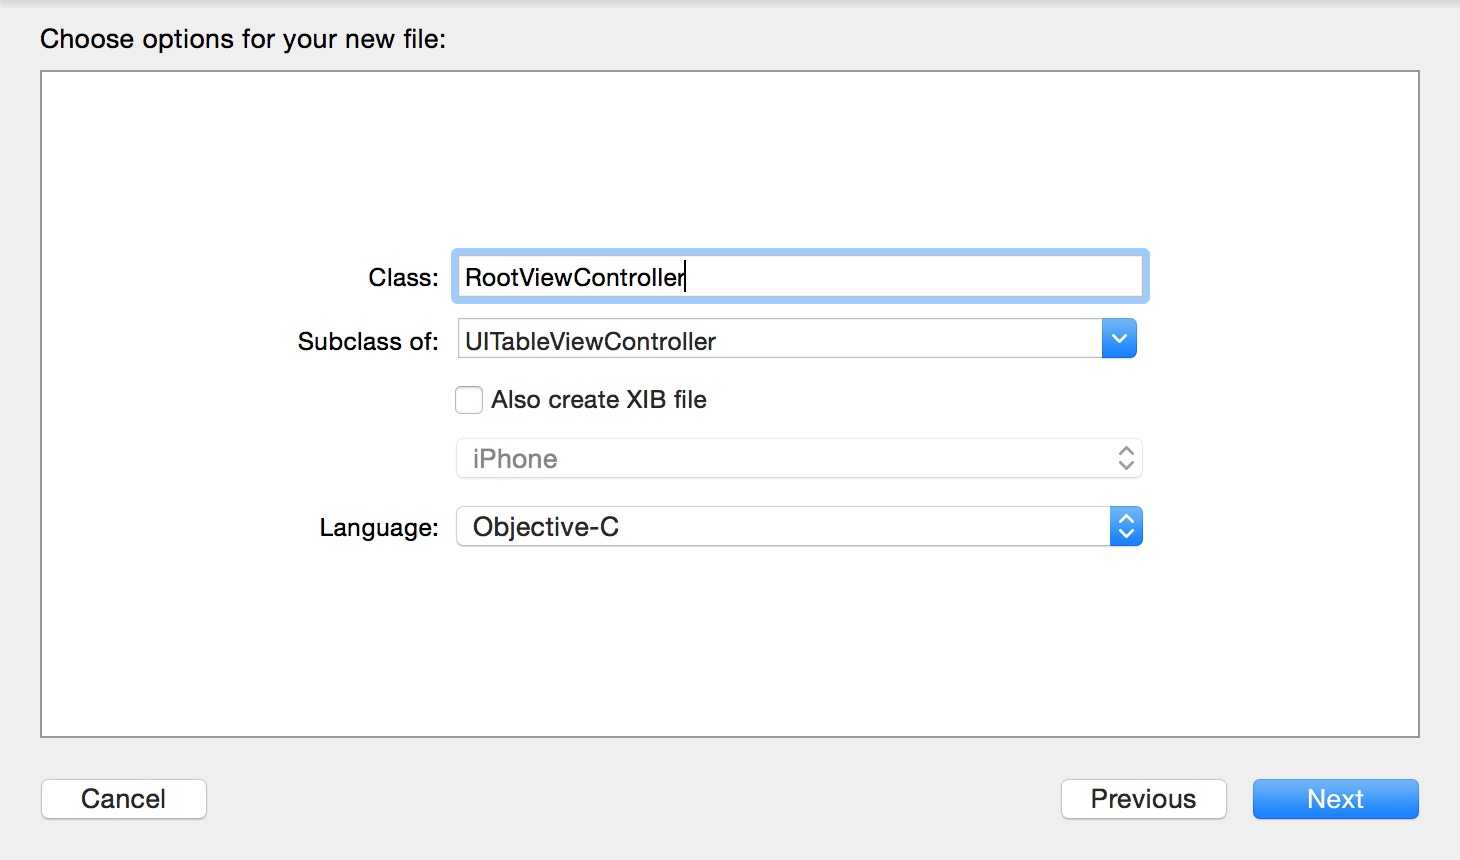
单击Next,在新窗口输入名称为RootViewController,sub of选择UItableViewController完成创建
三、AppDelegate添加如下代码
打开AppDelegate.h
添加 @property (strong, nonatomic) UINavigationController *navController;
打开AppDelegate.m 红色为添加的代码
#import "AppDelegate.h"
#import "RootViewController.h"
@interface AppDelegate ()
@end
@implementation AppDelegate
@synthesize navController;
- (BOOL)application:(UIApplication *)application didFinishLaunchingWithOptions:(NSDictionary *)launchOptions {
// Override point for customization after application launch.
//创建window
self.window = [[UIWindow alloc] initWithFrame:[[UIScreen mainScreen] bounds]];
RootViewController *root = [[RootViewController alloc] initWithStyle:UITableViewStylePlain];
self.navController = [[UINavigationController alloc] initWithRootViewController:root];
[self.window addSubview:navController.view];
//设置window背景
self.window.backgroundColor = [UIColor whiteColor];
//使window可见
[self.window makeKeyAndVisible];
return YES;
}
@end
四、Root View Controller中是一个表格,它的每一行对应一个Sub View Controller
打开RootViewController.h,添加属性:
@property (strong, nonatomic) NSArray *controllerList;
打开RootViewController.m,在@implementation之后添加代码:@synthesize controllerList;
在viewDidLoad中[super viewDidLoad];之后添加代码:
self.title = @"分类";
NSMutableArray *array = [[NSMutableArray alloc] init];
self.controllerList = array;
找到numberOfSectionsInTableView方法,修改其返回值为1。
找到numberOfRowsInSection:方法,修改代码为:return [controllerList count];
找到cellForRowAtIndexPath方法,修改其中代码如下:
- (UITableViewCell *)tableView:(UITableView *)tableView cellForRowAtIndexPath:(NSIndexPath *)indexPath {
static NSString *RootTableViewCell = @"RootTableViewCell";
UITableViewCell *cell = [tableView dequeueReusableCellWithIdentifier: RootTableViewCell];
if (cell == nil) {
cell = [[UITableViewCell alloc] initWithStyle:UITableViewCellStyleDefault reuseIdentifier: RootTableViewCell];
}
NSUInteger row = [indexPath row];
UITableViewController *controller = [controllerList objectAtIndex:row];
//这里设置每一行显示的文本为所对应的View Controller的标题
cell.textLabel.text = controller.title;
//accessoryType就表示每行右边的图标
cell.accessoryType = UITableViewCellAccessoryDisclosureIndicator;
return cell;
}
找到didSelectRowAtIndexPath:方法,修改其中代码如下:
- (void)tableView:(UITableView *)tableView didSelectRowAtIndexPath:(NSIndexPath *)indexPath
{
NSUInteger row = [indexPath row];
UITableViewController *nextController = [self.controllerList objectAtIndex:row];
[self.navigationController pushViewController:nextController animated:YES];
}
五、controllerList这个数组现在是空的,目前为止运行之后还是看不到任何效果
接下来创建一个Table View Controller,用于显示电影列表。建立的方法同建立RootViewController一样,名称为MovieViewController。
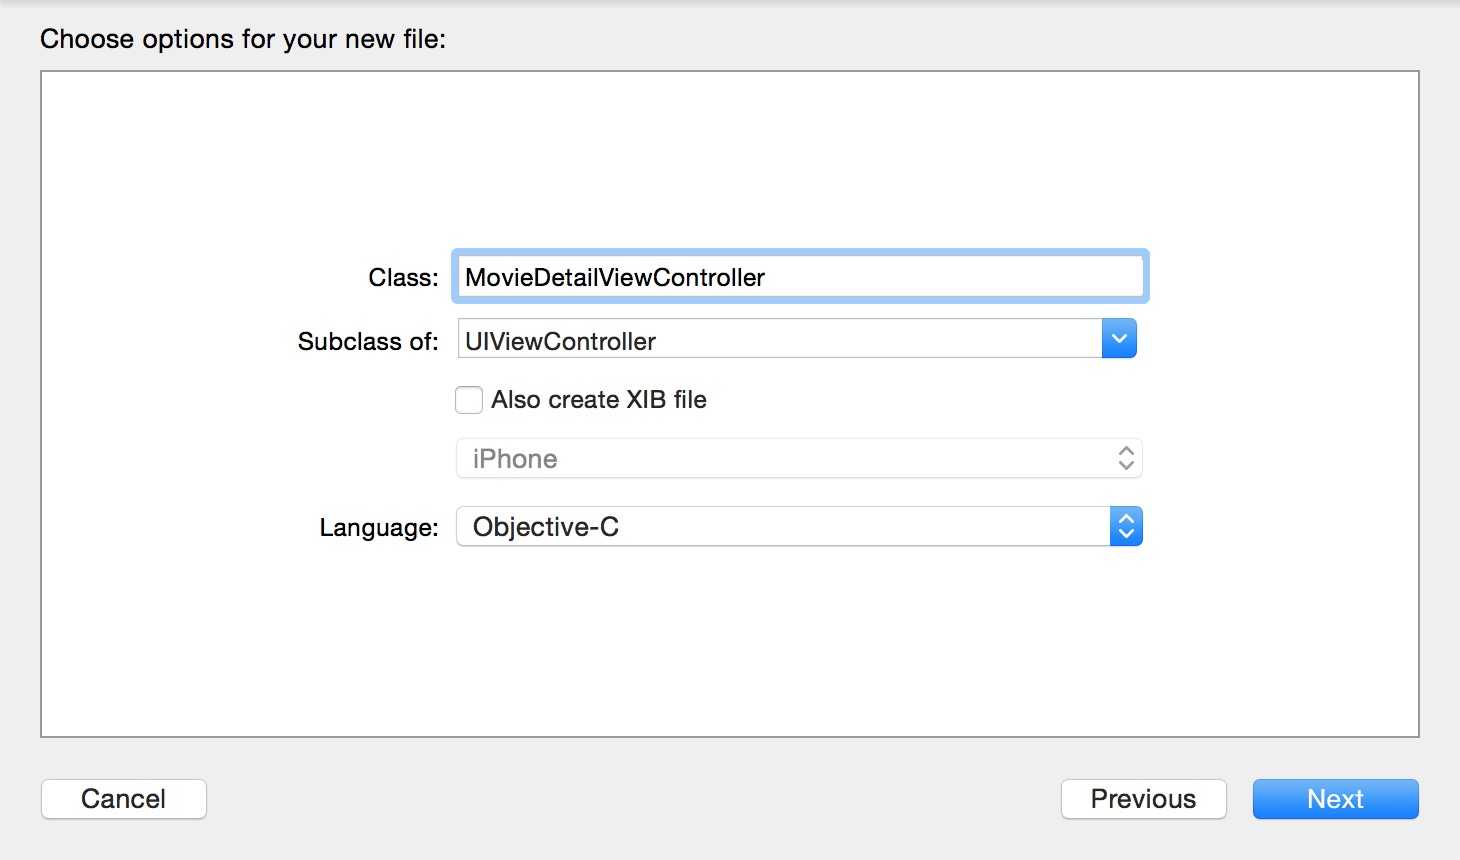
之后再创建一个View Controller,名称为MovieDetailViewController,用于显示电影的详细信息Subof选项为UIViewController:
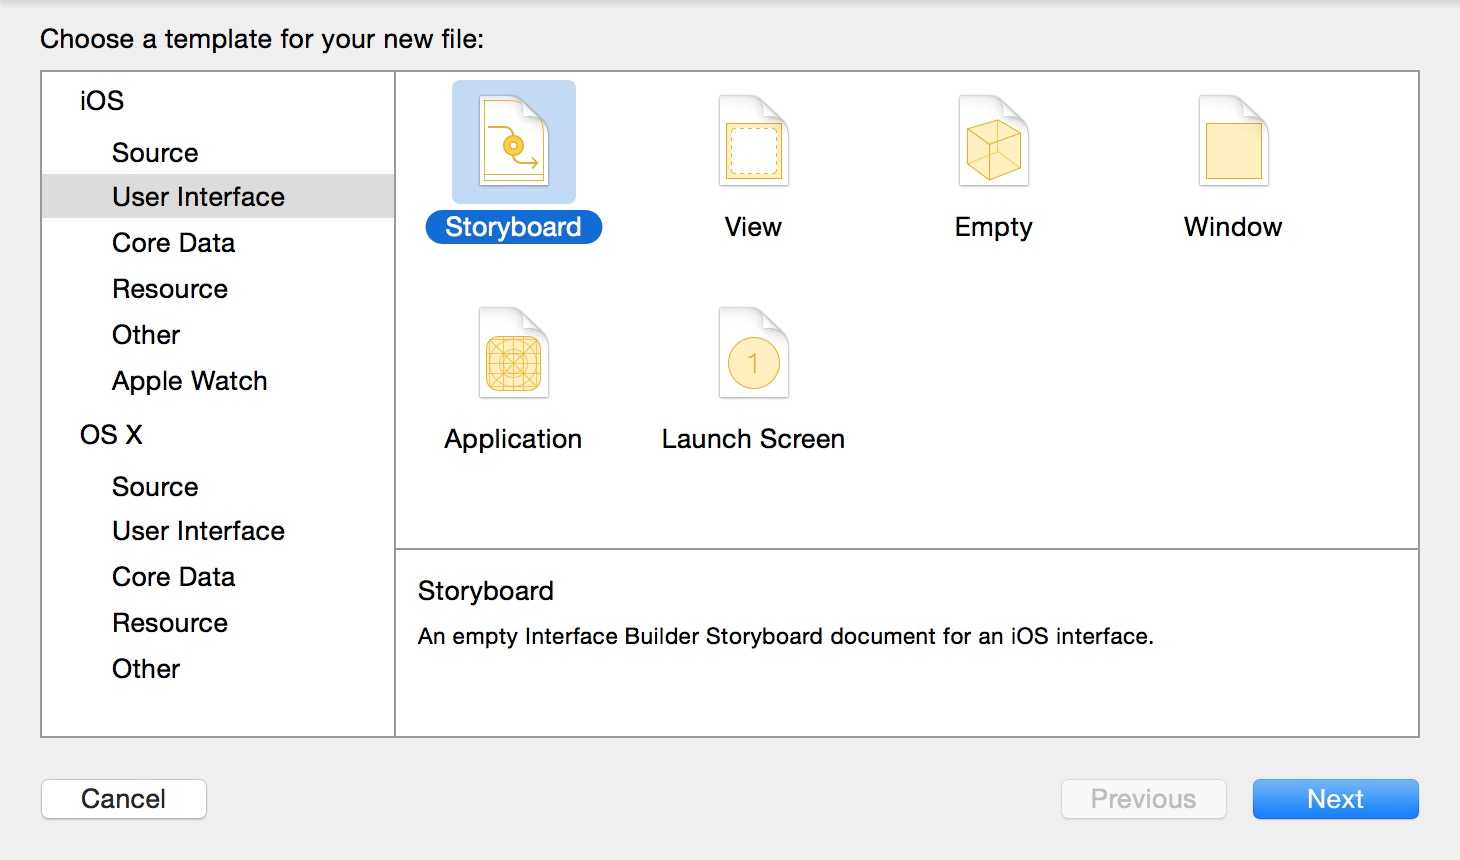
最后再创建一个Storyboard 命名为Main(创建空工程时若保留Storyboard,此时可不再重复创建)
六、布局MovieDetailViewController
选中Main.storyboard 选择: Tools -> Library ,从Library显示菜单中拖拉一个View Controller 到 故事版(storyboard)
选中 View Controller Identity->Custom Class->Class->MovieDetailViewController(将view controller 页面 和MovieDetailViewController文件 关联)
命名Storyboard ID为 MovieDetail 勾选Use Storyboard ID (动态Scene绑定时有用)

选择: Tools -> Library ; 从Library显示菜单中拖拉一个 Label 到 Movie Detail View Controller
将其映射到MovieDetailViewController.h中,名称为detailLabel

然后在MovieDetailViewController.h中添加属性:
@property (copy, nonatomic) NSString *message;
打开MovieDetailViewController.m,在@implementation之后添加代码:@synthesize message;
在viewDidLoad方法后面添加一个方法:
- (void)viewWillAppear:(BOOL)animated {
detailLabel.text = message;
[super viewWillAppear:animated];
}
viewWillAppear这个方法每次视图加载都会执行,而viewDidLoad方法只有在第一次加载时才会执行。
七、打开MovieViewController.h,向其中添加属性:
@property (strong, nonatomic) NSArray *movieList;
打开MovieViewController.m,在@implementation之前添加代码:
#import "MovieDetailViewController.h"
#import "AppDelegate.h"
@interface MovieViewController ()
@property (strong, nonatomic) MovieDetailViewController *childController;
@end
在@implementation之后添加代码:
@synthesize movieList;
@synthesize childController;
在viewDidLoad方法中添加代码:
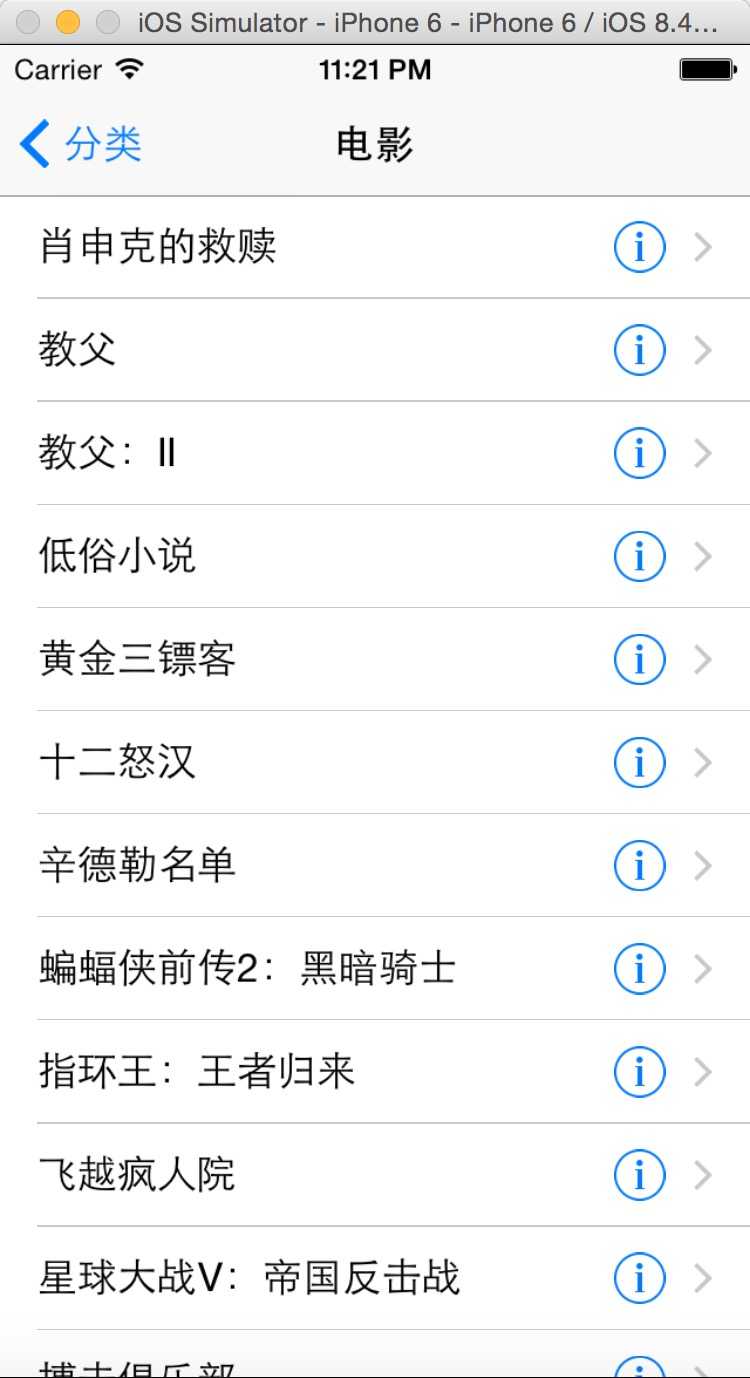
NSArray *array = [[NSArray alloc] initWithObjects:@"肖申克的救赎", @"教父", @"教父:II",
@"低俗小说", @"黄金三镖客", @"十二怒汉", @"辛德勒名单",
@"蝙蝠侠前传2:黑暗骑士", @"指环王:王者归来", @"飞越疯人院",
@"星球大战Ⅴ:帝国反击战", @"搏击俱乐部", @"盗梦空间", @"七武士",
@"指环王:护戒使者", @"好家伙", @"星球大战IV:新希望", @"上帝之城",
@"卡萨布兰卡", @"黑客帝国", @"西部往事", @"后窗", @"夺宝奇兵",
@"沉默的羔羊", @"非常嫌疑犯", @"七宗罪", @"指环王:双塔奇兵", @"阿甘正传",
@"惊魂记", @"美好人生", nil];
self.movieList = array;
找到numberOfSectionsInTableView方法,修改其返回值为1。
找到numberOfRowsInSection:方法,修改代码为:return [movieList count];
找到cellForRowAtIndexPath方法,修改其中代码如下
- (UITableViewCell *)tableView:(UITableView *)tableView cellForRowAtIndexPath:(NSIndexPath *)indexPath {
static NSString *MovieTableViewCell = @"MovieTableViewCell";
UITableViewCell *cell = [tableView dequeueReusableCellWithIdentifier: MovieTableViewCell];
if (cell == nil) {
cell = [[UITableViewCell alloc] initWithStyle:UITableViewCellStyleDefault reuseIdentifier: MovieTableViewCell];
}
NSUInteger row = [indexPath row];
NSString *movieTitle = [movieList objectAtIndex:row];
//这里设置每一行显示的文本为所对应的View Controller的标题
cell.textLabel.text = movieTitle;
//accessoryType就表示每行右边的图标
cell.accessoryType = UITableViewCellAccessoryDetailDisclosureButton;
return cell;
}
修改didSelectRowAtIndexPath方法
-(void)tableView:(UITableView *)tableView didSelectRowAtIndexPath:(NSIndexPath *)indexPath{
[tableView deselectRowAtIndexPath:indexPath animated:YES];
}
在@end之前添加方法
-(void)tableView:(UITableView *)tableView accessoryButtonTappedForRowWithIndexPath:(NSIndexPath *)indexPath{
if (childController == nil) {
//使用故事版 动态绑定scene
UIStoryboard *mainStoryboard = [UIStoryboard storyboardWithName:@"Main" bundle:nil];
childController = [mainStoryboard instantiateViewControllerWithIdentifier:@"MovieDetail"];
}
NSUInteger row = [indexPath row];
NSString *selectedMovie = [movieList objectAtIndex:row];
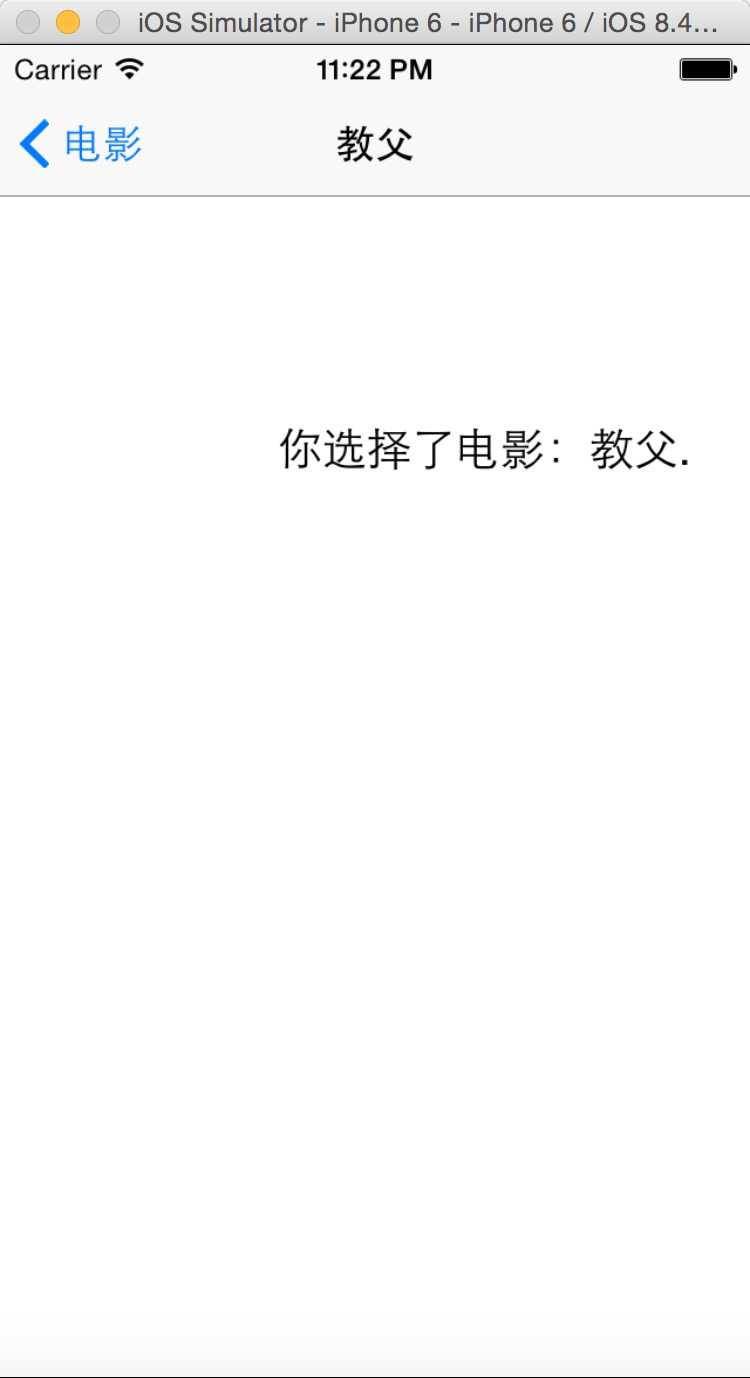
NSString *detailMessage = [[NSString alloc]initWithFormat:@"你选择了电影:%@.", selectedMovie];
childController.message = detailMessage;
childController.title = selectedMovie;
[self.navigationController pushViewController:childController animated:YES];
}
八、打开RootViewController.m
在@implementation之前添加代码:#import "MovieViewController.h"
在viewDidLoad方法中self.controllerList = array;之前添加代码:
MovieViewController *movieViewController = [[MovieViewController alloc] initWithStyle:UITableViewStylePlain];
movieViewController.title = @"电影";
[array addObject:movieViewController];
九、选择: File -> Save
最后在 xCode 选择 Build and then Running
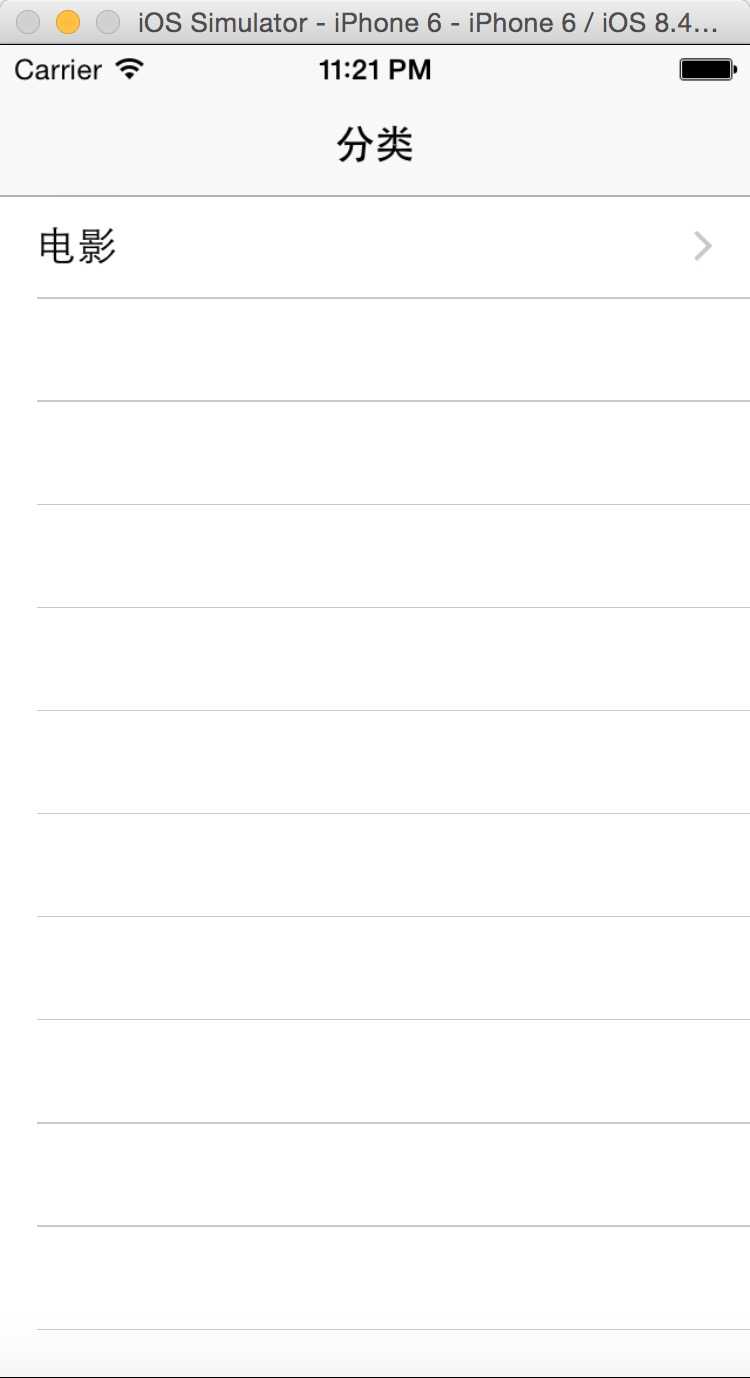
模拟器效果图
本文源于网上博客,经过本人修改和测试。原blog地址 http://justcoding.iteye.com/blog/1476196
标签:
原文地址:http://www.cnblogs.com/huaixu/p/4733345.html